How to Dye Your Hair at Home Without Damaging It
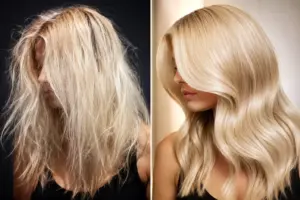
Nearly 40% of people who attempt at-home hair coloring report some level of damage — breakage, dryness, or uneven color — within the first month. That’s not because home dyeing is inherently risky. It’s because most people skip three or four critical steps that professional colorists do automatically. Learning how to dye your hair at home without damaging it is entirely achievable, and this guide walks you through every step, from choosing the right product to maintaining your color for weeks afterward.
I’ve been coloring my own hair for over a decade — everything from subtle highlights to full platinum bleach jobs — and I’ve made nearly every mistake in the book. What I’ve learned is that the difference between a salon-quality result and a hair disaster almost always comes down to preparation and patience, not talent.
Disclosure: This post contains affiliate links. As an Amazon Associate, we earn from qualifying purchases, and at no extra cost to you.
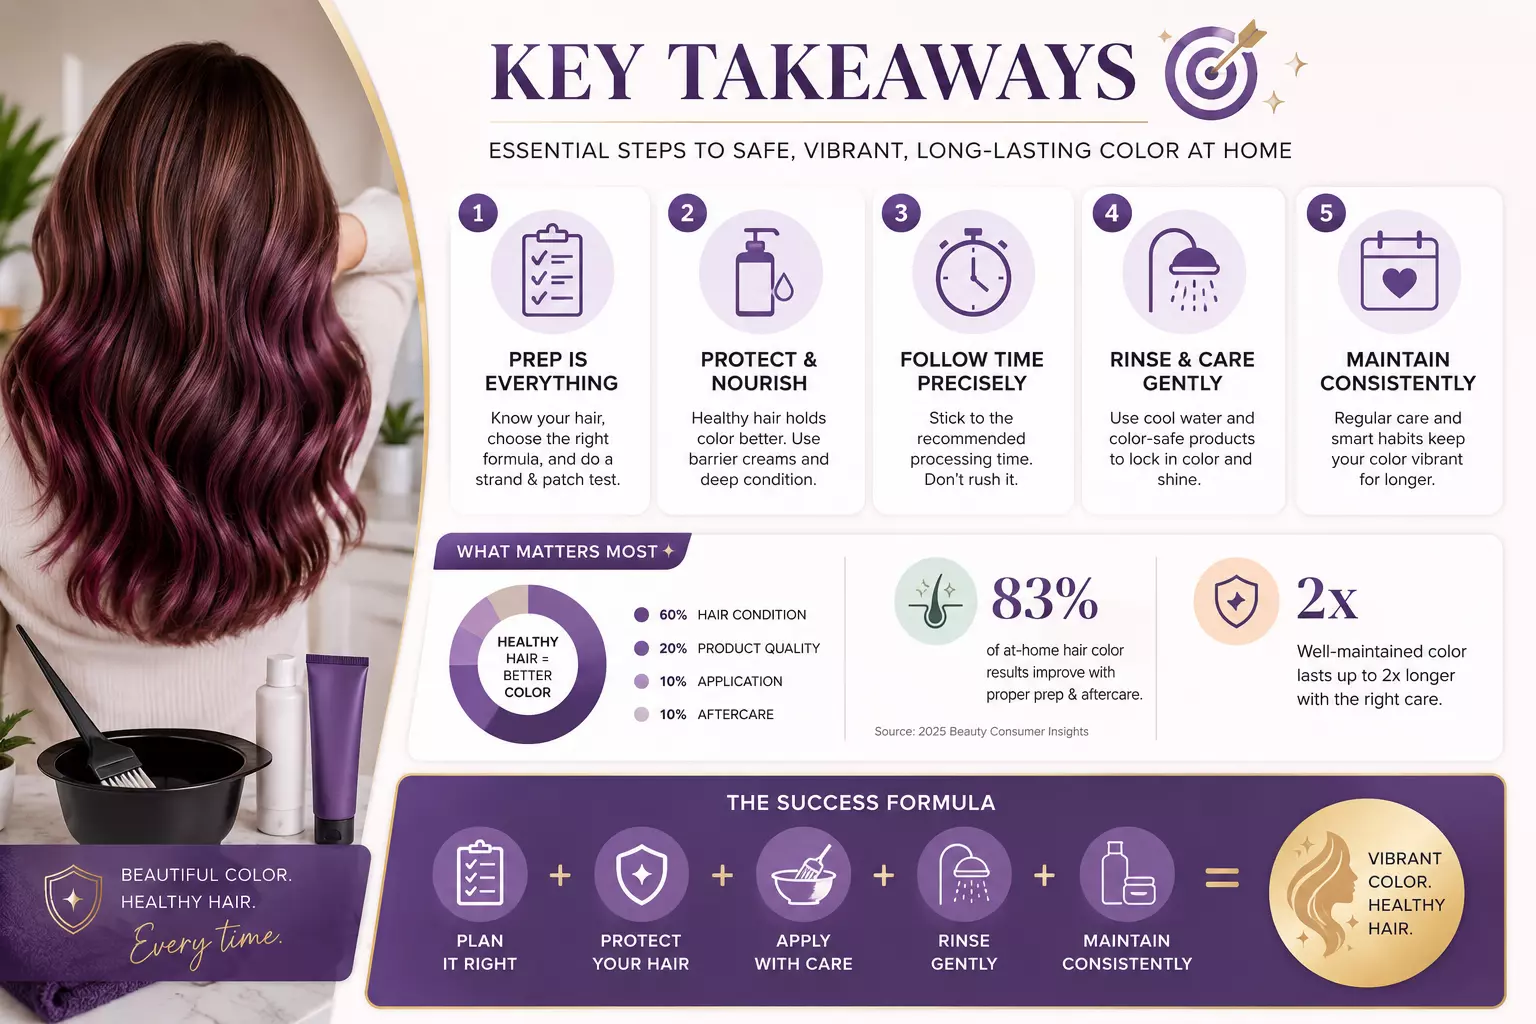
Key Takeaways 🎯
- Preparation is everything: A strand test, porosity check, and scalp assessment before you open any dye box can prevent 80% of common at-home coloring mistakes.
- Choose the right formula: Semi-permanent, demi-permanent, and permanent dyes each serve different purposes — matching the formula to your goal protects your hair.
- Timing and sectioning matter: Applying color in neat sections and respecting developer timing prevents patchiness and over-processing.
- Aftercare is non-negotiable: The week following a color treatment is when most damage occurs if you skip conditioning and use the wrong products.
- Less is more with bleach: If your goal requires lightening, go slower and gentler — multiple light sessions beat one aggressive session every time.
- Try our Free Interactive app: Your Healthy Hair Dye Planner: A Damage-Free Coloring Guide
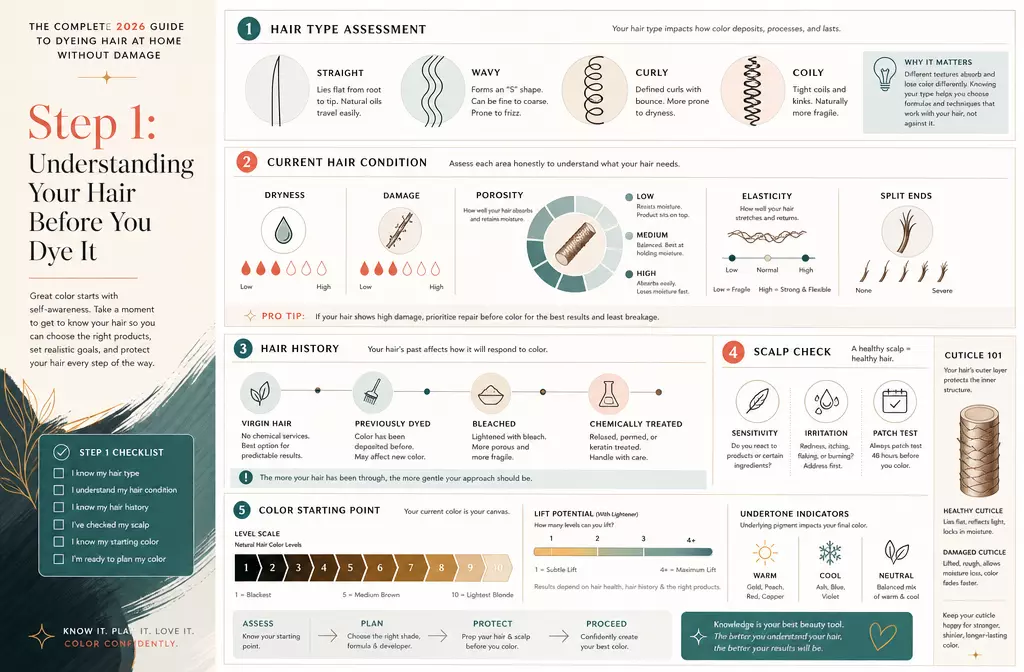
Step 1: Understanding Your Hair Before You Dye It
Before you even pick up a box of dye, you need to understand what you’re working with. This is the step most people skip entirely — and it’s the one that causes the most damage.
Know Your Hair Porosity
Hair porosity refers to how well your hair absorbs and retains moisture and color. There are three levels:
| Porosity Level | Characteristics | Color Behavior |
|---|---|---|
| Low | Cuticles tightly closed, water beads off | Color takes longer, may look dull |
| Medium | Balanced absorption | Color processes evenly, ideal |
| High | Cuticles raised, absorbs quickly | Color fades fast, may go too dark |
Quick porosity test: Drop a few clean, dry strands of hair into a glass of water. If they sink immediately, you have high porosity. If they float for a long time, you have low porosity. Medium porosity hair sinks slowly after a minute or two.
Knowing your porosity tells you whether you need to pre-treat your hair before coloring, which developer strength to use, and how long to leave the dye on.
Assess Your Hair’s Current Condition
“The healthiest color result starts with the healthiest hair possible.”
Ask yourself honestly:
- Is my hair already chemically processed (permed, relaxed, previously bleached)?
- Do I have significant breakage or split ends?
- Has my hair been heat-styled heavily in the past few weeks?
If you answered yes to any of these, you’ll want to do a deep conditioning treatment for at least two weeks before coloring. Damaged hair absorbs color unevenly and breaks more easily under chemical processing.
Do a Strand Test — Always
I know. It feels tedious. But a strand test takes five minutes and can save you from a color catastrophe. Cut a small section of hair from an inconspicuous area (near the nape of your neck works well), apply the dye according to the box instructions, and check the result before committing to your whole head.
A strand test tells you:
- ✅ Whether the color will look the way you expect on your hair
- ✅ How your hair responds to the developer
- ✅ Whether you need more or less processing time
Step 2: Choosing the Right Hair Dye Formula
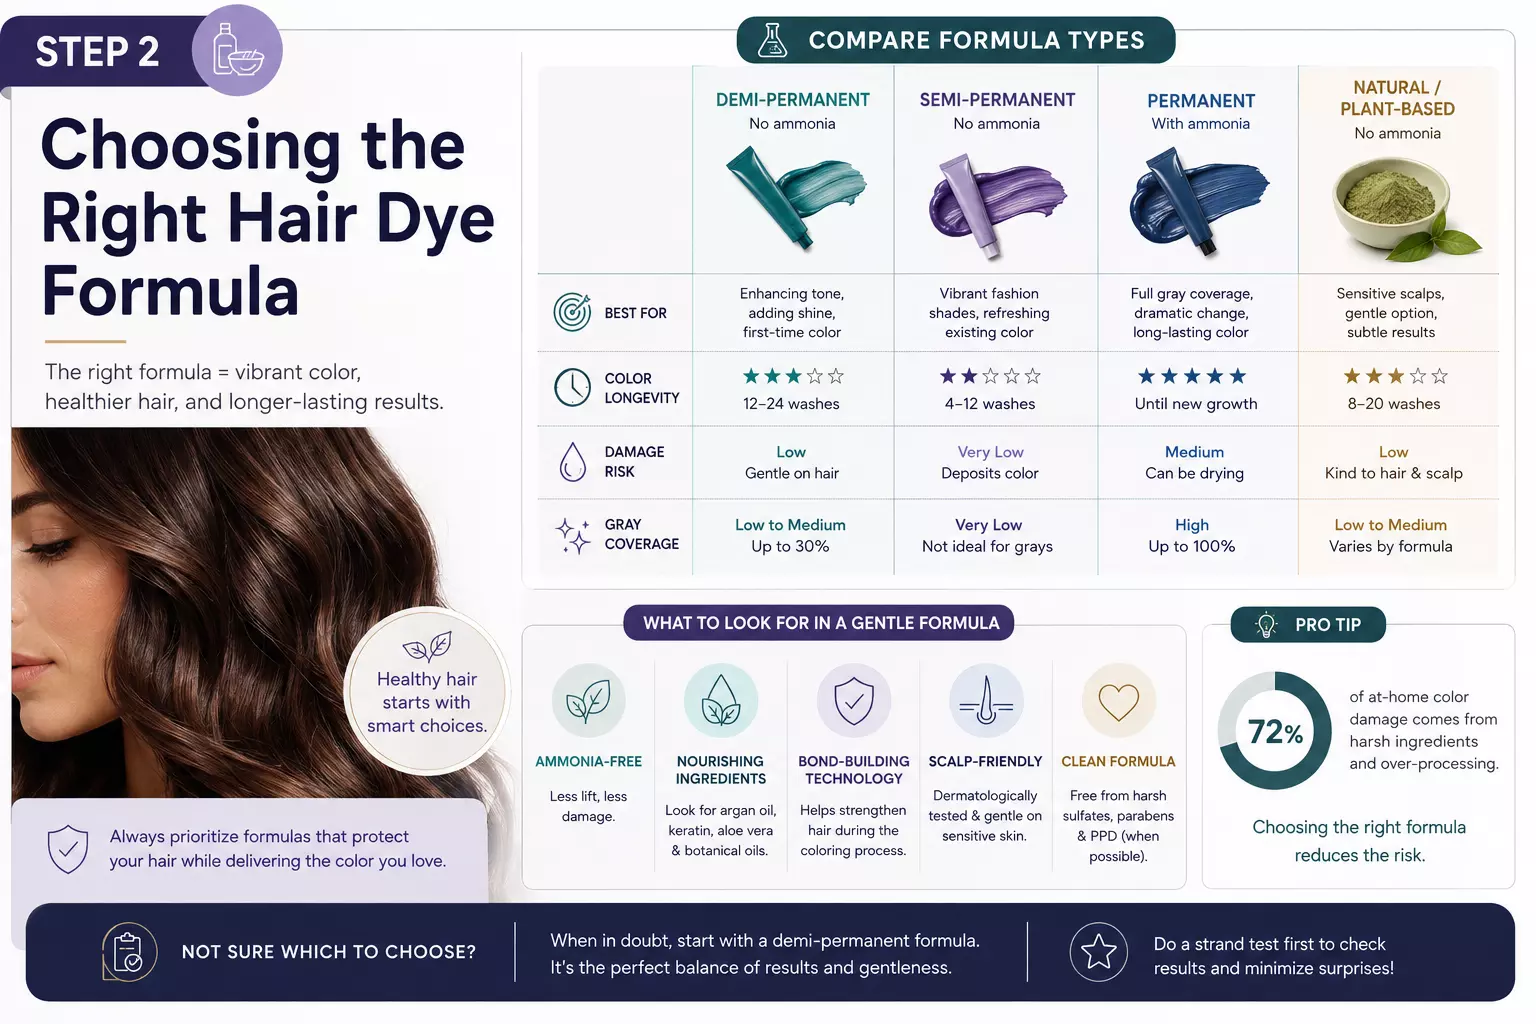
One of the most important aspects of how to dye your hair at home without damaging it is selecting the right type of dye for your specific goal. Not all hair color is created equal.
Types of Hair Dye: A Quick Breakdown
Temporary color (rinses, color sprays, color-depositing conditioners)
- No developer needed
- Washes out in 1–3 shampoos
- Zero damage risk
- Best for: experimenting with color, refreshing existing color
Semi-permanent dye
- No developer or a very low-volume developer (6–9 vol)
- Lasts 4–8 weeks
- Minimal damage
- Best for: adding shine, refreshing color, covering light grays, toning
Demi-permanent dye
- Uses a low-volume developer (10 vol)
- Lasts 8–12 weeks
- Low damage
- Best for: blending grays, darkening, adding depth
Permanent dye
- Uses a developer (typically 20–40 vol)
- Lasts until hair grows out
- Moderate damage potential
- Best for: full coverage, significant color changes, gray coverage
Bleach (lightener)
- Highest damage potential
- Must be used carefully with the right developer volume
- Best for: going lighter, creating a base for vivid colors
Match the Developer Volume to Your Goal
Developer strength (measured in volume) determines how much the hair cuticle opens during processing. Higher volume = more lift = more damage potential.
- 10 vol: Deposit only, no lift
- 20 vol: 1–2 levels of lift, standard for gray coverage
- 30 vol: 2–3 levels of lift
- 40 vol: 3–4 levels of lift (use sparingly, not on scalp)
💡 Pro tip: If you’re going darker, you almost never need more than 10 or 20 vol developer. Save the higher volumes for lightening only.
Step 3: Preparing for the Application Process
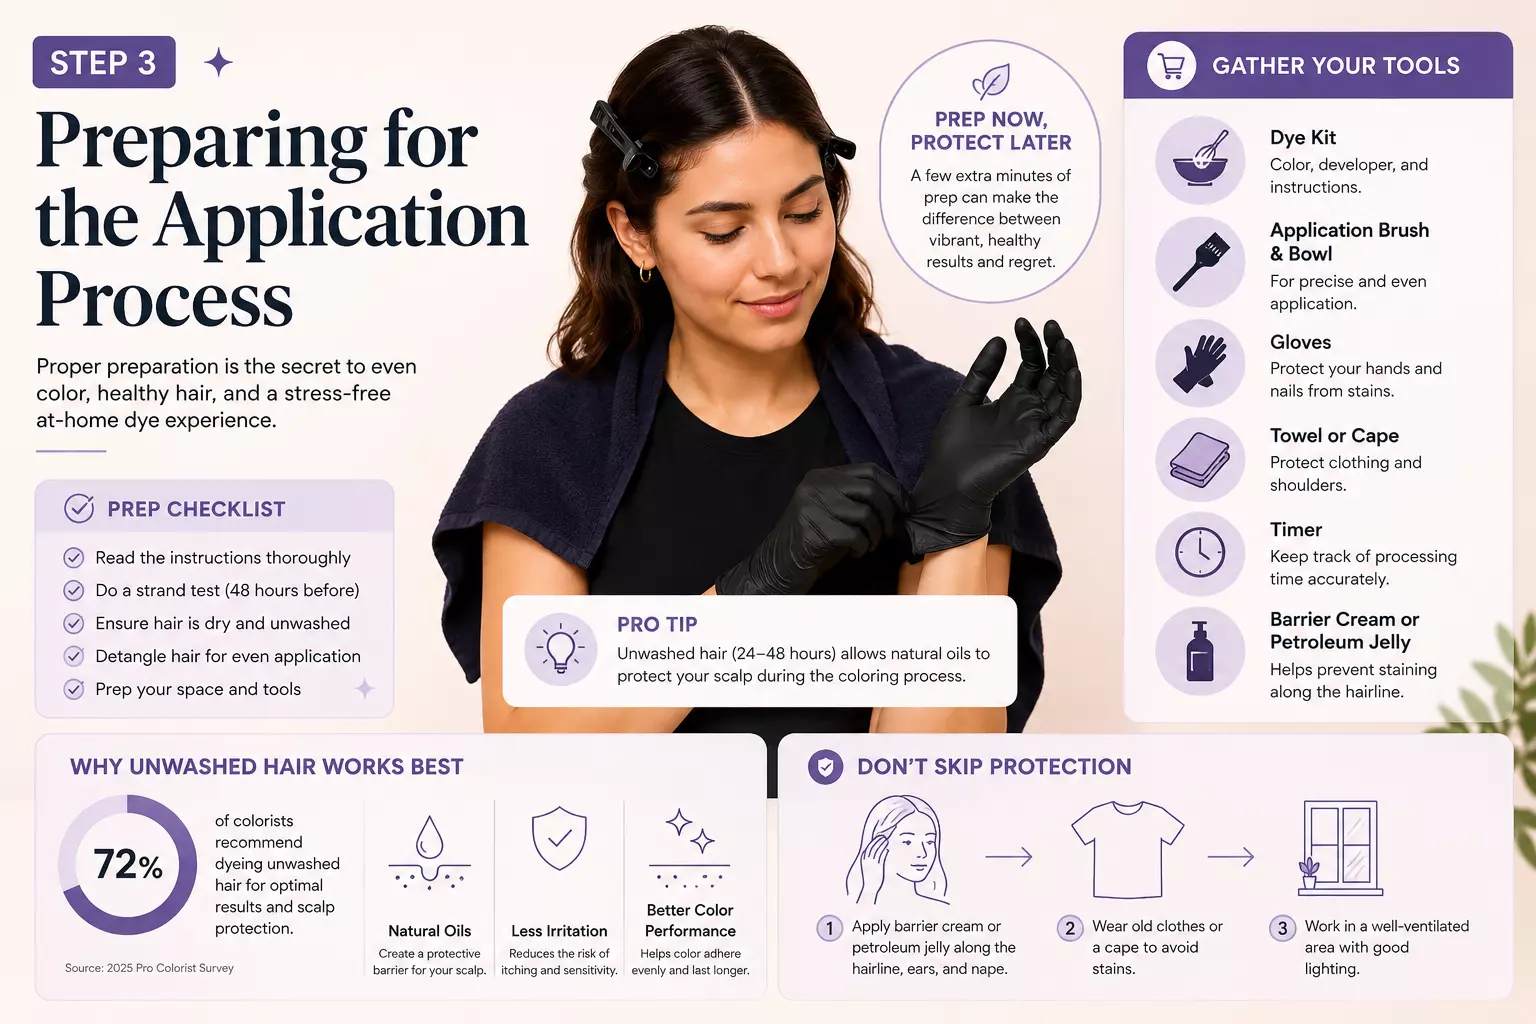
Preparation separates a professional-looking result from a patchy, uneven mess. Here’s how to set yourself up for success.
What You’ll Need 🛒
- Rubber or latex gloves (the ones in the box are often thin — buy better ones)
- Tint brush and mixing bowl (for more precise application than squeezing from a bottle)
- Sectioning clips (at least 6–8)
- Old towel and old clothing you don’t mind staining
- Petroleum jelly or barrier cream (apply along your hairline and ears)
- Timer
- Good lighting
Pre-Color Hair Care
Do NOT wash your hair immediately before dyeing. Your scalp’s natural oils create a protective barrier that reduces irritation and helps color process more evenly. Wash your hair 24–48 hours before application.
Do NOT apply heat tools the day before or the day of coloring. Heat-stressed hair is more vulnerable to chemical damage.
Do a patch test for allergies. Apply a small amount of mixed dye to the inside of your elbow 48 hours before your full application. If you experience redness, itching, or swelling, do not proceed.
Step 4: How to Dye Your Hair at Home Without Damaging It — The Application
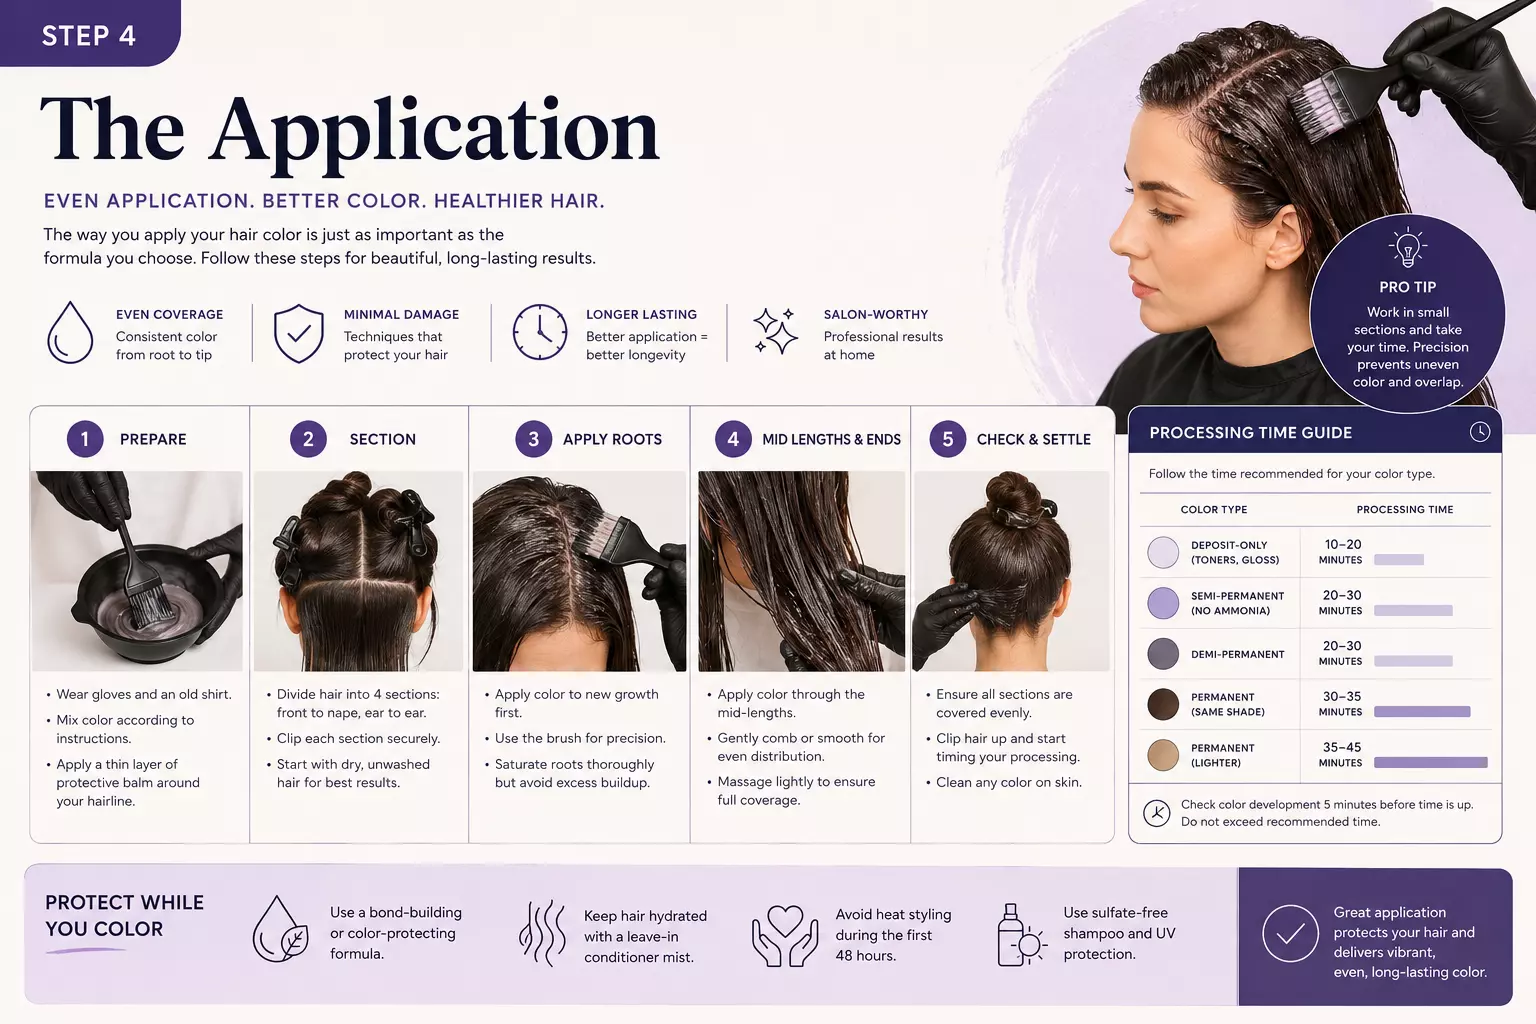
This is where technique makes all the difference. Follow these steps carefully for an even, damage-minimized result.
Section Your Hair Properly
Divide your hair into four quadrants using a center part from forehead to nape, then a horizontal part from ear to ear. Clip each section up. This ensures you work systematically and don’t miss any areas.
For longer or thicker hair, divide each quadrant into 2–3 smaller subsections.
Application Order for Permanent Color
- Start at the roots — this is where the most gray coverage is needed and where color processes most slowly (body heat speeds processing at the roots)
- Work through mid-lengths
- Apply to ends last (ends are often more porous and process faster)
Exception: If you’re doing a root touch-up only, apply color exclusively to the new growth and avoid overlapping onto previously colored hair. Overlapping causes over-processing and breakage.
Timing Is Critical ⏱️
Set a timer the moment you finish applying color. Do not guess. Do not “check in a few minutes.” Use the exact timing recommended on the packaging as your starting point, then adjust based on your strand test results.
Signs you’ve left color on too long:
- Hair feels mushy or gummy when wet
- Excessive shedding after rinsing
- Color appears darker than intended
Signs you haven’t left color on long enough:
- Uneven coverage
- Gray hairs still visible
- Color appears lighter than the box showed
Rinsing Correctly
Rinse with cool to lukewarm water — never hot. Hot water opens the hair cuticle and causes color to bleed out faster. Rinse until the water runs completely clear, which may take several minutes.
Apply the conditioning treatment included in the box (or a separate deep conditioner) immediately after rinsing. Leave it on for at least 3–5 minutes. This helps close the cuticle and lock in color.
Step 5: Recognizing and Avoiding Common Damage Mistakes
Even experienced home colorists make mistakes. Here are the most common ones — and how to avoid them.
Mistake #1: Overlapping Color on Previously Processed Hair
This is the number one cause of at-home hair breakage. Every time you apply permanent color or bleach over hair that’s already been chemically processed, you’re stacking damage.
Solution: For root touch-ups, apply color only to the new growth (typically the first 1–2 inches). Pull color through to the ends only in the last 5–10 minutes of processing time if needed for refreshing.
Mistake #2: Using Too-High Developer
Many people assume that a higher-volume developer gives better results. It doesn’t — it gives faster results with more damage.
Solution: Use the lowest developer volume that achieves your goal. For most color-to-color changes (not going significantly lighter), 20 vol is sufficient.
Mistake #3: Bleaching Wet or Damp Hair
Bleach on damp hair processes unevenly and can cause more scalp irritation. Always apply bleach to dry hair.
Mistake #4: Skipping the Protein Treatment
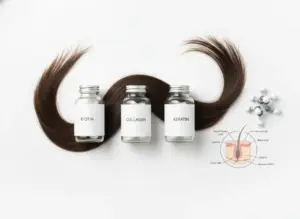
Chemical color processes break down the protein bonds in your hair (specifically keratin). Without replenishing protein, hair becomes weak and prone to breakage.
Solution: Use a protein treatment one week before coloring and one week after. Look for products containing hydrolyzed keratin, silk proteins, or wheat protein.
Mistake #5: Coloring Already-Damaged Hair
If your hair is already breaking, adding more chemicals will make it worse — not better.
Solution: If your hair is significantly damaged, wait. Spend 4–8 weeks on an intensive repair routine before attempting any chemical process.
| Common Mistake | Consequence | Prevention |
|---|---|---|
| Overlapping color | Breakage, over-processing | Apply only to new growth |
| Wrong developer volume | Damage, uneven lift | Match volume to goal |
| Skipping strand test | Color surprise, damage | Always test first |
| Coloring damaged hair | Severe breakage | Repair first, color later |
| Rinsing with hot water | Color fading, frizz | Use cool water only |
Step 6: Post-Color Care to Maintain Healthy, Vibrant Hair
The coloring process doesn’t end when you rinse out the dye. In fact, the 48–72 hours after coloring are when your hair is most vulnerable. This is where most people drop the ball — and where the real difference between damaged and healthy color-treated hair is made.
The First 48 Hours
- Do not wash your hair for at least 48–72 hours after coloring. The color is still oxidizing and settling into the hair shaft. Washing too soon causes significant fading.
- Avoid heat styling during this window. If you must style, use the lowest heat setting and always apply a heat protectant.
- Avoid chlorine and saltwater. Both strip color and dry out chemically treated hair aggressively.
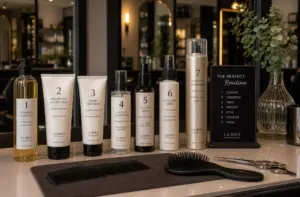
Building a Color-Safe Hair Care Routine
Once you’re past the initial 48 hours, switch your routine to products specifically formulated for color-treated hair.
What to look for in a color-safe shampoo:
- ✅ Sulfate-free formula
- ✅ “Color-safe” or “color-protecting” labeling
- ✅ Gentle cleansing agents like sodium cocoyl isethionate
What to avoid:
- ❌ Sodium lauryl sulfate (SLS) — strips color aggressively
- ❌ Clarifying shampoos (unless doing a specific treatment)
- ❌ Shampoos with high alcohol content
Weekly Deep Conditioning Is Non-Negotiable
Color-treated hair loses moisture faster than untreated hair because the chemical process partially disrupts the hair’s natural moisture barrier. A weekly deep conditioning mask helps restore that barrier.
Look for masks containing:
- Argan oil — seals the cuticle, adds shine
- Shea butter — intense moisture without weighing hair down
- Ceramides — rebuild the hair’s protective layer
- Hydrolyzed proteins — repair structural damage
Protecting Color from Fading
Color fading is largely caused by UV exposure, heat, and frequent washing. Here’s how to slow it down:
- Wash hair 2–3 times per week maximum — water alone causes color molecules to exit the hair shaft
- Use a UV-protecting hair product when spending time outdoors
- Sleep on a silk or satin pillowcase — reduces friction and moisture loss
- Use cool water for every wash — this one habit alone can extend color vibrancy by weeks
💡 Color-refreshing tip: Every 3–4 weeks, use a color-depositing conditioner in your shade to refresh vibrancy between full color applications. This reduces how often you need to re-dye, which in turn reduces cumulative damage.
Special Considerations: Bleach and Going Lighter
If your goal is to go significantly lighter, the process requires extra care. Bleach is the most chemically aggressive process you can apply to hair, and it demands respect.
The “Go Slow” Rule
Never try to lift more than 2–3 levels in a single session at home. If you want to go from dark brown to platinum blonde, that’s a multi-session process — potentially 3–4 sessions spaced weeks apart.
Trying to achieve dramatic lightening in one session almost always results in severe damage, breakage, and an uneven result.
Bleach Washing as a Gentler Alternative
A bleach wash (also called a soap cap) mixes bleach with shampoo and developer in a 1:1:1 ratio. It’s significantly gentler than full-strength bleach and is ideal for:
- Removing stubborn color buildup
- Lightening hair by just half to one level
- Correcting uneven color
Toning After Bleaching
Bleach lifts hair through a series of warm undertones — orange, yellow, pale yellow — before reaching white. A toner (typically a semi-permanent or demi-permanent color in ash, violet, or beige tones) neutralizes these warm tones to achieve a clean blonde.
Toning is a separate step from bleaching and should be done after the bleach is fully rinsed and hair is in a stable condition.
Conclusion: Your Roadmap to Beautiful, Healthy Color at Home
Learning how to dye your hair at home without damaging it is genuinely achievable for almost anyone — but it requires treating the process with the same care and intention a professional would. The biggest shift is mental: stop thinking of at-home coloring as a quick, casual task and start treating it as a skill worth learning properly.
Here’s your action plan:
- This week: Assess your hair’s porosity and current condition. Do a patch test and strand test before any color application.
- Before you buy: Match your dye formula and developer volume to your specific goal — not just the color on the box.
- On color day: Section properly, apply systematically, time precisely, and rinse with cool water.
- The week after: Commit to the 48-hour no-wash rule, switch to sulfate-free products, and begin weekly deep conditioning.
- Ongoing: Protect your color from UV, heat, and over-washing. Use color-depositing conditioners between sessions to reduce how often you need to re-dye.
The difference between hair that looks vibrant and healthy after home coloring and hair that looks fried almost always comes down to these fundamentals. Take your time, do the prep work, and your hair will reward you for it. 💇♀️✨