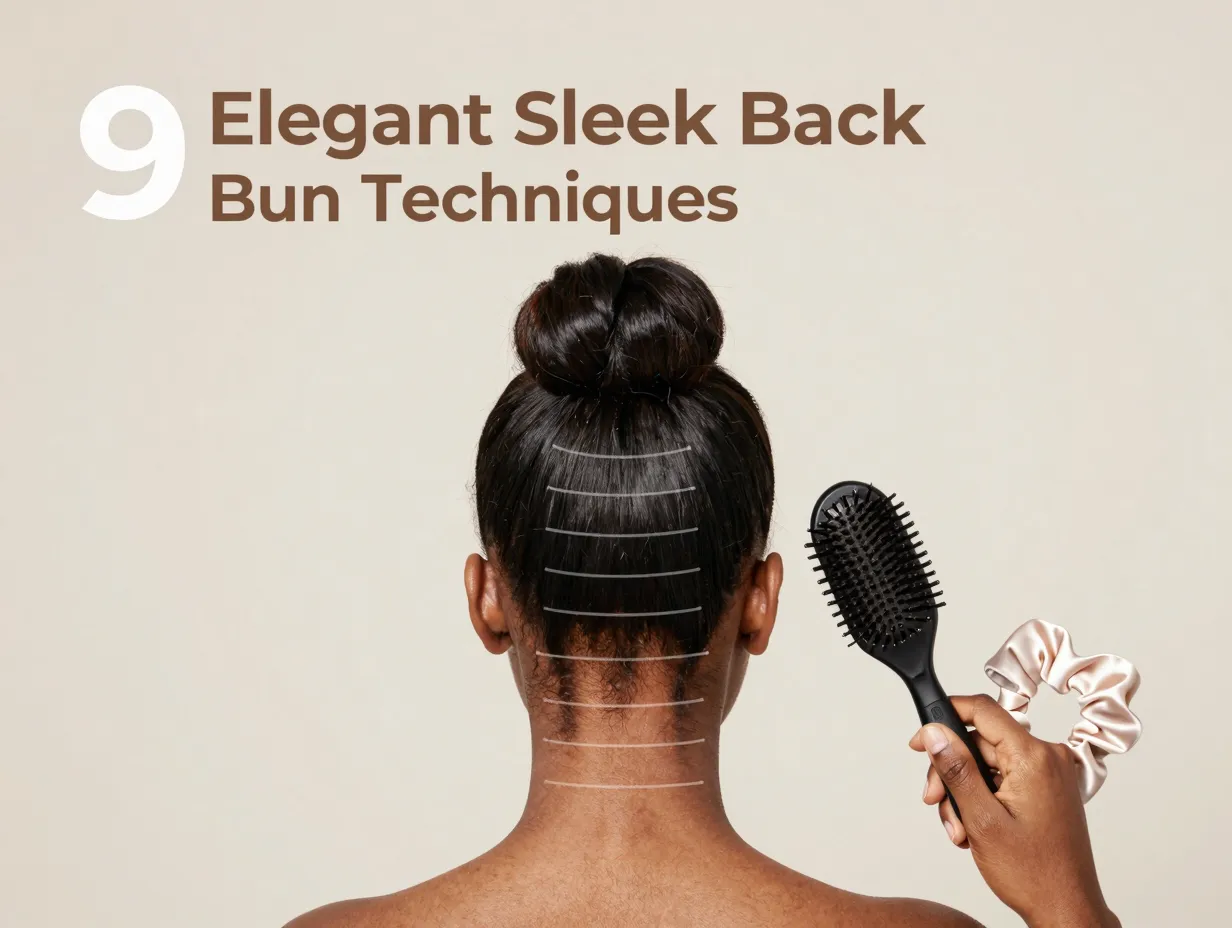
9 Elegant Sleek Back Bun Techniques for Natural Hair
Only 34% of Black women say they feel fully confident styling their natural hair without professional help — yet the sleek back bun remains one of the most requested protective styles across every curl type and hair length. That gap between desire and confidence is exactly why mastering the 9 Elegant Sleek Back Bun Techniques for Natural Hair matters so much in 2026.
Whether you are rocking a TWA (teeny weeny afro) or shoulder-length coils, a polished bun can take you from a Monday morning meeting to a Saturday evening event without missing a beat. In this guide, I break down each technique step by step, covering the right products, tools, and methods to get that glass-smooth finish every time.
Key Takeaways 📌
- Sectioning is everything — dividing hair into horizontal and vertical subsections is the foundation of a flawless sleek bun.
- Product choice matters — defining gels and gummy wax work together to hold edges and the crown without flaking.
- All hair lengths qualify — even short 4B natural hair can achieve a sleek bun without heat.
- High buns and low buns require different techniques — placement and brushing direction change the entire process.
- Edge care is a separate, dedicated step — never rush the baby hair phase if you want a truly polished result.
Why the Sleek Back Bun Works for Every Natural Hair Type
Before diving into the specific techniques, it helps to understand why this style is so versatile. The sleek back bun works across 3A to 4C curl patterns because it relies on product and technique rather than heat. That means less damage, more longevity, and a style that respects the integrity of your natural strands.
💬 “A great sleek bun is not about taming your hair — it is about directing it with intention.”
Here is a quick reference table for product and tool essentials before you start:
| Tool / Product | Purpose | Best For |
|---|---|---|
| Boar bristle brush | Smoothing and slicking | All curl types |
| Edge brush | Laying baby hairs | Hairline definition |
| Eco Styler or Big Papa gel | Hold and shine | Crown and length |
| Gummy wax | Root and edge grip | Flyaway control |
| Satin scrunchies (5–6) | Section holding | Organized styling |
| Wide-tooth comb | Detangling | Pre-style prep |
| Rat-tail comb | Clean parts | Sectioning |
Now let us get into the techniques.
9 Elegant Sleek Back Bun Techniques for Natural Hair: The Complete Breakdown
1. The Middle-Part Foundation Bun
The middle-part foundation bun is the starting point that most professional tutorials recommend as standard practice [1]. Begin by creating a clean, precise center part using a rat-tail comb on freshly moisturized hair. This symmetrical foundation ensures that both sides of the head receive equal product distribution and tension during the slicking process.
How to do it:
- Apply a leave-in conditioner first to add slip.
- Use the rat-tail comb to draw a straight line from the center of your forehead to the nape of your neck.
- Apply gel to each half separately, brushing toward the back.
- Secure both sides into a single ponytail at the desired height.
- Wrap the ponytail into a bun and pin.
✅ Best for: 3C–4B curl types | Medium to long hair
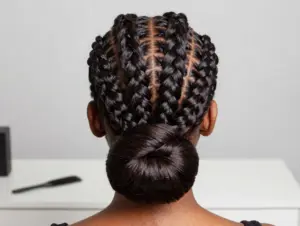
2. The Horizontal Sectioning Sleek Bun
One of the most underused techniques in DIY tutorials is the horizontal sectioning method [2]. Rather than trying to slick all your hair back in one motion — which often leads to lumps and uneven texture — this method divides the back of the head into three or more horizontal layers.
Why it works: Each layer is smoothed individually before being released and combined, creating a uniformly flat surface from root to tip.
Step-by-step:
- Part hair from ear to ear, clipping the top section away.
- Slick the bottom section first, securing loosely with a satin scrunchie.
- Release the middle section, slick over the first, re-secure.
- Repeat with the top section.
- Remove all scrunchies, gather into a ponytail, and form the bun.
💡 Pro tip: Keep 5–6 satin scrunchies on hand during this process to hold each layer without creating dents or breakage [2].
✅ Best for: 4A–4C curl types | Thick or dense hair
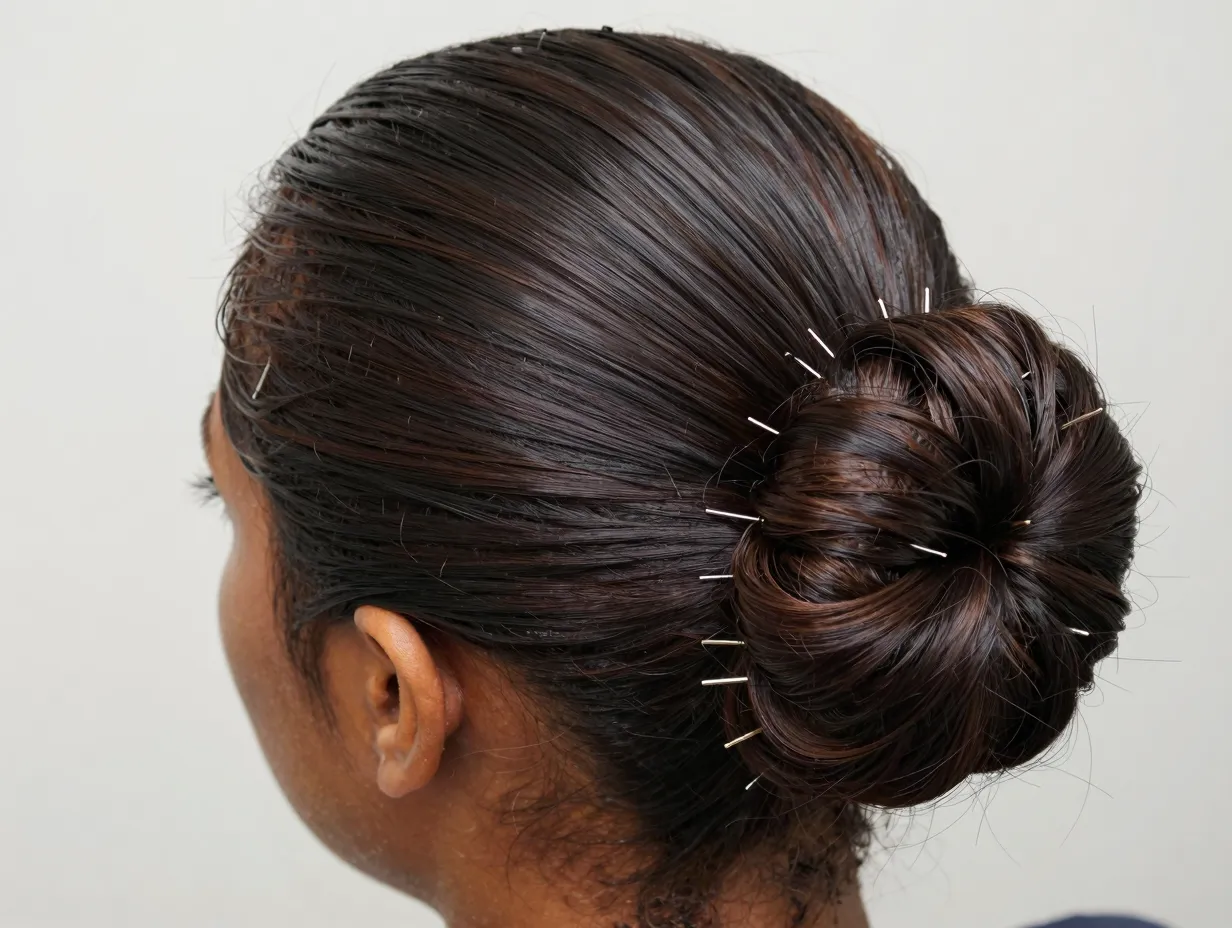
3. The Classic Low Bun at the Nape
The classic low bun is a timeless option that never goes out of style [3]. The key to this look is positioning — the ponytail base must sit directly at the nape of the neck, not above it. This placement creates the elegant, elongated silhouette that makes the style look intentional rather than rushed.
How to do it:
- Brush all hair downward and backward using a boar bristle brush coated in gel.
- Secure a ponytail at the nape with a strong elastic.
- Divide the ponytail into two sections.
- Twist both sections around each other, then wrap around the base.
- Pin with bobby pins and smooth any bumps with a damp toothbrush or edge brush.
✅ Best for: All curl types | Medium to long hair | Professional settings
4. The Gel-and-Gummy-Wax Sleek Bun
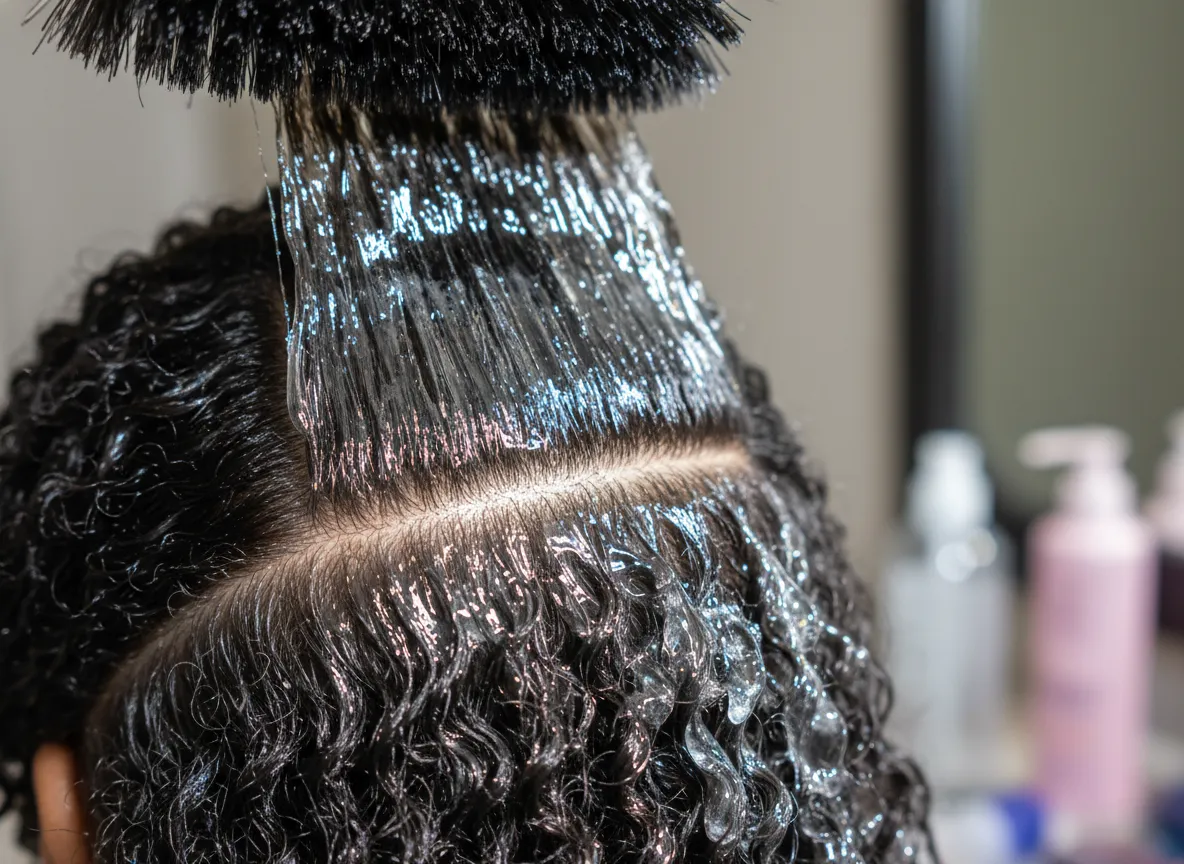
Product layering is a game-changer for natural hair bun styles, and this technique focuses entirely on that principle [4]. The combination of a defining gel — such as Big Papa or Eco Styler — applied from roots to ends, followed by gummy wax specifically at the roots and hairline, delivers maximum hold without the dreaded white flaking that plagues many natural hair styling attempts.
Product layering order:
- Moisturizer or leave-in conditioner (base layer)
- Defining gel — applied mid-shaft to ends
- Gummy wax — applied at roots and along the hairline
- Brush through with a boar bristle brush
- Secure, wrap, and pin the bun
💬 “The right product combination is the difference between a bun that lasts 20 minutes and one that lasts 3 days.”
✅ Best for: 4B–4C curl types | High-humidity environments | Long-wear occasions
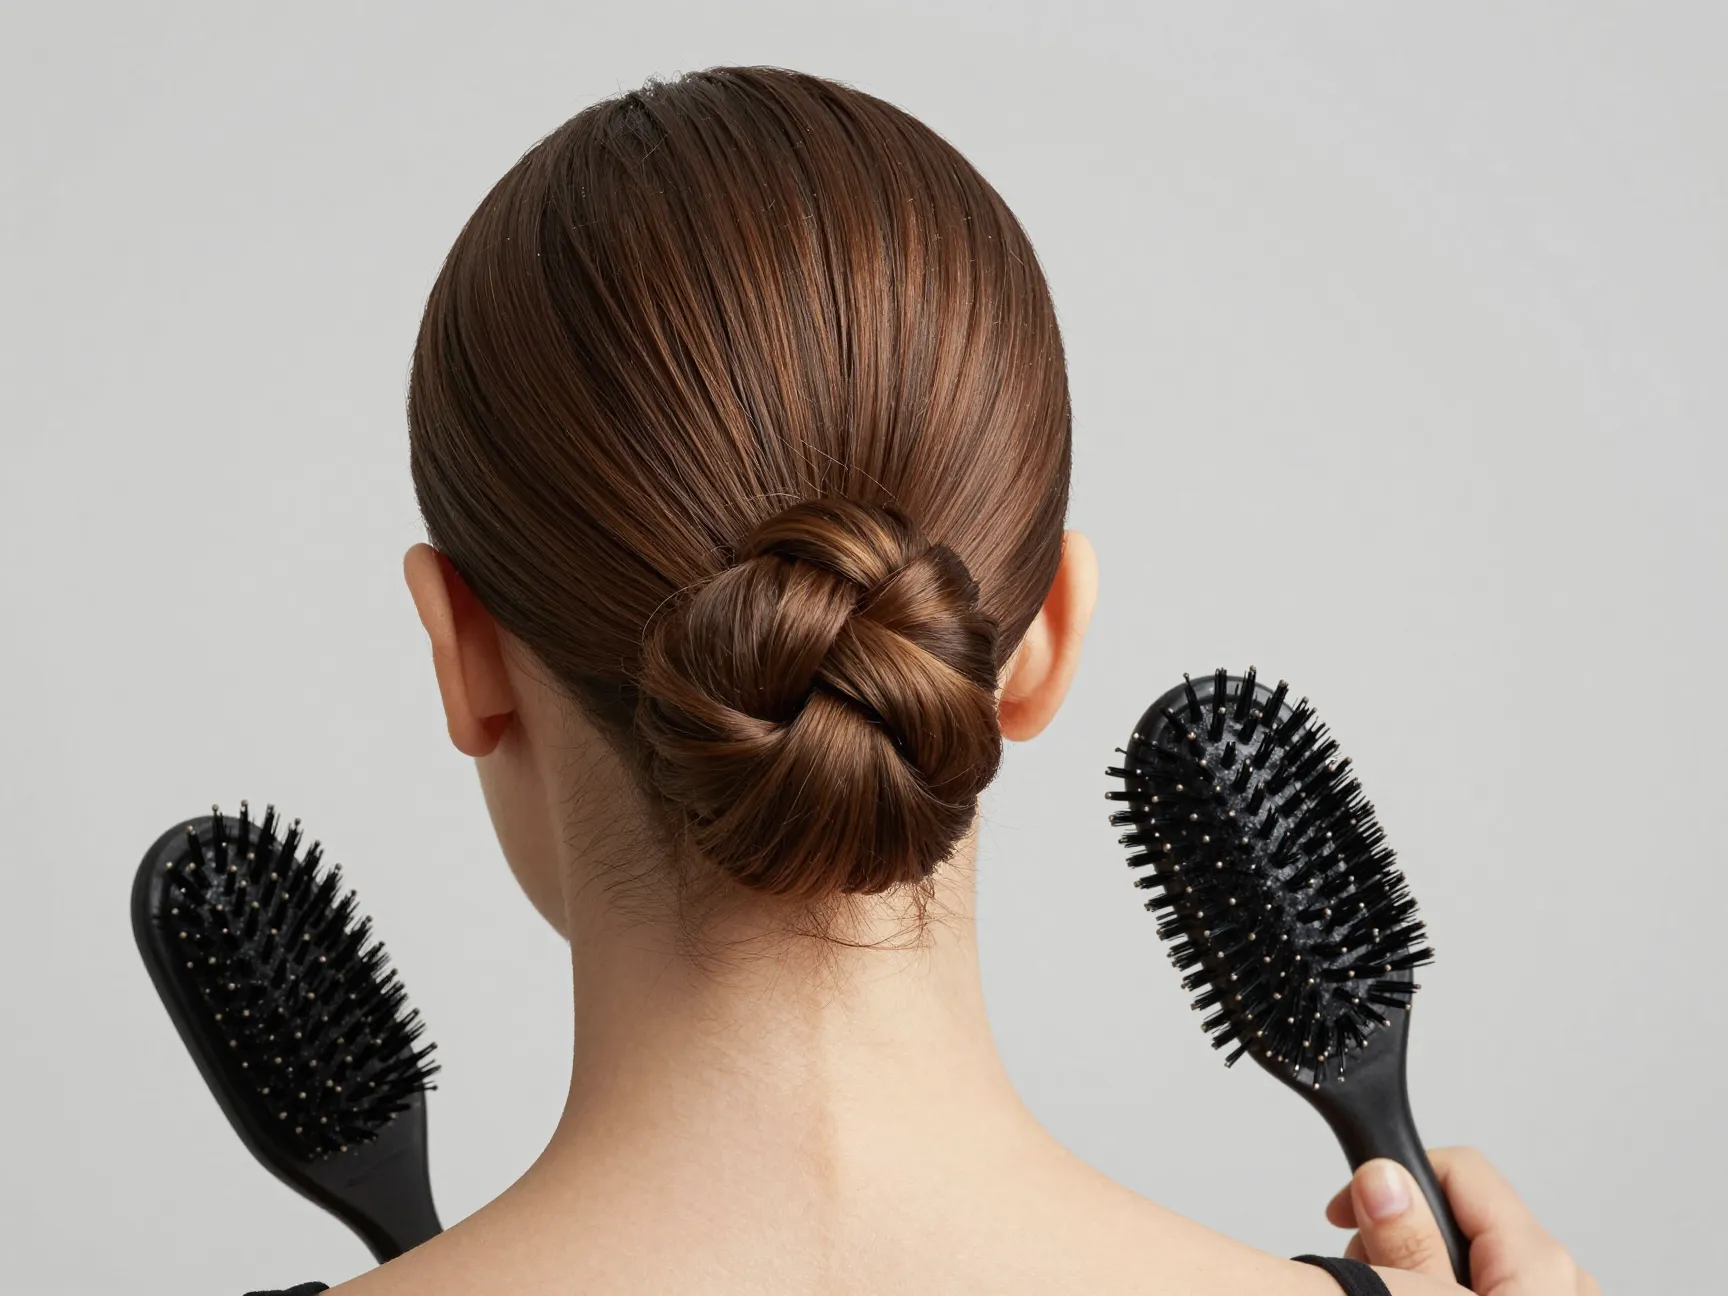
5. The Wrapped Knot Bun
The wrapped knot bun is a minimalist technique that skips extensions entirely and uses your own hair to create a structured, elegant shape [4]. This method is especially popular for those who want a clean, modern aesthetic without added bulk.
How to do it:
- Create a sleek ponytail at your preferred height using gel and a boar bristle brush.
- Divide the ponytail into two equal sections.
- Twist one section around the base of the ponytail in a clockwise direction.
- Secure with a rubber band or bobby pins.
- Twist the second section in the opposite direction over the first.
- Tuck the ends under and pin flat.
The result is a compact, polished knot that looks intentional and stays put all day.
✅ Best for: 3B–4A curl types | Shorter ponytail lengths | Minimalist aesthetics
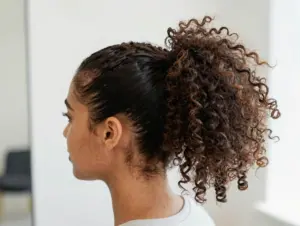
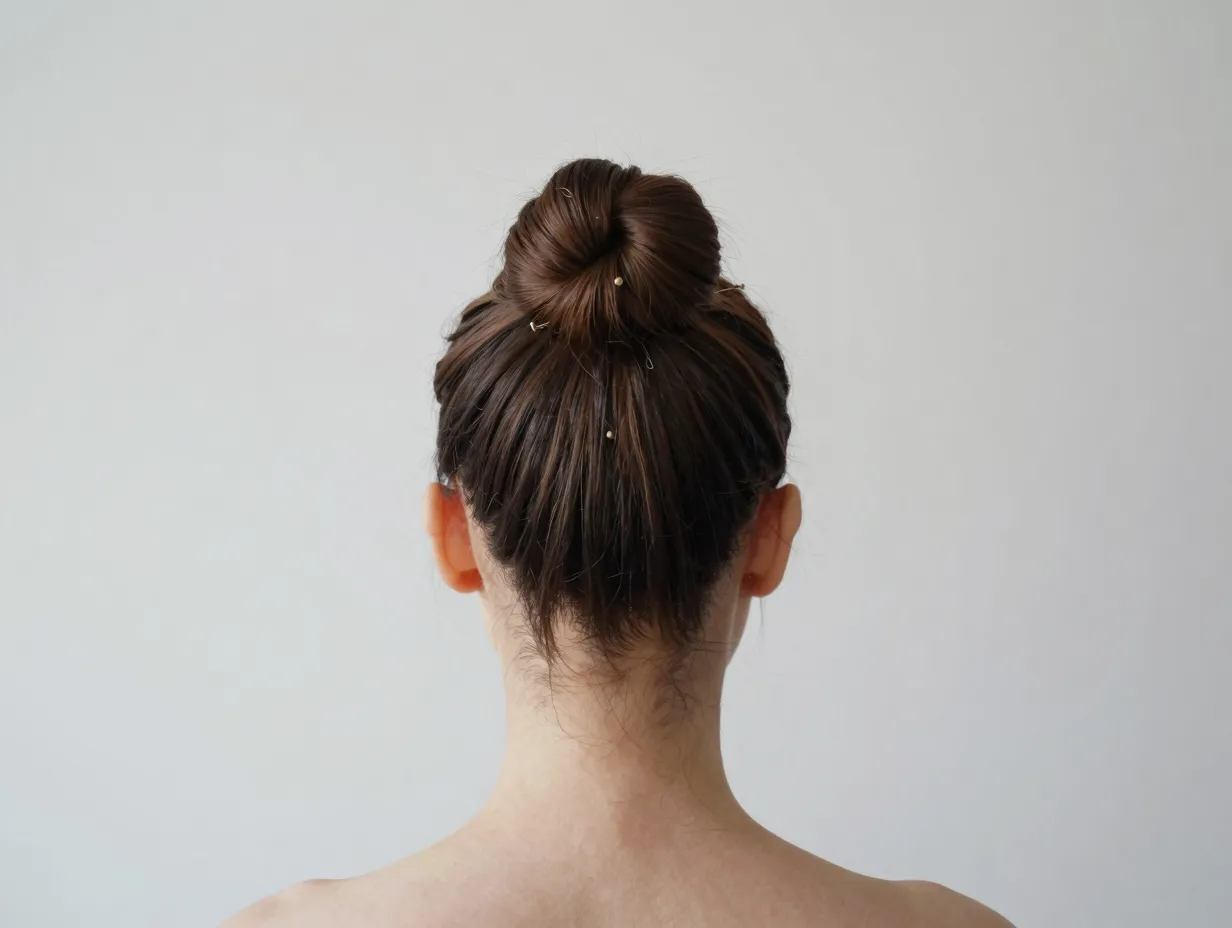
6. The High Bun / Top Knot
The high bun — sometimes called the top knot — is a completely different beast from the low bun, and it deserves its own technique category [9]. Instead of brushing hair downward toward the nape, you are directing all tension upward toward the front hairline. This changes the brushing angle, the product placement, and the way you secure the base.
Key differences from the low bun:
| Feature | Low Bun | High Bun / Top Knot |
|---|---|---|
| Ponytail placement | Nape of neck | Crown or front hairline |
| Brushing direction | Downward and back | Upward and forward |
| Tension point | Lower occipital area | Top of head |
| Best for | Professional, formal | Casual, editorial |
How to do it:
- Apply gel generously across the entire scalp surface.
- Use a boar bristle brush to sweep all hair upward in one smooth motion.
- Secure a high ponytail at the crown.
- Wrap the ponytail into a bun shape and pin securely.
- Smooth the perimeter with a damp edge brush.
✅ Best for: All curl types | Casual and editorial looks | Showing off facial features
7. The Short 4B Natural Hair Bun (No Heat Required)
One of the most common misconceptions about sleek buns is that they require long hair or heat tools. This technique proves otherwise [7]. Even a TWA or very short 4B natural hair can achieve a polished sleek bun using the right gel and securing method — no flat iron needed.
Adapted technique for short hair:
- Start with freshly washed and conditioned hair for maximum product absorption.
- Apply a generous layer of a strong-hold gel (Eco Styler Olive Oil formula works well).
- Use a soft boar bristle brush to smooth hair in the desired direction.
- Gather what you can into a small ponytail at the nape or crown.
- For hair too short to ponytail, use bobby pins to tuck and pin sections into a flat bun shape.
- Lay edges with edge control for a finished look.
💡 Even a small, flat bun pinned close to the scalp reads as elegant when the edges are clean and the surface is smooth.
✅ Best for: 4B–4C curl types | TWA and short natural hair | Heat-free styling
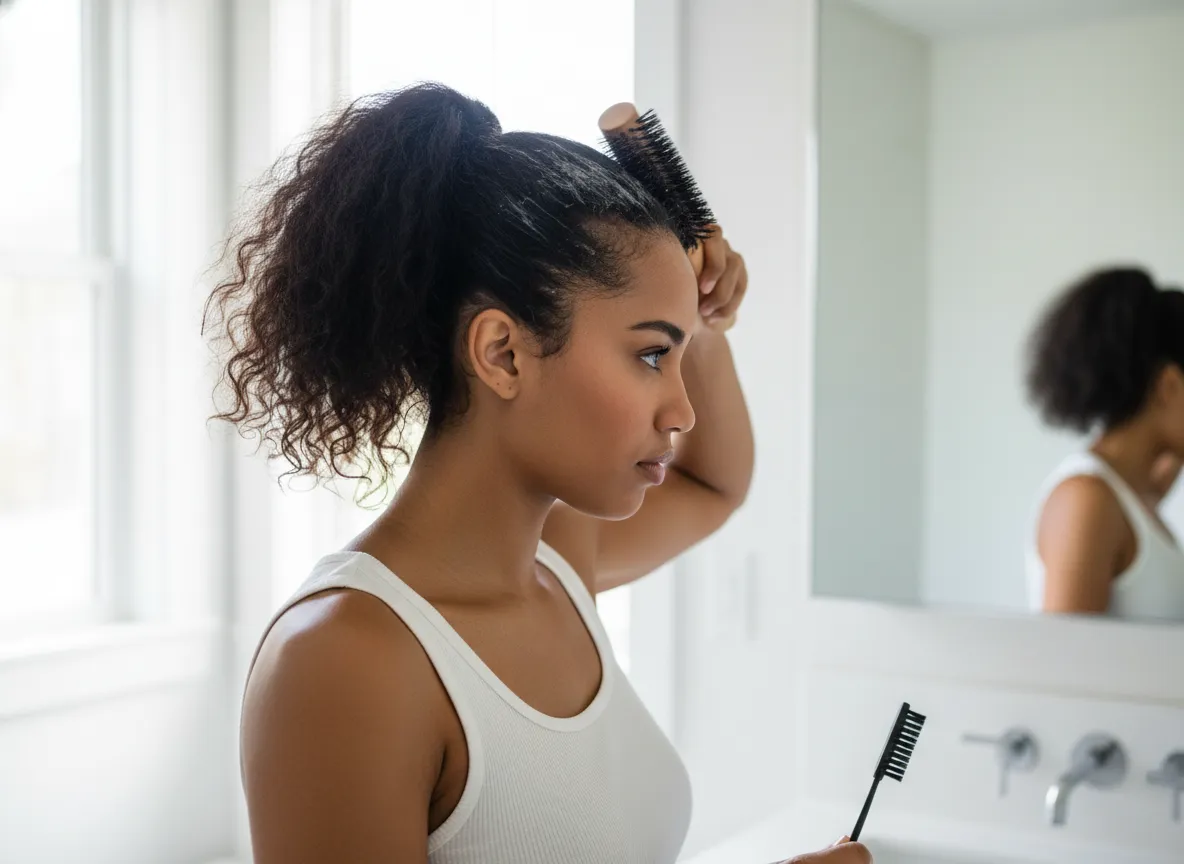
8. The Edge-Laid Sleek Bun
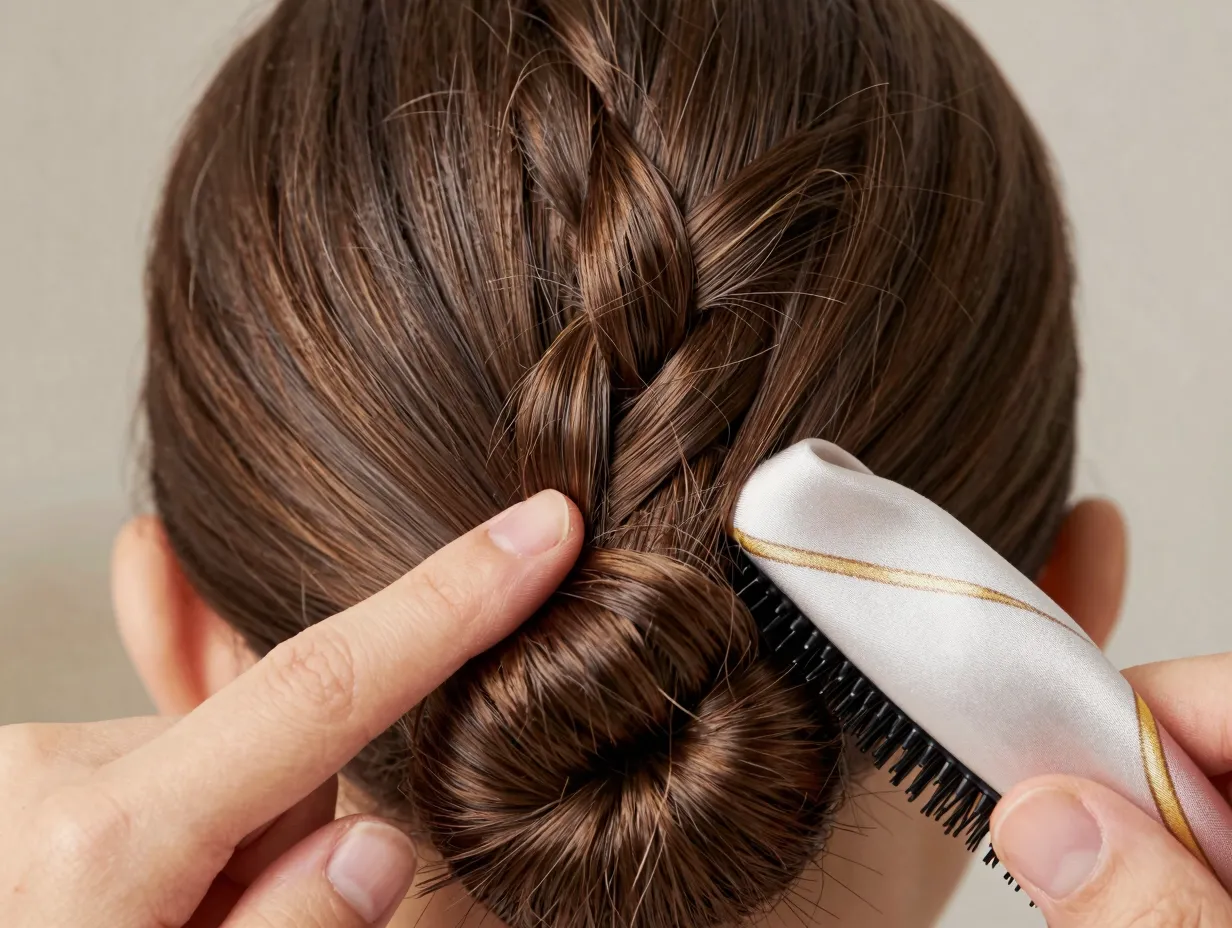
No list of 9 Elegant Sleek Back Bun Techniques for Natural Hair would be complete without dedicating an entire technique to edge care [5]. Laid edges are not just a finishing touch — for many natural hair wearers, they are the centerpiece of the entire look. This technique treats edge styling as a dedicated, separate step rather than an afterthought.
The edge-laying process:
- Complete your bun first — edges come last.
- Apply a small amount of edge control product using your fingertip.
- Use an edge brush to smooth the baby hairs in your desired pattern (swirls, waves, or sleek flat).
- Use a soft scarf or silk wrap to press edges flat for 10–15 minutes.
- Remove the scarf carefully to reveal defined, long-lasting edges.
Popular edge patterns in 2026:
- Classic flat swoop
- Double swirl
- Wave pattern
- Straight-back sleek
✅ Best for: All curl types | Any bun style | Occasions where detail matters
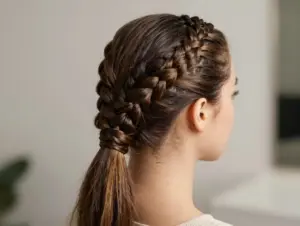
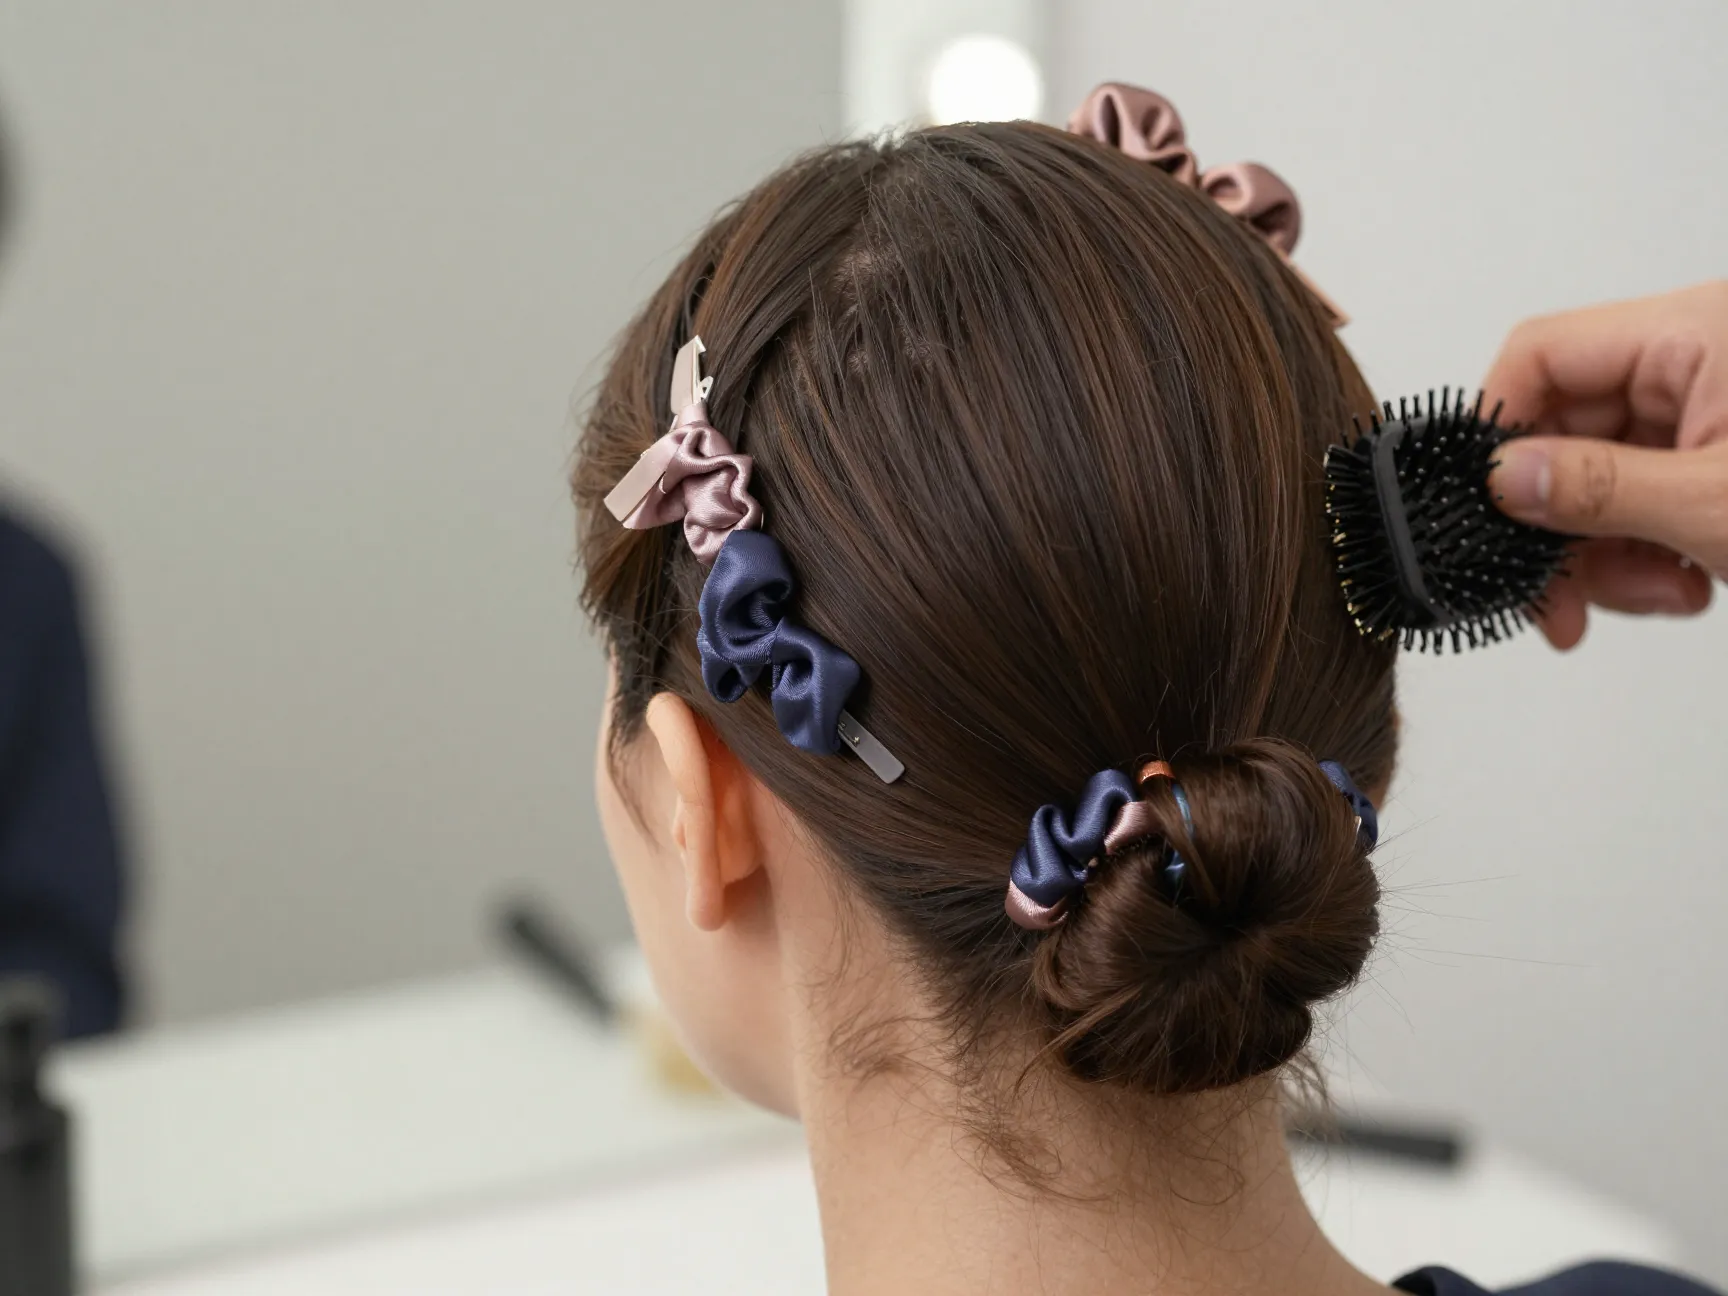
9. The Multi-Scrunchie Organized Bun
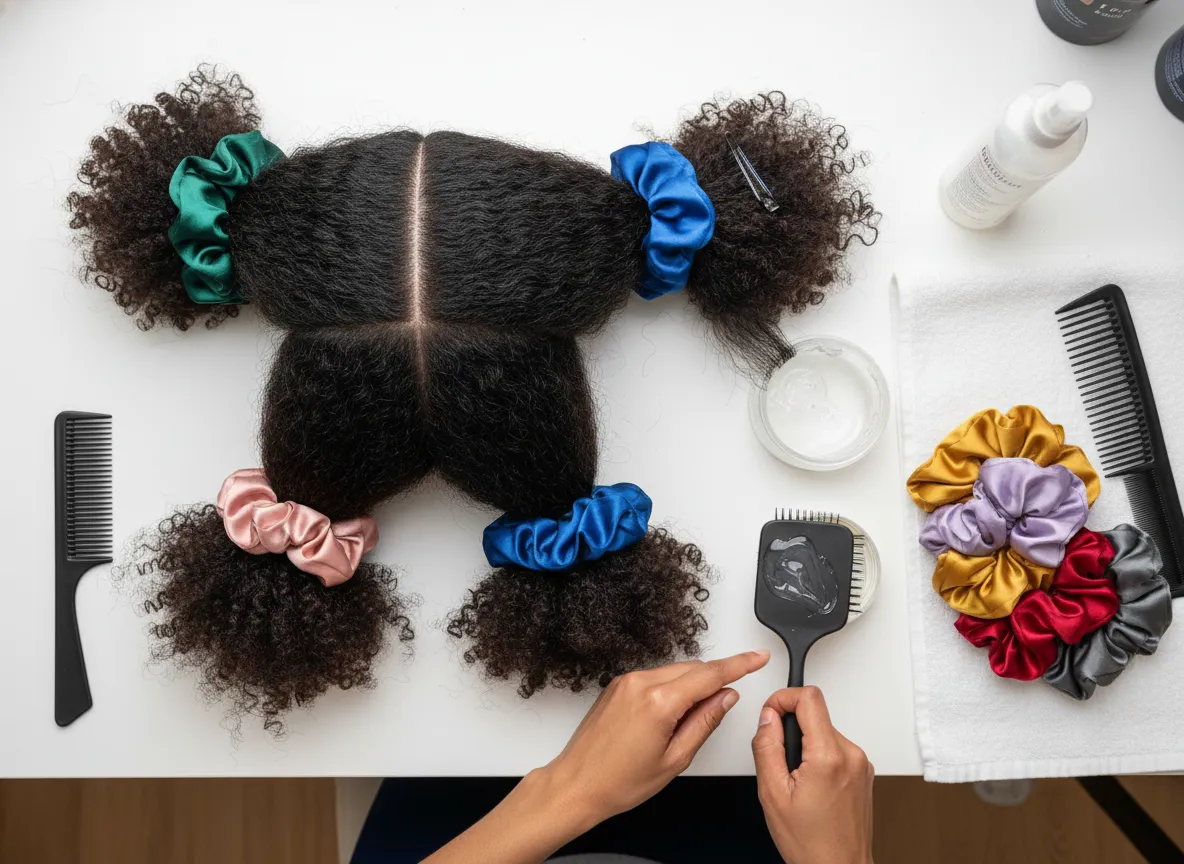
This final technique is less about the finished bun shape and more about the process that gets you there [2]. The multi-scrunchie method uses five to six satin scrunchies strategically placed throughout the styling process to keep sections organized, prevent tangling, and maintain tension without causing damage or dents.
Why satin matters: Unlike regular elastics, satin scrunchies do not snag or break natural hair strands when used as temporary holders during styling.
How the method works:
- Section hair into four quadrants using your rat-tail comb.
- Loosely secure each quadrant with a satin scrunchie.
- Work through one section at a time — apply gel, brush smooth, re-secure.
- Once all sections are slicked, remove scrunchies one at a time and gather into a final ponytail.
- Form the bun and secure with a final satin scrunchie or bobby pins.
This method is especially helpful for beginners who feel overwhelmed trying to manage all their hair at once.
✅ Best for: 4A–4C curl types | Thick or high-density hair | Beginners
Common Mistakes to Avoid With Sleek Natural Hair Buns
Even with the right technique, small errors can derail your results. Here are the most frequent pitfalls and how to fix them:
❌ Skipping moisture before gel — Gel applied to dry natural hair causes flaking and breakage. Always moisturize first.
❌ Using one giant section — Trying to slick all hair back at once creates lumps. Use the horizontal sectioning method instead [2].
❌ Pulling too tight — Chronic tension at the hairline leads to traction alopecia. Sleek does not mean painful.
❌ Rushing the edges — Edges need time and a scarf press to truly lay flat. Do not skip the 10-minute wrap step [5].
❌ Wrong product for your porosity — High-porosity hair needs heavier gels; low-porosity hair benefits from lighter, water-based formulas.
How to Make Your Sleek Bun Last Longer
A well-executed sleek bun should last two to five days with proper maintenance. Here is how to extend the life of your style:
- 🌙 Wrap with a satin scarf or bonnet every night to preserve edges and reduce frizz.
- 💧 Use a light oil or water spray on the hairline each morning to refresh edges without disturbing the bun.
- 📌 Re-pin any loose sections rather than redoing the entire style.
- 🚿 Avoid excessive moisture on the crown — steam from showers can loosen gel hold.
- ✂️ Trim split ends regularly — ragged ends make buns look unkempt even when the base is smooth.
Choosing the Right Technique for Your Hair Type
Not every technique suits every curl pattern. Use this quick guide to find your best match:
| Hair Type | Best Technique(s) |
|---|---|
| 3A–3B (loose curls) | Middle-Part Foundation, Classic Low Bun |
| 3C–4A (tight curls) | Gel-and-Gummy-Wax, Wrapped Knot, High Bun |
| 4B (kinky coils) | Horizontal Sectioning, Short Hair Adaptation |
| 4C (tightly coiled) | Multi-Scrunchie Method, Edge-Laid Bun |
| Short / TWA | Short 4B No-Heat Bun, Edge-Laid Bun |
| Thick / Dense | Horizontal Sectioning, Multi-Scrunchie Method |
Conclusion: Your Next Steps Toward a Flawless Sleek Bun
Mastering the 9 Elegant Sleek Back Bun Techniques for Natural Hair is not about perfection on the first try — it is about building a toolkit of skills you can mix and match depending on your hair’s needs that day. Start with the technique that best matches your curl type and hair length, then layer in the product knowledge and edge care steps as you grow more confident.
Here are your actionable next steps:
- Identify your curl type and density using the table above before choosing a technique.
- Gather your tools — at minimum, a boar bristle brush, edge brush, strong-hold gel, and satin scrunchies.
- Practice the horizontal sectioning method first — it is the single most impactful skill for any sleek bun style.
- Dedicate time to your edges — treat them as a separate step, not a rushed finish.
- Protect your style overnight with a satin bonnet or scarf to maximize wear time.
The sleek back bun is more than a hairstyle — it is a confidence builder. Once you find the technique that works for your hair, you will reach for it again and again.
References
[1] slick back, low bun natural hair tutorial – https://www.youtube.com/watch?v=lFZvUx6QG7o
[2] How To Do Sleek Bun On Natural Hair – https://www.youtube.com/watch?v=WAaETkEAhhQ
[3] Natural Hair Bun Styles – https://www.purewow.com/beauty/natural-hair-bun-styles
[4] HOW TO: Slick Back Bun Tutorial on Natural Hair – https://www.youtube.com/watch?v=xDmkQaBBmxs
[5] How To: SUPER Sleek Bun + How I Lay My Edges On Natural Hair – https://www.youtube.com/watch?v=E0omxn5Dxpo
[6] Watch – https://www.youtube.com/watch?v=e1g4l_qtEfk
[7] HOW TO: SLEEK BUN ON SHORT 4B NATURAL HAIR WITH NO HEAT – https://www.youtube.com/watch?v=BCk9EAfdqQg
[8] Watch – https://www.youtube.com/watch?v=lFmqxKwavbk
[9] Natural Hairstyles High Bun Styles – https://www.curlynikki.com/natural-hairstyles-high-bun-styles.html
[10] Watch – https://www.youtube.com/watch?v=d8F2t2hDg1M