9 Stunning Claw Clip Hairstyles for Long Hair (Beyond the Basic Bun)
The global hair accessories market crossed $28 billion in 2025 — and the humble claw clip is one of the biggest reasons why. Once dismissed as a relic of the 1990s, this little tool has staged a full comeback, and long-haired people everywhere are discovering just how versatile it really is.
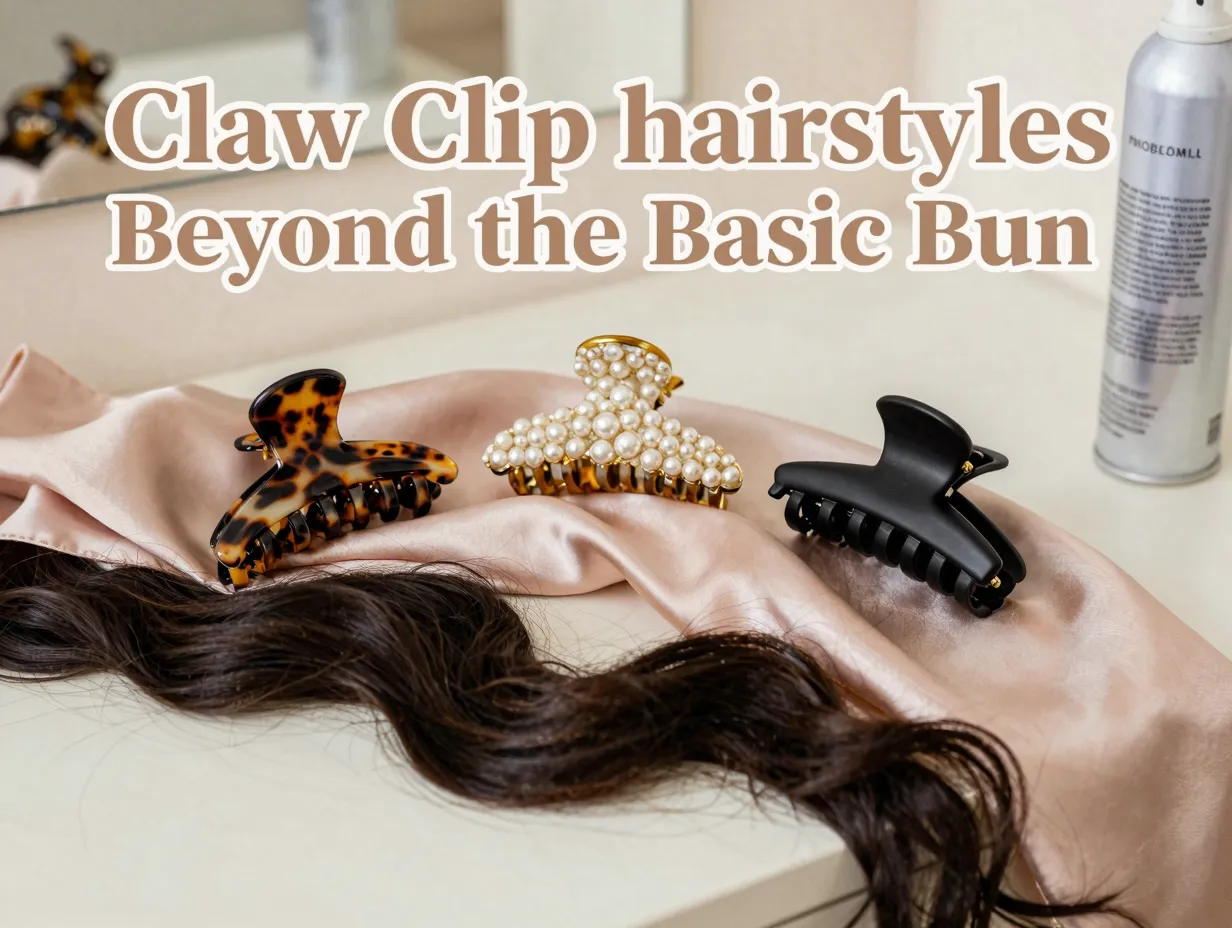
If you’ve been using your claw clip only for a quick, messy bun on lazy mornings, you’re leaving a lot of style on the table. This guide covers 9 stunning claw clip hairstyles for long hair (beyond the basic bun) — looks that range from polished and office-ready to romantic and red-carpet-worthy. Every style here is achievable at home, requires no heat, and takes under five minutes once you know the technique.
Key Takeaways 📌
- Claw clips work for far more than buns — they can create updos, half-up styles, twisted looks, and even faux braids.
- Clip size matters: larger clips (3–4 inches) handle thick or long hair best; smaller clips work for sections and accents.
- No heat required — most of these styles actually look better with second-day, slightly textured hair.
- Prep is everything: a light spritz of texturizing spray or dry shampoo gives hair the grip it needs to stay in place.
- These styles work across hair types — straight, wavy, curly, and thick hair all respond well to claw clip techniques with minor adjustments.
Why Claw Clips Deserve a Permanent Spot in Your Routine
Before we dive into the 9 stunning claw clip hairstyles for long hair (beyond the basic bun), let’s talk about why this accessory has earned its place at the top of the styling toolkit.
💬 “The claw clip is the most democratic hair tool ever made — it works on every texture, every length past the shoulder, and every skill level.”
Here’s a quick comparison of claw clips versus other common styling tools:
| Tool | Heat Required | Skill Level | Time to Style | Hair Damage Risk |
|---|---|---|---|---|
| Claw Clip | ❌ None | Beginner | 1–5 min | Very Low |
| Curling Iron | ✅ Yes | Intermediate | 15–30 min | Medium–High |
| Bobby Pins | ❌ None | Intermediate | 10–20 min | Low |
| Hair Elastic | ❌ None | Beginner | 1–2 min | Low–Medium |
| Hot Rollers | ✅ Yes | Intermediate | 20–40 min | Medium |
The numbers don’t lie. For speed, safety, and versatility, the claw clip wins almost every category.
What you’ll need before you start:
- One large claw clip (3–4 inches) for full updos
- One or two medium clips (2–3 inches) for half-up styles
- Texturizing spray or dry shampoo
- A fine-tooth comb or paddle brush
- Optional: a few bobby pins for securing flyaways
The 9 Stunning Claw Clip Hairstyles for Long Hair (Beyond the Basic Bun)
These nine styles are arranged from easiest to most polished, so you can build your skills as you go. Each one includes a step-by-step breakdown, a difficulty rating, and a tip for making it last longer. 💇♀️
1. The Twisted Half-Up
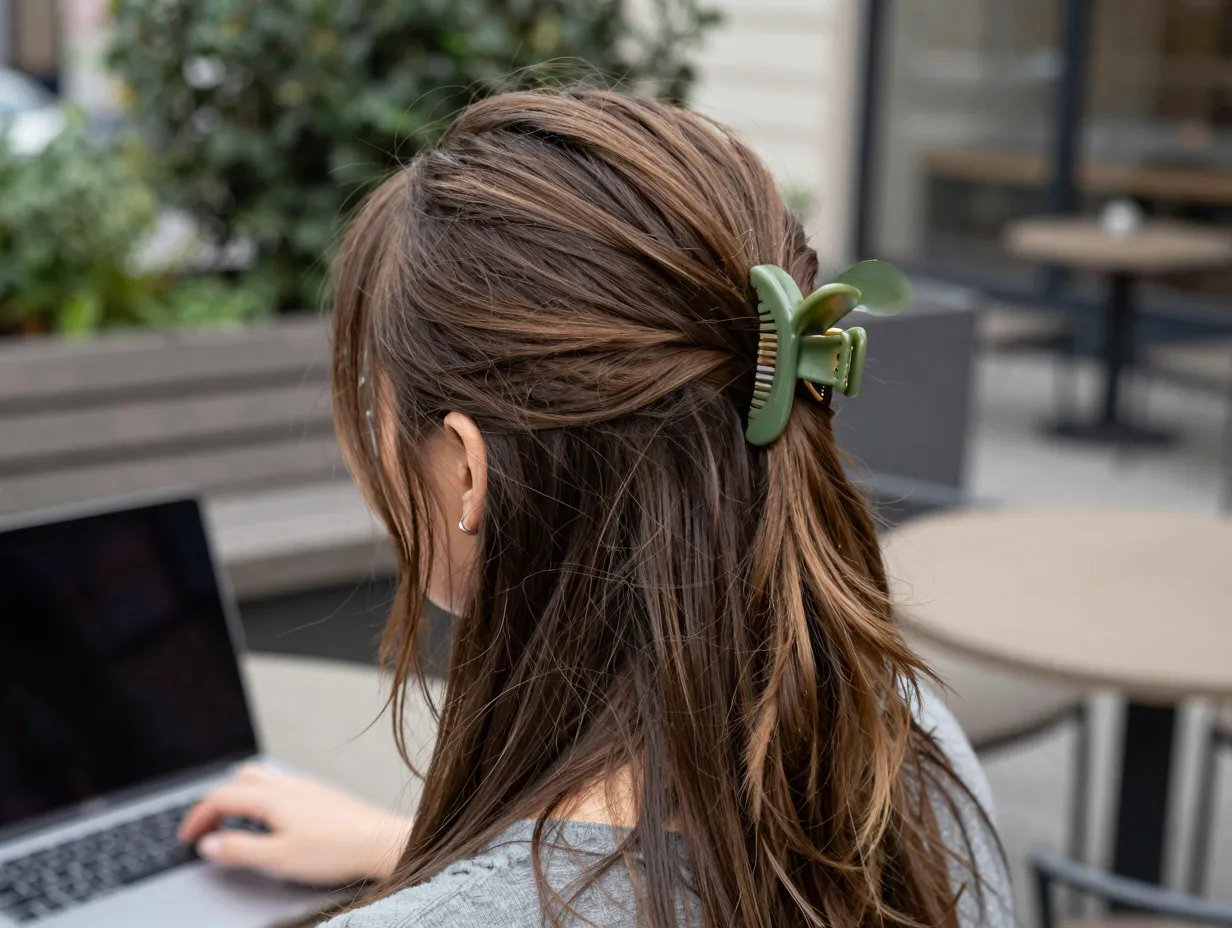
Difficulty: ⭐ Beginner
Best for: Everyday wear, casual outings, work-from-home days
The twisted half-up is the gateway style — it’s where most people discover that their claw clip can do more than just hold a bun.
How to do it:
- Separate the top half of your hair from the bottom, roughly from ear to ear.
- Twist the top section loosely two or three times toward the back of your head.
- Clip the twist at the crown using a medium-to-large claw clip, letting the ends fan out slightly over the clip.
- Pull a few face-framing pieces loose at the front.
Pro tip: 🌟 Twist away from your face on both sides before clipping for a more polished look. Twisting toward the face gives a more relaxed, bohemian vibe.
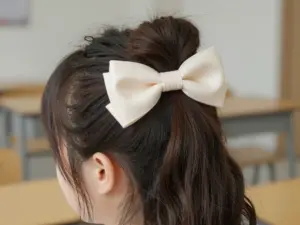
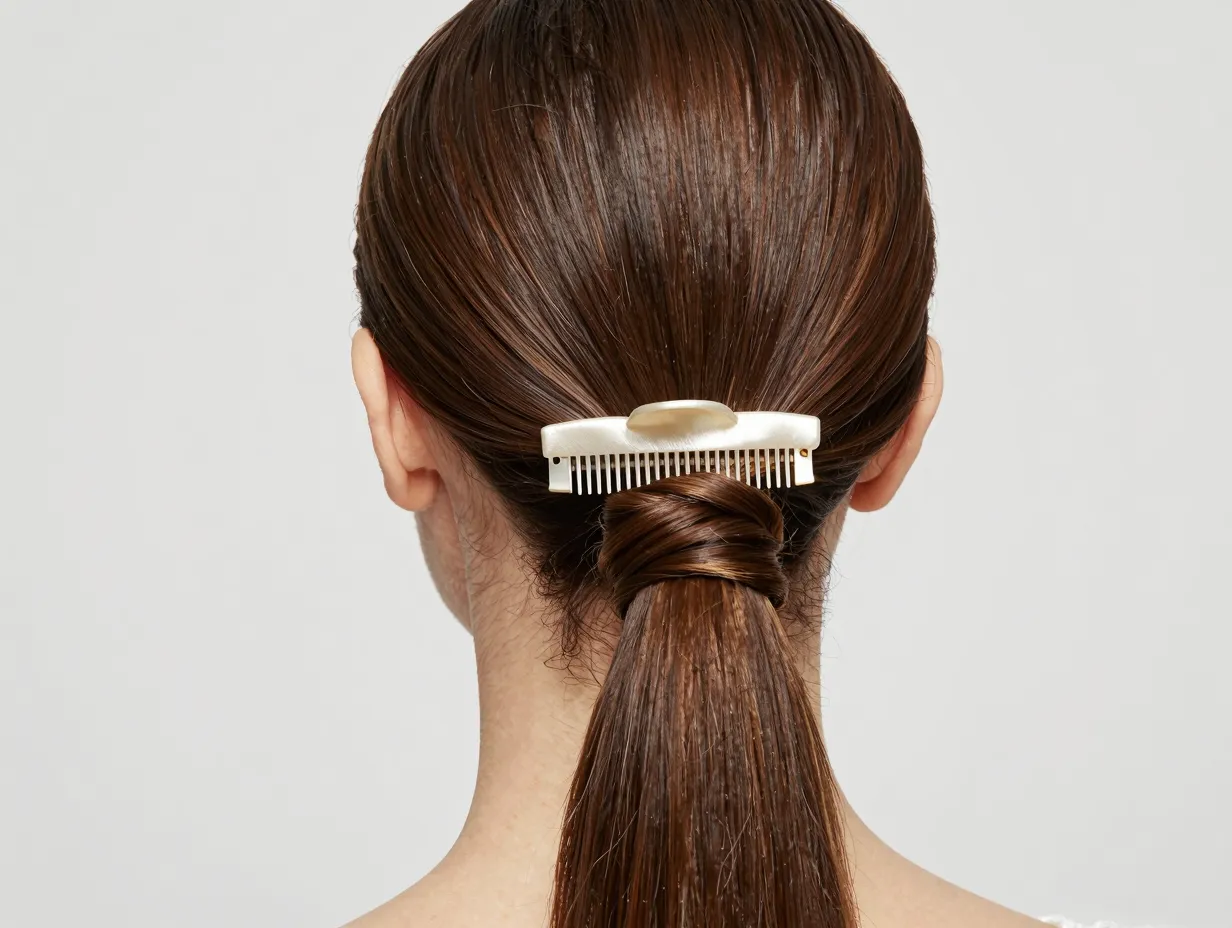
2. The French Twist Alternative
Difficulty: ⭐⭐ Beginner–Intermediate
Best for: Office settings, dinner dates, formal events
The classic French twist used to require a dozen bobby pins and a lot of patience. A large claw clip cuts that process in half.
How to do it:
- Gather all your hair into a low ponytail at the nape of your neck without using an elastic — just hold it with your hand.
- Twist the ponytail upward, rolling it toward the back of your head.
- Tuck the ends under or let them fan out at the top.
- Secure the entire roll with a large claw clip placed vertically along the twist.
Pro tip: 🌟 Smooth the sides with a boar bristle brush before twisting for a sleeker, more refined finish. A light hold hairspray after clipping keeps flyaways at bay.
3. The Waterfall Clip
Difficulty: ⭐ Beginner
Best for: Romantic occasions, festivals, beach days
This style lets the beauty of long hair do the heavy lifting. It’s effortless-looking but genuinely stunning.
How to do it:
- Gather a loose section of hair from one side of your head — about a quarter of your total hair.
- Drape it across the back of your head toward the opposite side.
- Clip it loosely near the opposite ear with a small-to-medium claw clip.
- Let the rest of your hair flow freely beneath.
Pro tip: 🌟 Add a few loose waves with a diffuser or overnight braids before attempting this style — the texture makes the waterfall effect look more dramatic and intentional.
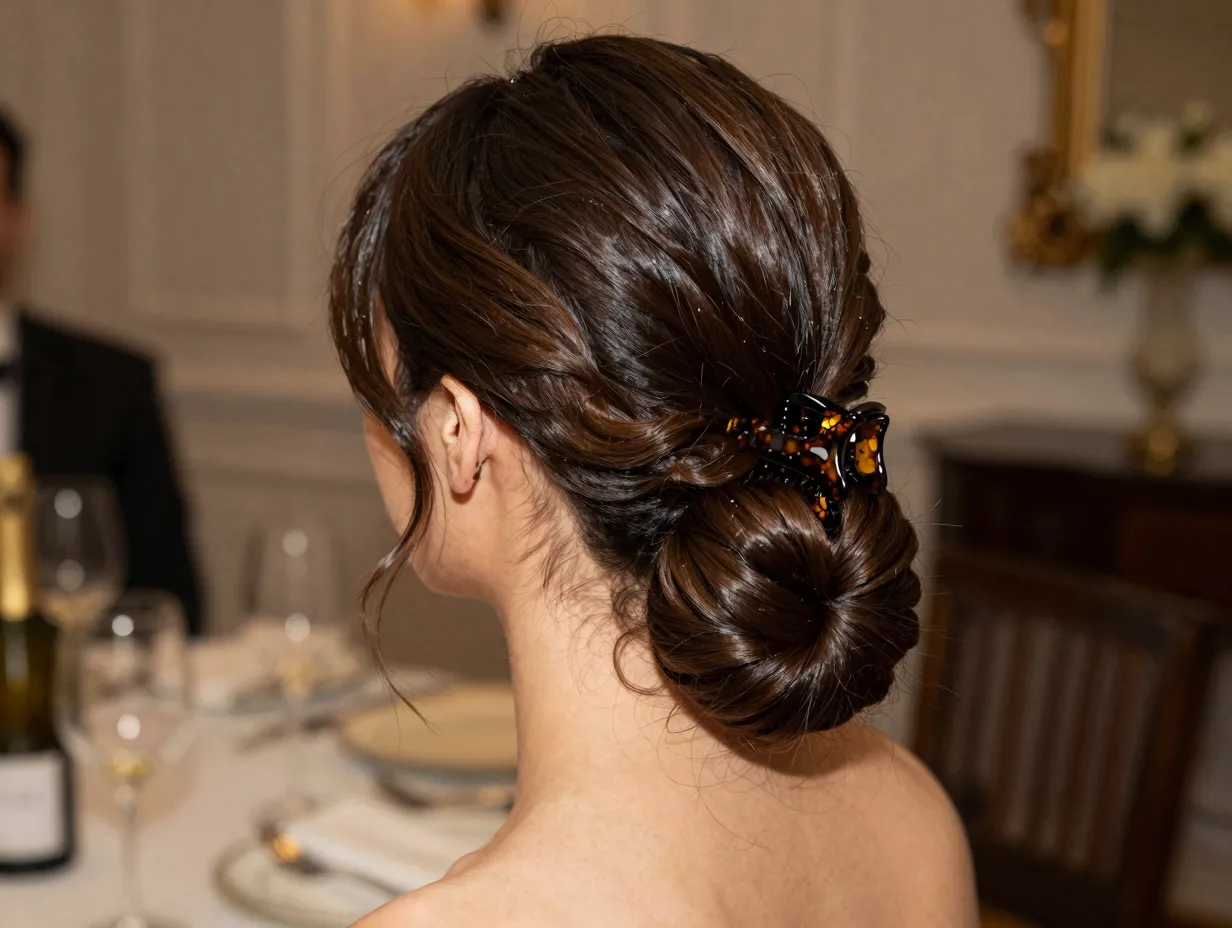
4. The Sleek Low Chignon
Difficulty: ⭐⭐⭐ Intermediate
Best for: Professional settings, weddings, special events
This is the claw clip’s answer to a formal updo. It looks like it took 30 minutes. It takes about four.
How to do it:
- Brush all your hair back into a smooth, low ponytail at the nape of your neck.
- Fold the ponytail upward against the back of your head, tucking the ends under.
- Hold the folded section flat against your head and clip horizontally with a large claw clip.
- Smooth any bumps with a fine-tooth comb and a light spritz of shine spray.
Pro tip: 🌟 Use a satin-lined claw clip for this style — it grips without leaving a dent, which matters when you take your hair down later.
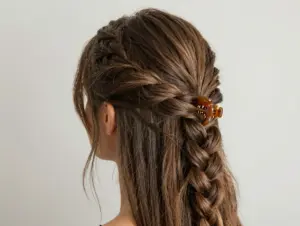
5. The Claw Clip Faux Braid

Difficulty: ⭐⭐ Beginner–Intermediate
Best for: Casual chic, content creation, weekend outings
This isn’t a real braid — but it looks like one, and nobody needs to know.
How to do it:
- Divide your hair into three loose sections: left, center, and right.
- Take the left section, twist it once, and clip it loosely to the center-back of your head.
- Take the right section, twist it once, and clip it just below the first clip, overlapping slightly.
- Gather the remaining center hair and clip it below both, letting the ends hang loose.
Pro tip: 🌟 Use three matching claw clips in a gradient color (light to dark, or all tortoiseshell) to make the “braid” effect look intentional and editorial. 🐢
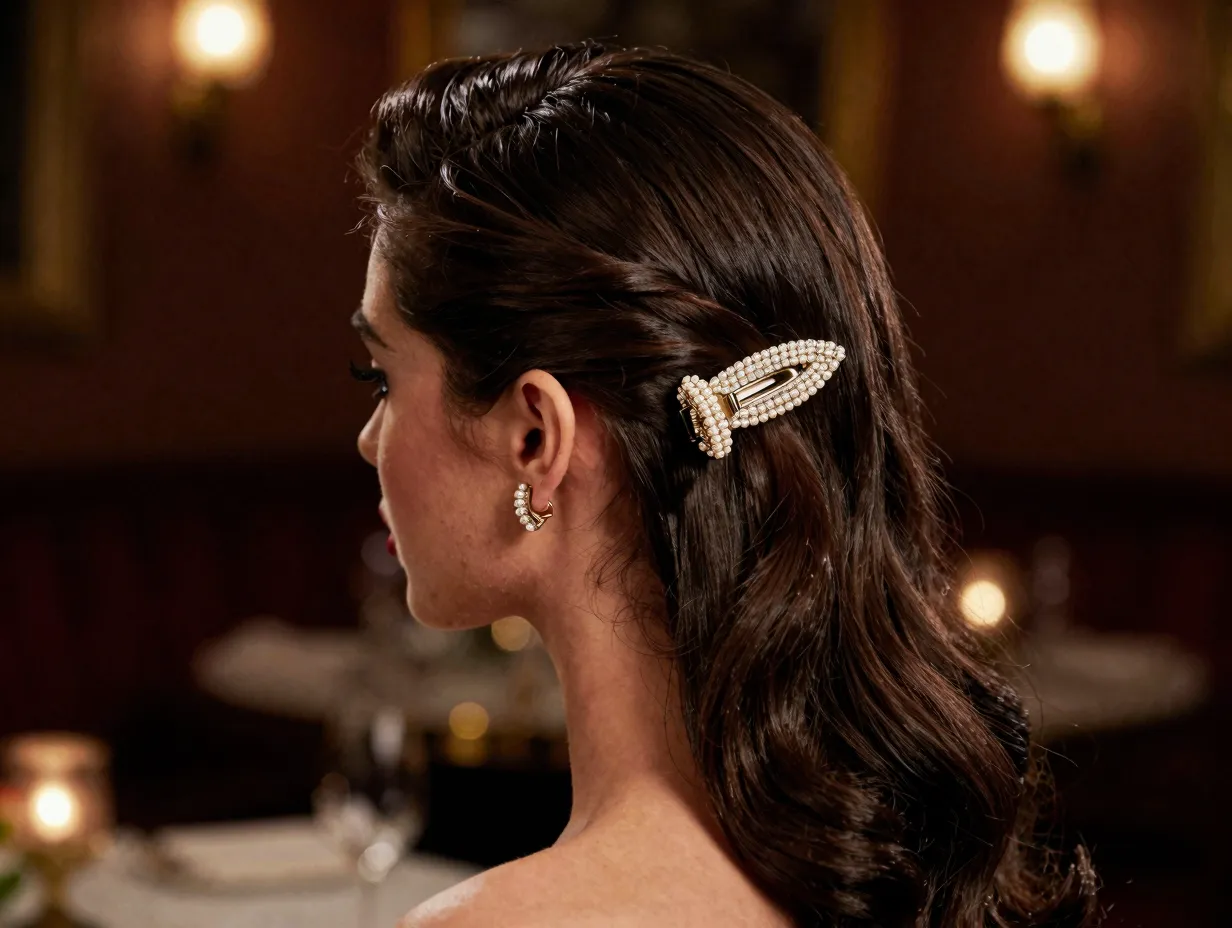
6. The Romantic Side Sweep
Difficulty: ⭐⭐ Beginner–Intermediate
Best for: Date nights, holiday parties, soft glam looks
Side-swept hair has always been associated with old Hollywood glamour — and a claw clip makes it accessible on any morning.
How to do it:
- Deep part your hair to one side.
- Gather the heavier side of your hair and sweep it across the back of your head.
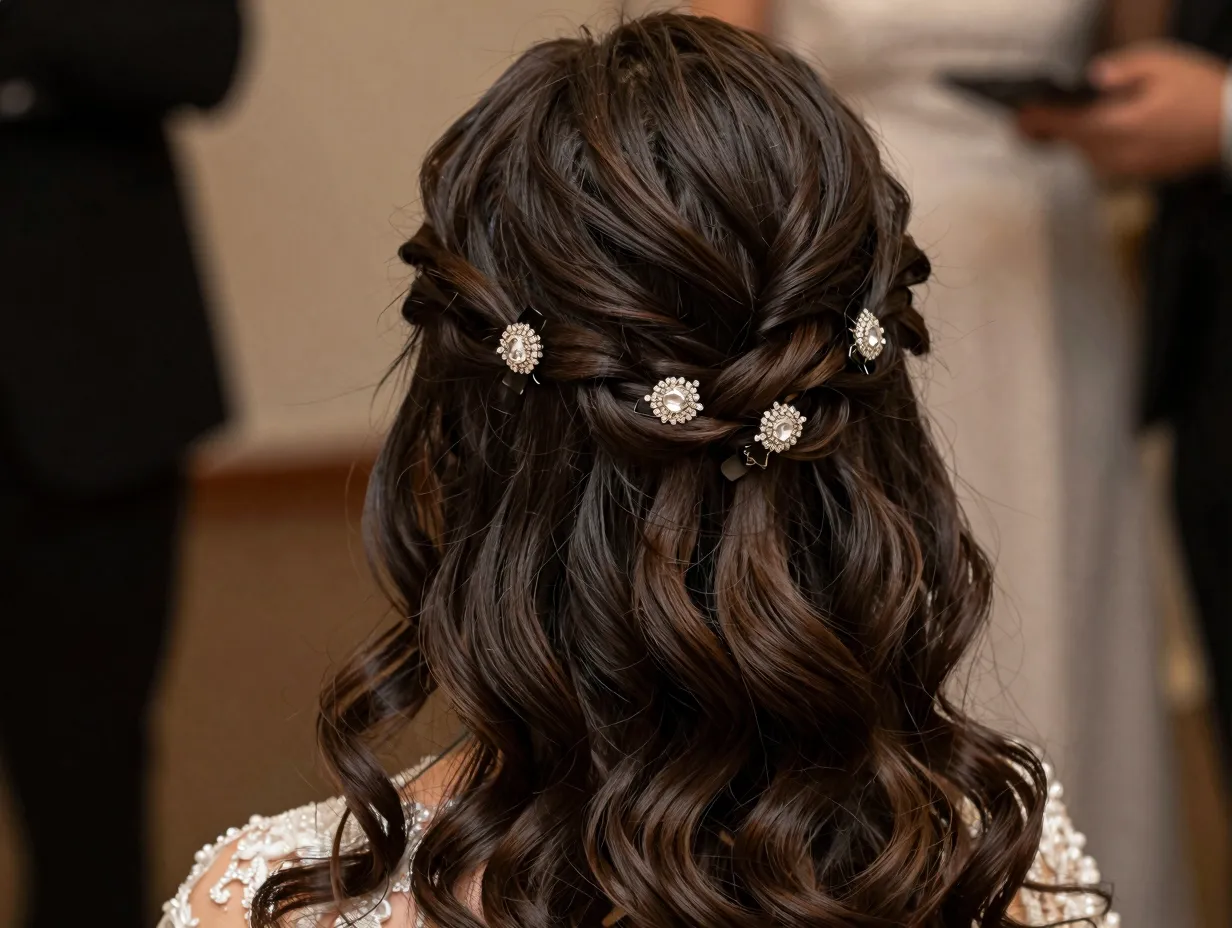
- Clip it behind the opposite ear using a decorative claw clip.
- Let the swept section cascade over one shoulder.
Pro tip: 🌟 Choose a jeweled or pearl-embellished claw clip for this style — the clip becomes part of the look, not just a tool. Pair with a low earring on the exposed ear for balance.
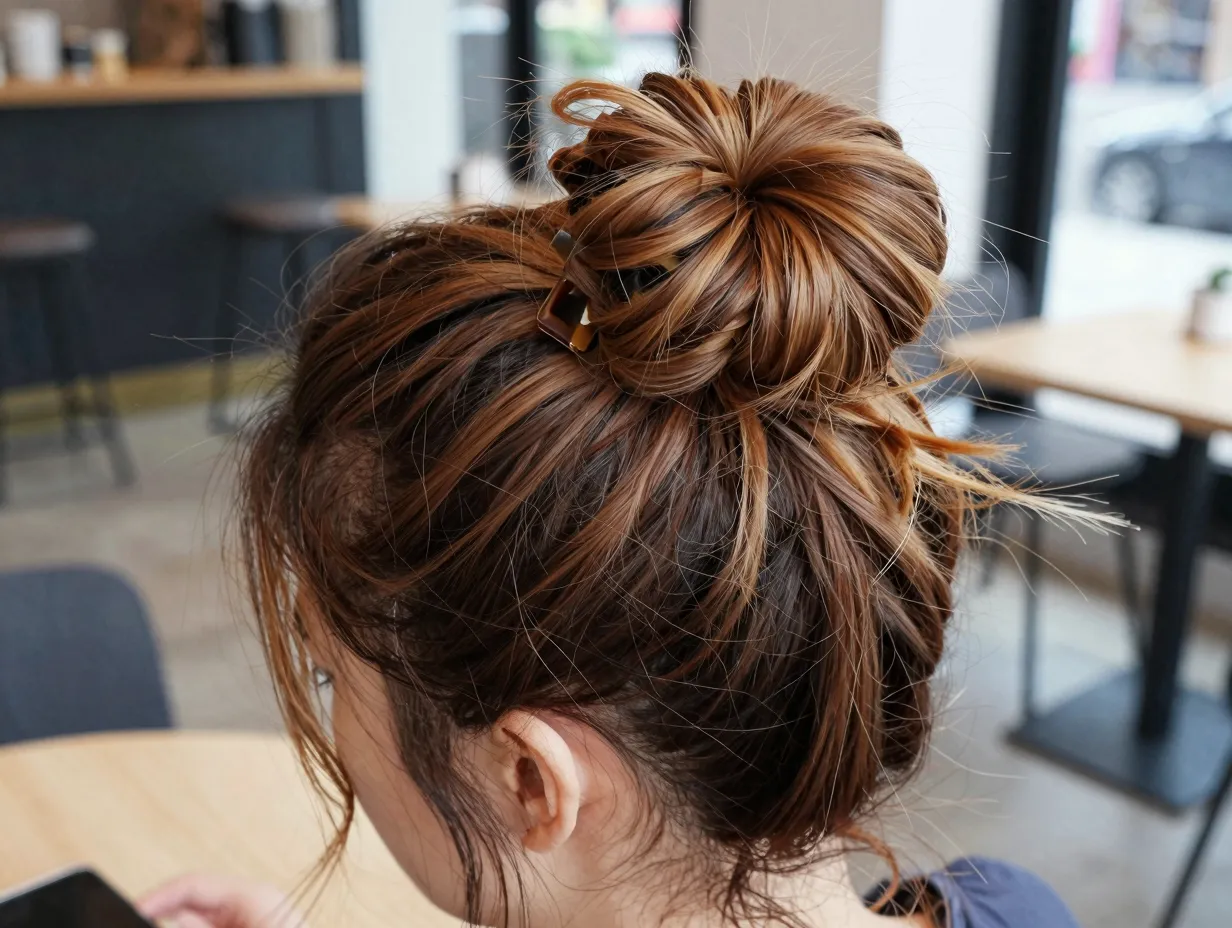
7. The Textured Top Knot Upgrade
Difficulty: ⭐⭐ Beginner–Intermediate
Best for: Elevated casual, brunch, running errands in style
This is the basic bun’s cooler, more intentional cousin. The difference is in the texture and placement.
How to do it:
- Apply texturizing spray to dry hair and scrunch to build volume.
- Gather hair into a high ponytail — but don’t smooth it. Let it stay messy.
- Twist the ponytail loosely and wrap it into a loose knot shape at the crown.
- Clip with a large claw clip, letting pieces fall out naturally at the front and sides.
Pro tip: 🌟 Pull the knot apart gently with your fingers after clipping to create more volume. The goal is “intentionally undone,” not “I just woke up.” There’s a difference, and it’s all in the deliberate loosening. 😄
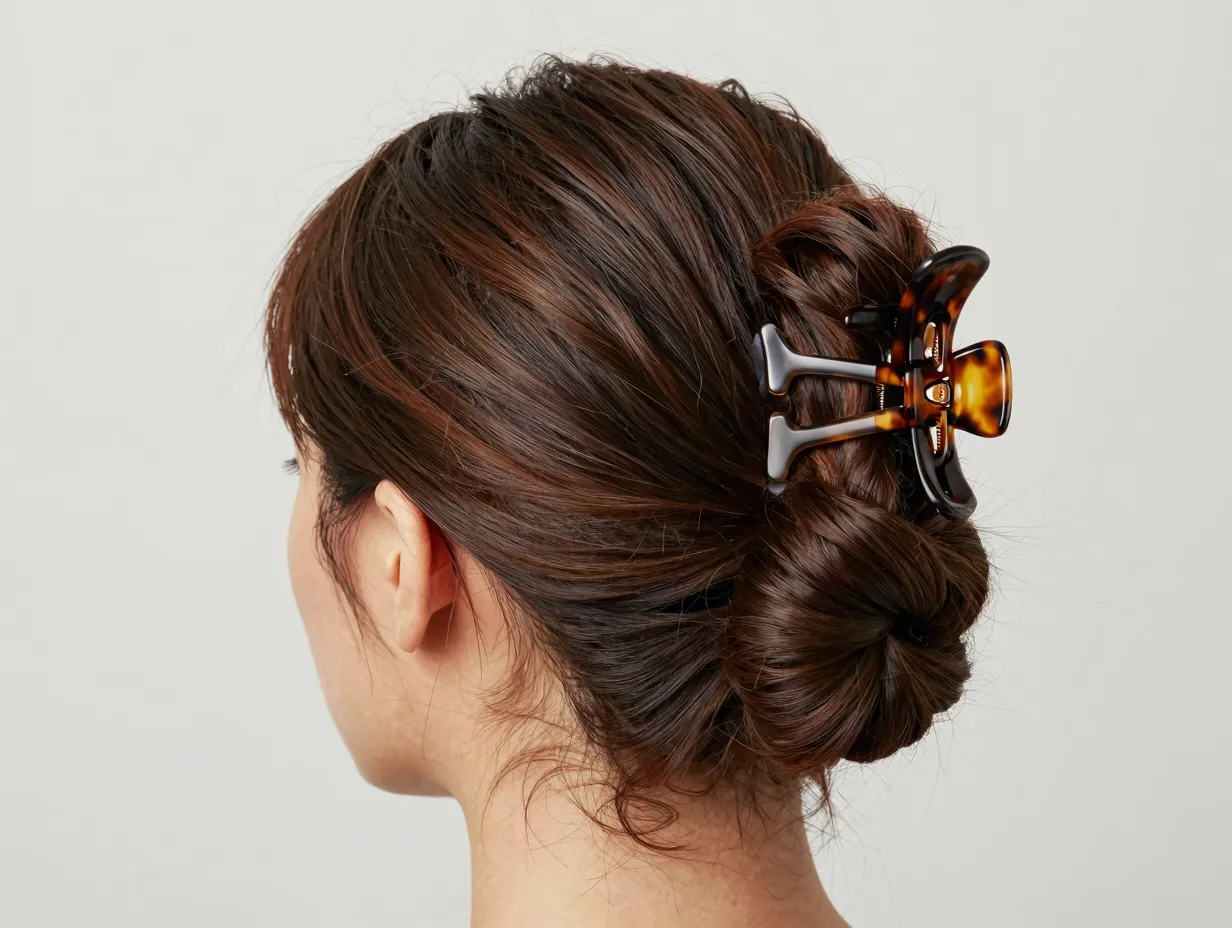
8. The Double Clip Updo
Difficulty: ⭐⭐⭐ Intermediate
Best for: Thick hair, voluminous hair, full updos without elastics
Thick-haired readers, this one is made for you. One clip often isn’t enough — two clips used strategically can hold even the densest hair in a polished updo.
How to do it:
- Divide your hair horizontally into two sections: top half and bottom half.
- Clip the top half out of the way temporarily.
- Twist the bottom half upward and secure it with the first large claw clip at the mid-back of your head.
- Release the top half, fold it over the first clip, and secure it with the second clip just above the first.
Pro tip: 🌟 Make sure both clips are the same size and style — mismatched clips at the back can look unintentional. Matching clips read as a deliberate design choice.
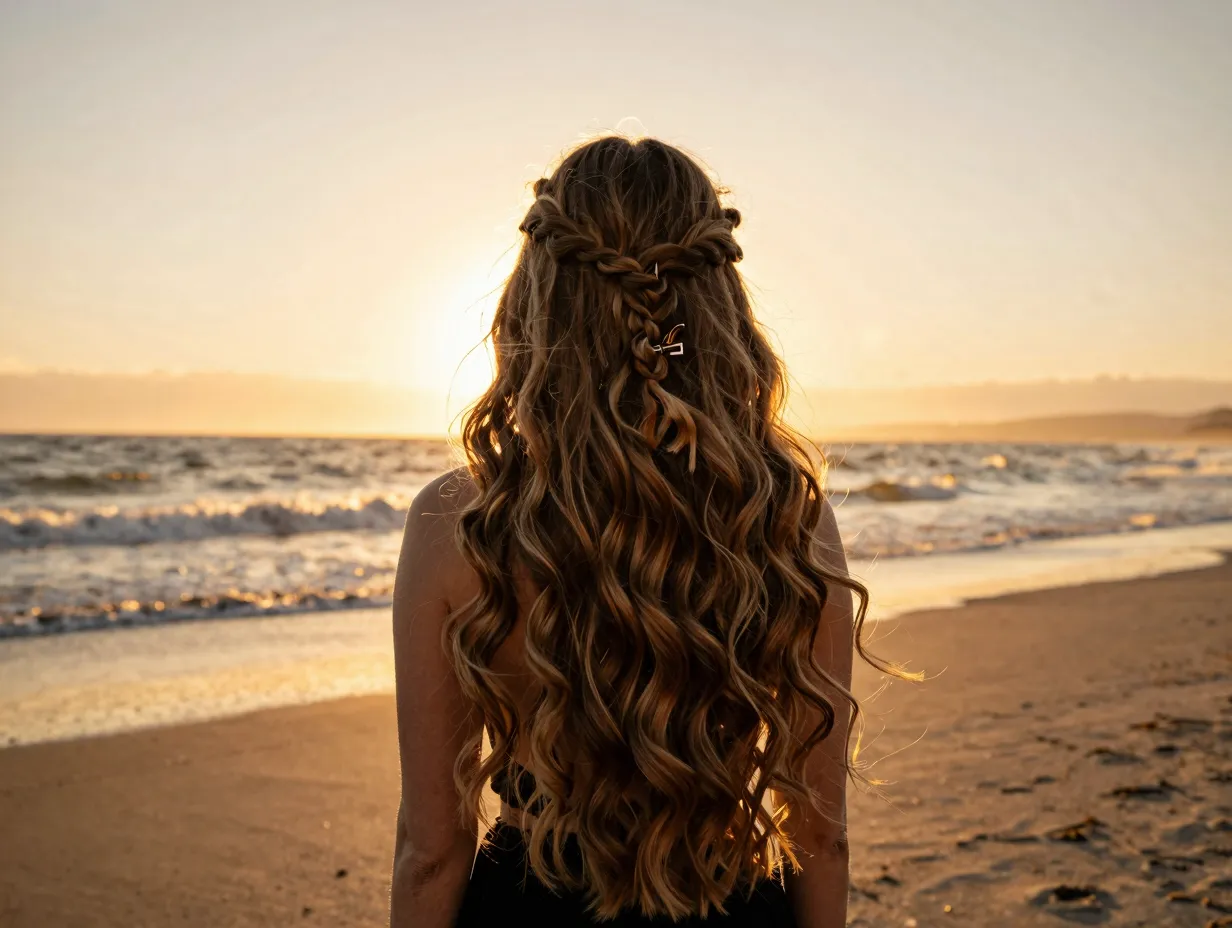
9. The Cascading Crown Twist
Difficulty: ⭐⭐⭐ Intermediate
Best for: Weddings, formal events, elevated date nights
This is the showstopper of the group — the style that makes people ask, “Did you go to a salon?” You didn’t. You just practiced.
How to do it:
- Take a section of hair from the front-right of your head, about two inches wide.
- Twist it back and across toward the left side of your crown.
- Clip it at the crown with a medium decorative clip.
- Take a section from the front-left, twist it back toward the right, and tuck it under the first twist before clipping with a second clip.
- Let the remaining hair fall naturally in loose waves or curls.
Pro tip: 🌟 This style works best on wavy or lightly curled hair. If your hair is straight, add loose waves with a diffuser or braiding it overnight before styling. The texture helps the twists hold their shape and adds visual depth to the finished look.
Tips for Making Every Claw Clip Style Last All Day
Even the most beautiful style falls flat if it collapses by noon. Here’s what actually works for long-lasting claw clip looks:
Before you style:
- 🧴 Use dry shampoo or texturizing spray on clean or second-day hair. Freshly washed hair is often too slippery for clips to grip.
- 🪮 Detangle thoroughly — knots create uneven tension and cause clips to slip.
While you style:
- Always twist or fold hair before clipping rather than just gathering it. The twist creates structure that the clip can grip.
- Clip at a slight angle when possible — a diagonal grip holds more securely than a straight horizontal one.
After you style:
- Use a light-hold hairspray on flyaways, not on the whole style — over-spraying makes hair stiff and reduces the natural movement that makes these styles look good.
- Carry a backup clip in your bag. If a style loosens, re-clipping takes 30 seconds.
Choosing the Right Claw Clip for Your Hair Type
Not all claw clips are created equal. Here’s a quick guide:
| Hair Type | Recommended Clip Size | Best Material | Notes |
|---|---|---|---|
| Fine/Thin | 2–3 inches | Acrylic or resin | Avoid oversized clips — they overwhelm fine hair |
| Medium/Normal | 3 inches | Any | Most styles work well |
| Thick/Dense | 3.5–4+ inches | Metal-reinforced | Look for clips with strong spring tension |
| Curly/Coily | 3–4 inches | Satin-lined | Reduces friction and breakage |
| Wavy | 3–3.5 inches | Acrylic or resin | Works well with most styles |
A note on clip quality: 💡 Cheap clips break — and they break at the worst moments. Investing in two or three high-quality clips (expect to pay $8–$20 each for well-made options) is far better than buying a bag of ten that snap within a month.
Common Mistakes to Avoid
Even with the right clip and the right technique, a few common errors can sabotage your style:
- Using a clip that’s too small. A clip that can’t fully close around your hair will slip out. Size up.
- Skipping the twist. Simply gathering hair and clipping it without twisting or folding first gives the clip nothing to grip. Always add structure first.
- Clipping at the very end of the hair. The clip needs to catch the body of the gathered section, not just the tips.
- Ignoring hair prep. Clean, freshly washed hair is the enemy of clip styles. A little texture goes a long way.
- Choosing style over function. A beautiful clip that has a weak spring won’t hold long hair. Test the tension before buying.
Conclusion: Start Experimenting Today 🎉
The 9 stunning claw clip hairstyles for long hair (beyond the basic bun) covered in this guide prove one thing clearly: your claw clip is one of the most underused tools in your beauty arsenal. From the breezy waterfall clip to the show-stopping cascading crown twist, there is a style here for every occasion, every skill level, and every hair type.
Here are your actionable next steps:
- Start with Style 1 or 3 (the twisted half-up or waterfall clip) if you’re new to claw clip styling — both are forgiving and fast.
- Invest in two or three quality clips in different sizes so you’re ready for any of these looks.
- Practice on second-day hair — the texture makes everything easier and holds longer.
- Work your way up to Styles 8 and 9 as your confidence builds. Take photos as you go to track your progress.
- Experiment with clip styles — tortoiseshell, jeweled, matte black, and metallic clips each give the same hairstyle a completely different personality.
The best part? Every one of these styles can be done in under five minutes once you’ve practiced it twice. In 2026, there is genuinely no reason to default to the same basic bun every single day when this much variety is just one clip away.