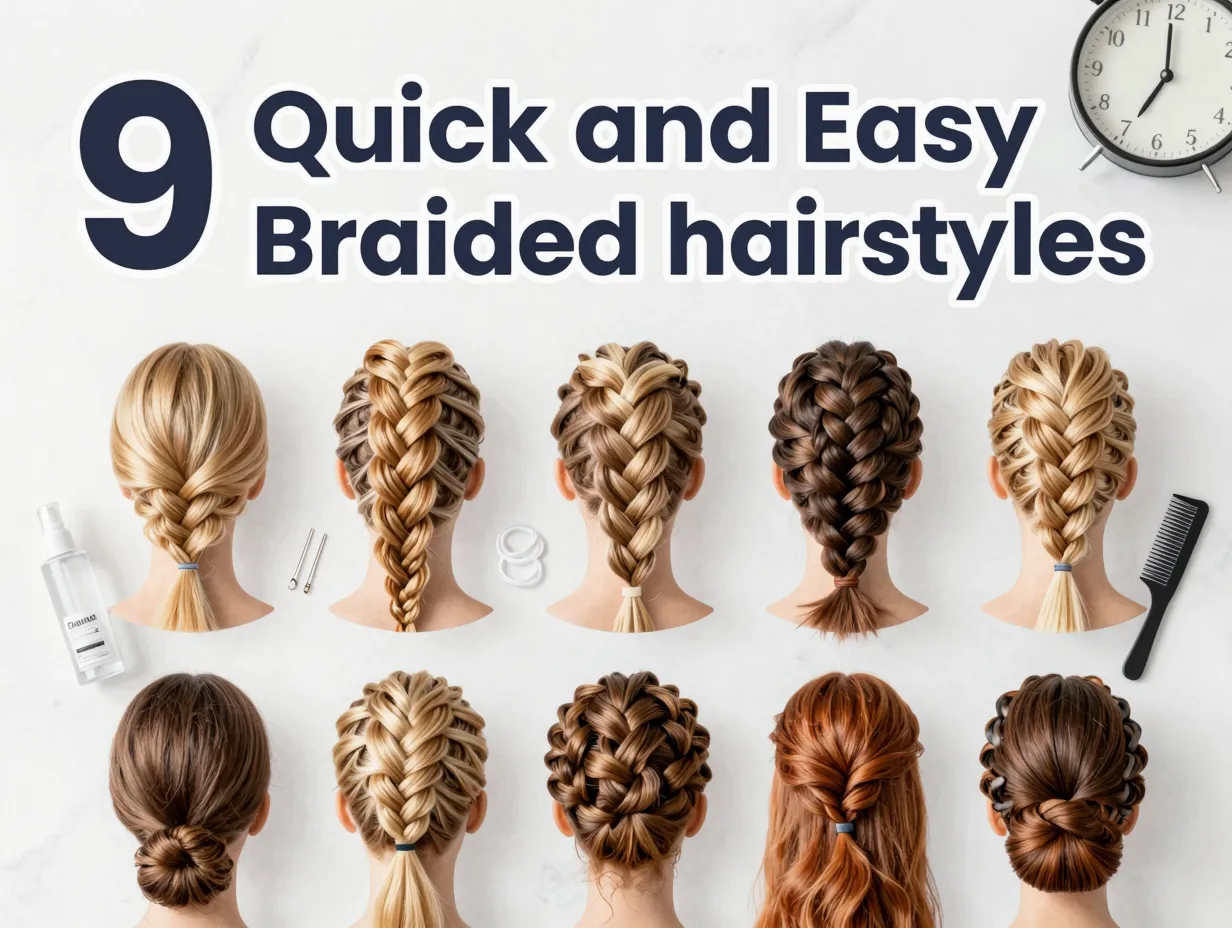
9 Quick and Easy Braided Hairstyles for When You’re Short on Time
The average American woman spends 55 minutes getting ready each morning — yet surveys consistently show that most of us wish we could cut that time in half. If your hair routine is eating up precious minutes, braids might be the smartest shortcut you’re not using enough. The 9 Quick and Easy Braided Hairstyles for When You’re Short on Time covered in this guide are designed to look polished, hold up all day, and take ten minutes or less to execute — even on a chaotic Tuesday morning.
Whether your hair is short, medium, or long, whether you’re a braiding beginner or someone who just needs a faster routine, these styles deliver. Let’s get into it.
Key Takeaways
- ✅ Braids work on almost every hair type and length — including short hair [1][5].
- ✅ Most of these styles take 5–10 minutes once you’ve practiced them a couple of times.
- ✅ The right prep matters — second-day hair, texturizing spray, and the correct tools make braiding faster and easier.
- ✅ Beginner-friendly techniques like the rope twist and three-strand braid are the best starting points [2][4].
- ✅ A single style can be adapted into multiple looks by changing placement, accessories, or tension.
Why Braids Are the Ultimate Time-Saving Hairstyle in 2026
Before diving into the styles themselves, it helps to understand why braids are such a reliable go-to. Unlike blowouts or curling iron looks, braids:
- Require no heat (protecting your hair in the process)
- Actually look better on second-day hair because natural oils add grip
- Can last 24–48 hours, meaning one morning of effort covers two days
- Work across all hair textures, from fine and straight to thick and coily [5][7]
💬 “The biggest myth about braids is that they’re complicated. Most everyday braid styles come down to two or three simple moves repeated over and over.” — Common advice from professional stylists
A growing number of women are ditching daily heat styling in favor of protective braided styles, a trend that beauty industry reports have tracked consistently through the mid-2020s. The appeal is simple: less time, less damage, more versatility.
The 9 Quick and Easy Braided Hairstyles for When You’re Short on Time
Here are nine styles that are genuinely fast, genuinely easy, and genuinely stylish. Each one includes a difficulty rating, estimated time, and what hair types it works best on.
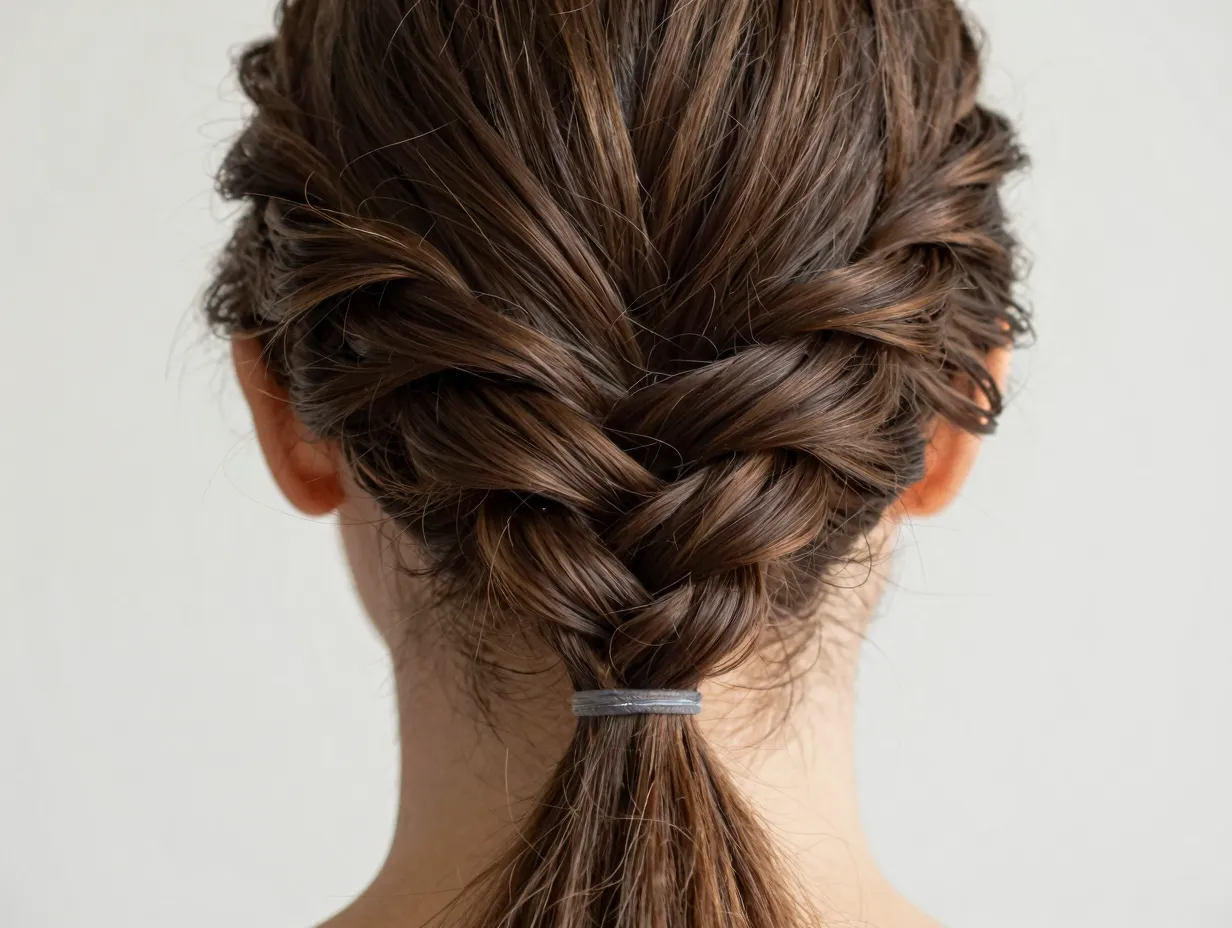
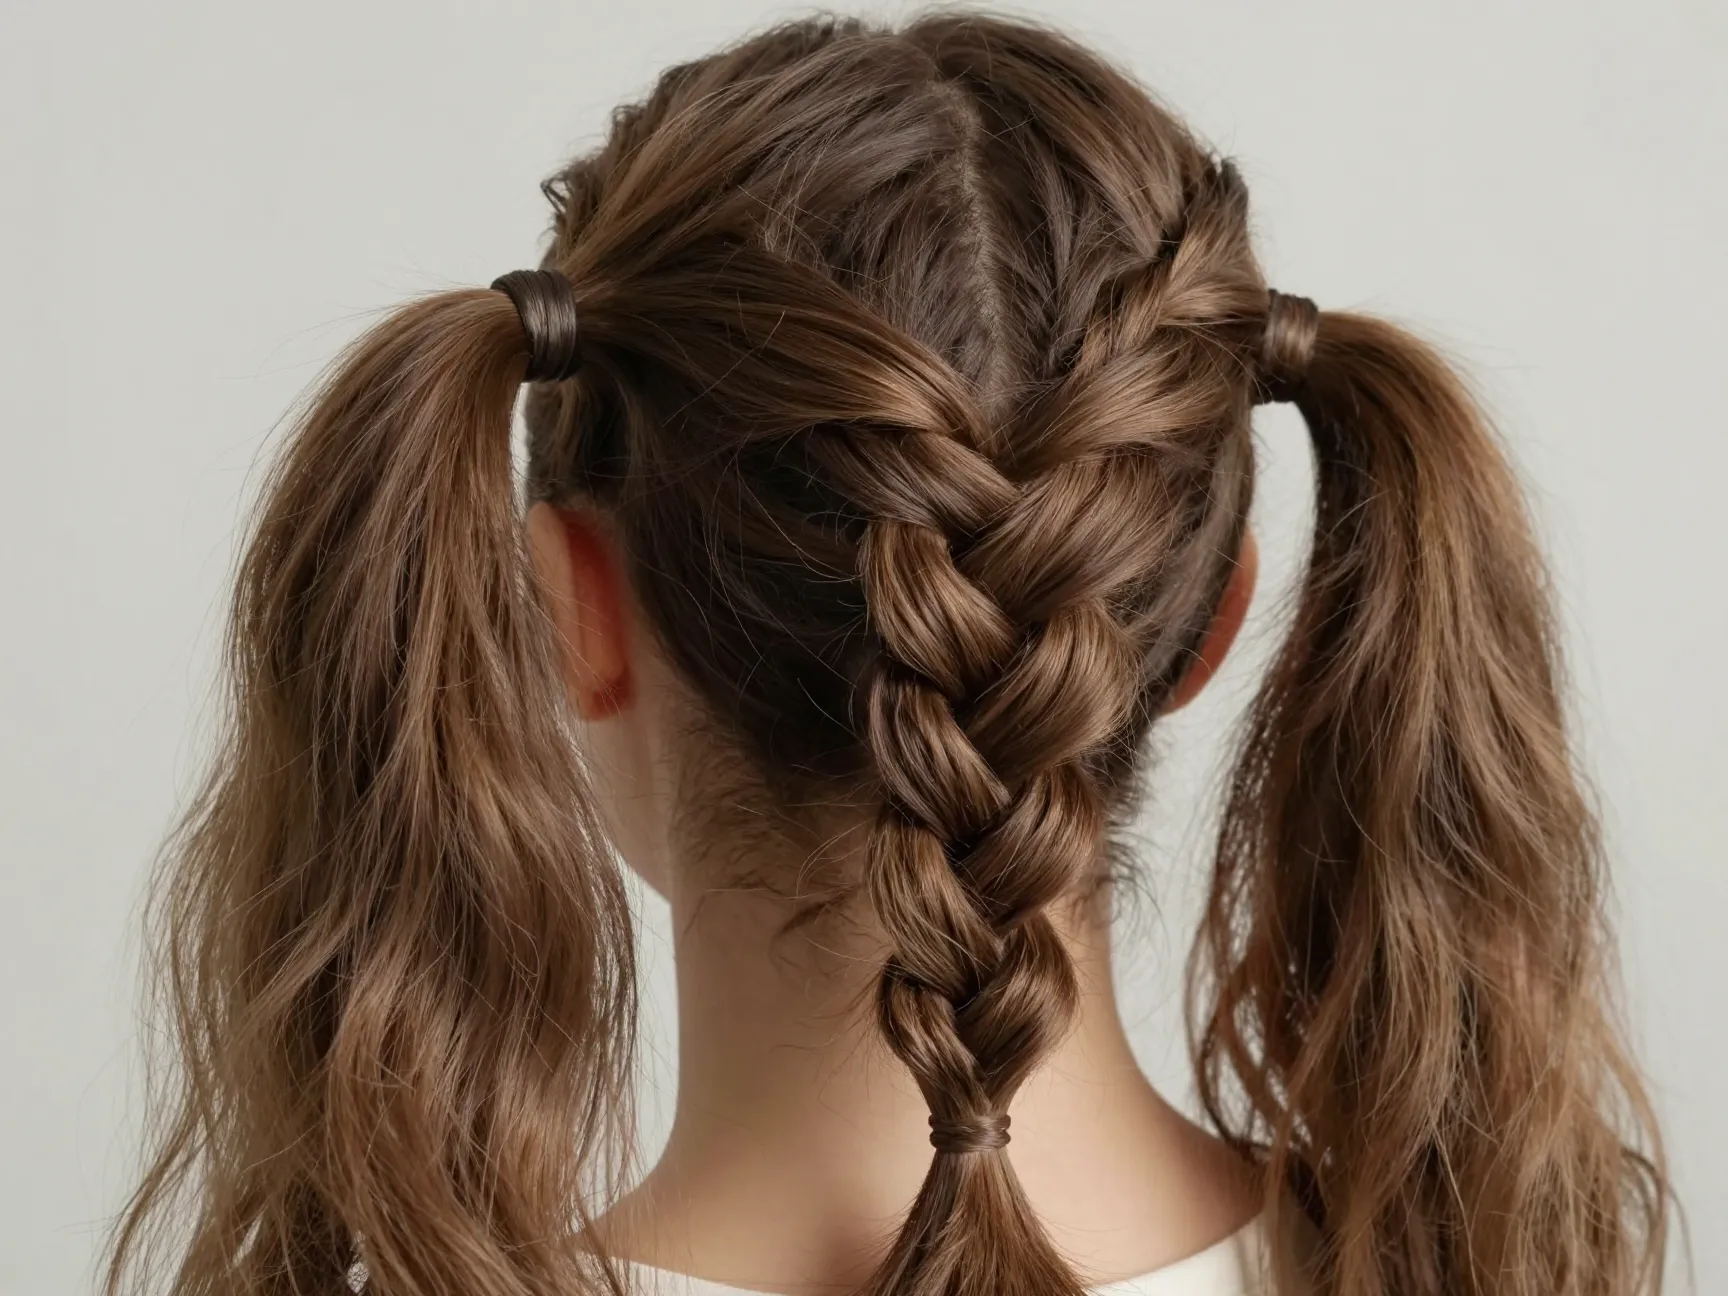
1. The Classic Three-Strand Braid
⏱ Time: 3–5 minutes
💪 Difficulty: Beginner
🎯 Best for: All hair types and lengths
This is where every braiding journey starts. The three-strand braid — also called a regular braid or plait — is the foundation for almost every other style on this list. If you can do this, you can do anything.
How to do it:
- Gather your hair into a low or high ponytail, or leave it loose.
- Divide the section into three equal parts.
- Cross the right strand over the middle, then the left strand over the middle.
- Repeat, keeping even tension, until you reach the ends.
- Secure with a clear elastic.
Pro tip: Pull the braid apart gently with your fingertips after securing it to create a fuller, more textured look. This technique — called “pancaking” — makes thin hair look dramatically thicker [7].
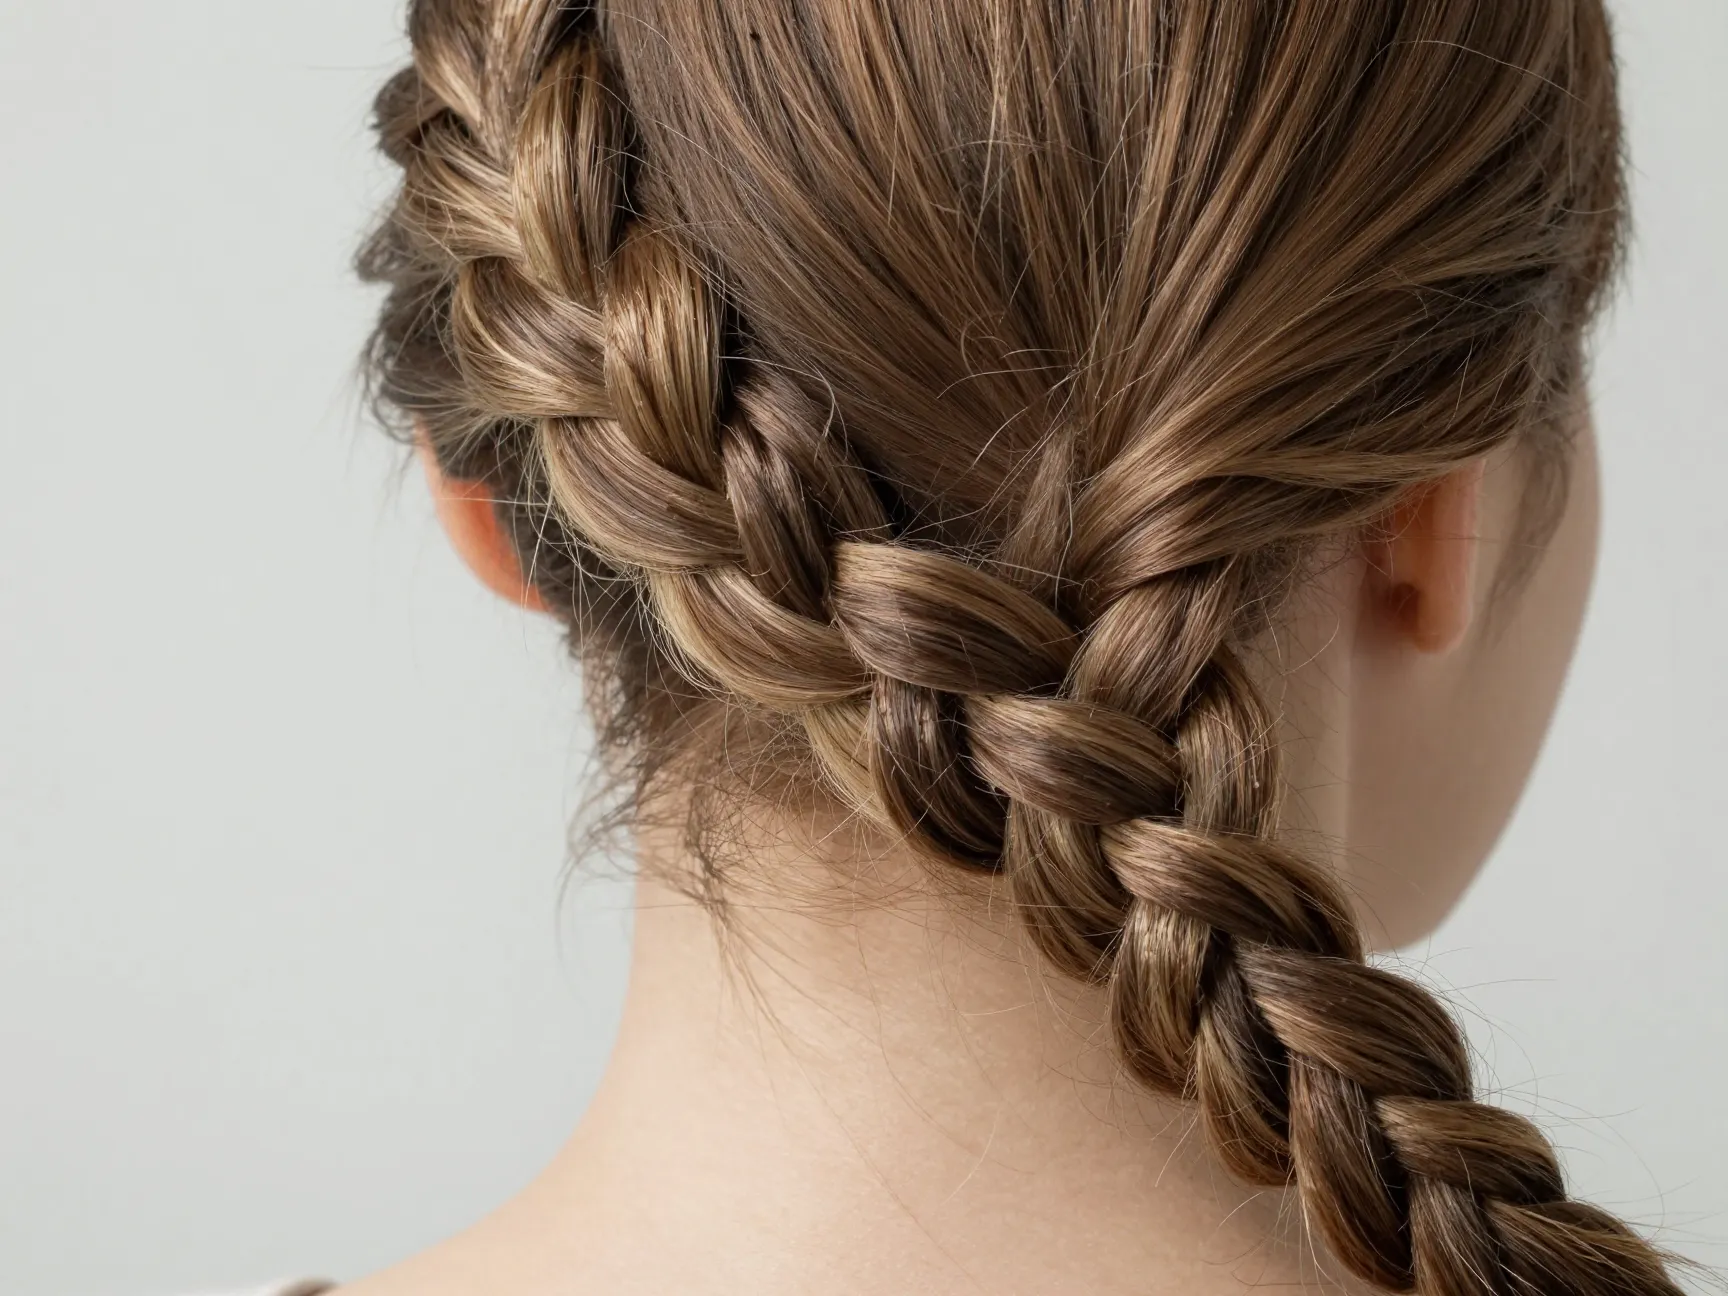
2. The Rope Twist
⏱ Time: 3–5 minutes
💪 Difficulty: Beginner
🎯 Best for: All hair types, especially great for fine or slippery hair
The rope twist is technically not a braid, but it belongs in every quick-style toolkit. It looks intricate, holds beautifully, and takes almost no skill [2].
How to do it:
- Split your hair (or a ponytail) into two equal sections.
- Twist each section in the same direction (both clockwise, for example).
- Then wrap the two twisted sections around each other in the opposite direction.
- Secure the end with an elastic.
The opposing tension is what keeps this style locked in place all day. Wear it as a side rope twist, a low rope braid, or even pin it up into a bun for a more formal look.
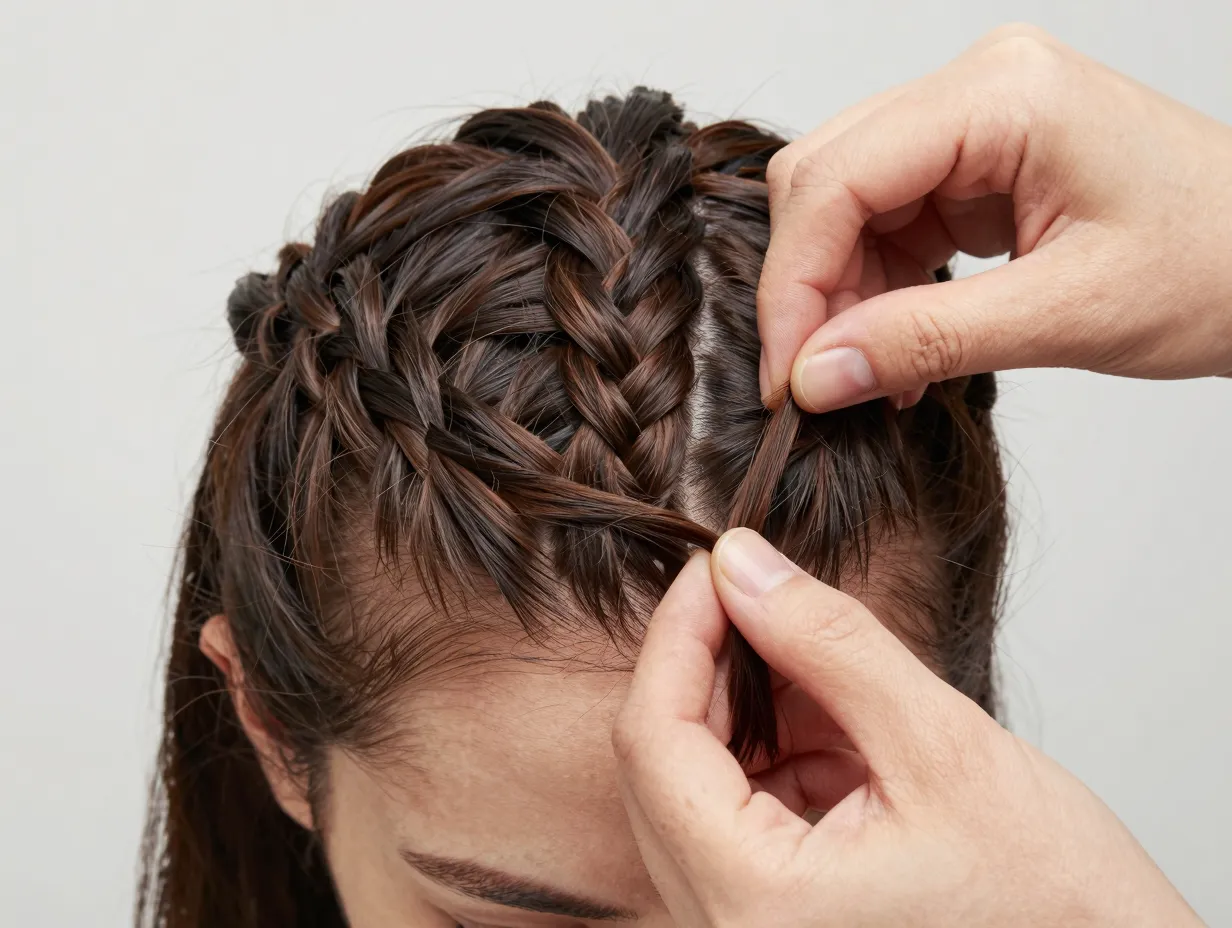
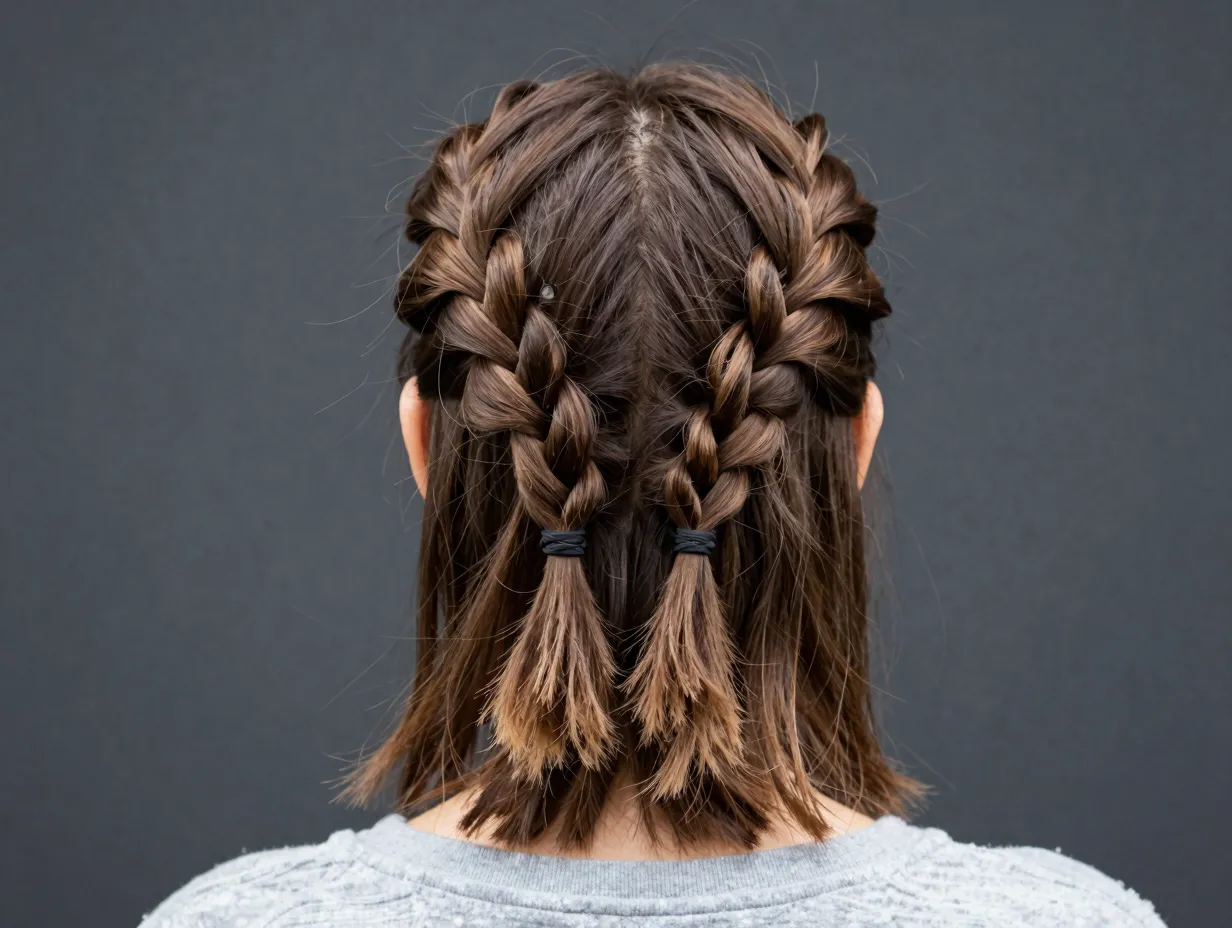
3. The Dutch Braid (Reverse French Braid)
⏱ Time: 7–10 minutes
💪 Difficulty: Intermediate
🎯 Best for: Medium to long hair, all textures
The Dutch braid sits on top of the hair rather than lying flat, giving it that bold, raised look that’s been everywhere on social media. It’s sometimes called an “inside-out” French braid, and once you get the motion down, it becomes surprisingly fast [4][6].
How to do it:
- Start at the crown with a small section of hair divided into three parts.
- Cross the right strand under the middle (not over — this is the key difference from a French braid).
- Cross the left strand under the middle.
- Add a small amount of hair to each outer section before crossing it under.
- Continue down to the nape, then finish with a regular three-strand braid.
Style hack: Do two Dutch braids side by side for the classic “boxer braids” look — a style that works for the gym, errands, or even a casual night out.
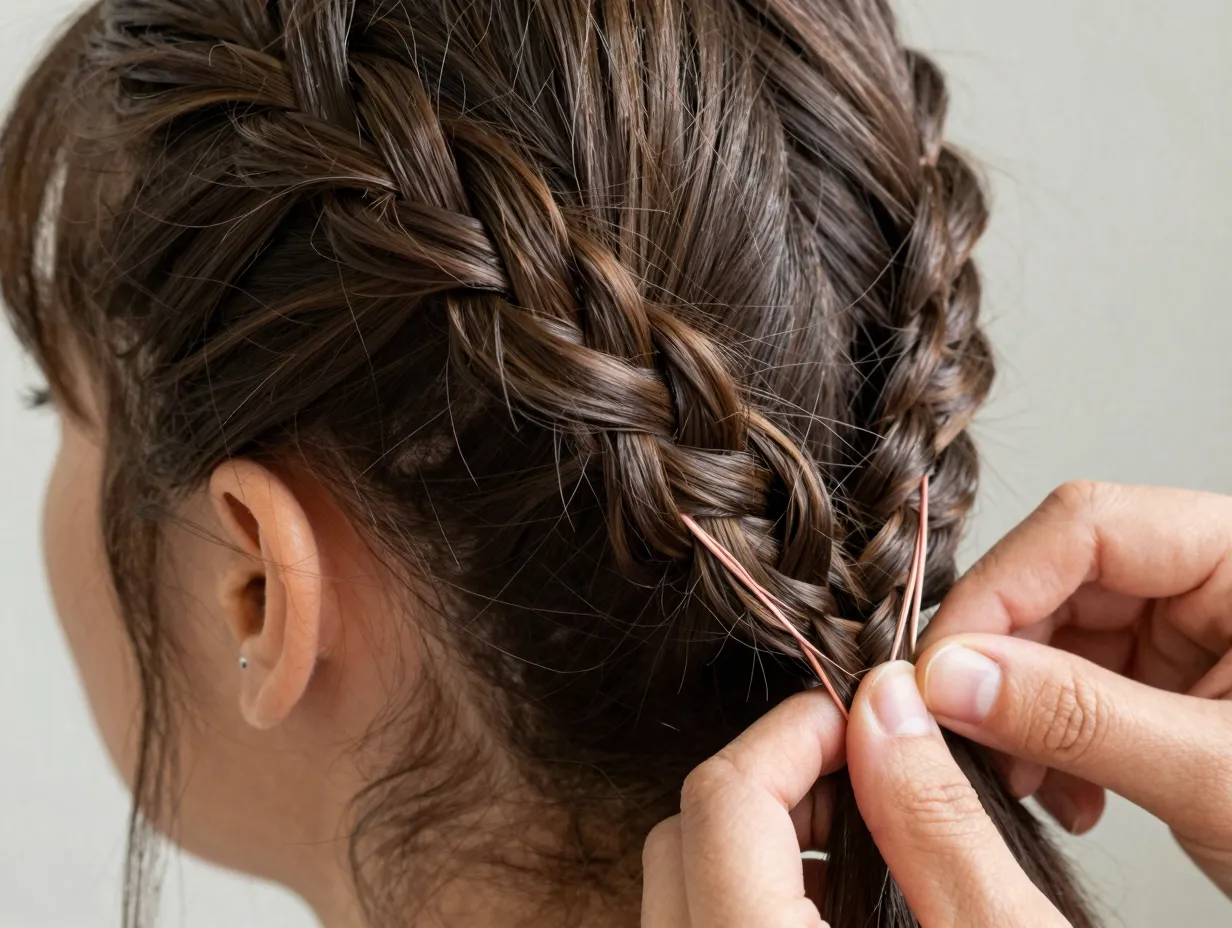
4. The Fishtail Braid
⏱ Time: 8–10 minutes
💪 Difficulty: Intermediate
🎯 Best for: Medium to long hair, especially thick or textured hair
The fishtail braid looks impossibly intricate, but it only uses two sections instead of three, making it easier than it appears. It’s one of those styles that earns compliments far out of proportion to the effort involved [3].
How to do it:
- Split your hair into two equal sections.
- Take a thin strand from the outer edge of the right section and cross it over to join the left section.
- Take a thin strand from the outer edge of the left section and cross it over to join the right section.
- Repeat, alternating sides, all the way down.
- Secure and pancake for volume.
Key insight: The thinner the strands you pull, the more detailed and refined the fishtail looks. Rushing with thick strands gives a chunkier, more casual result — both are valid depending on your mood.
5. The Pull-Through Braid
⏱ Time: 8–10 minutes
💪 Difficulty: Beginner to Intermediate
🎯 Best for: All hair types, especially fine hair that needs volume
The pull-through braid is a clever optical illusion. It looks like a complex braid but is actually made entirely of ponytails looped through each other — no actual braiding required. It’s perfect for people who struggle with traditional braiding techniques [6].
How to do it:
- Create a small ponytail at the crown of your head.
- Create a second ponytail just below it, incorporating the first.
- Split the first ponytail in two, pull the second ponytail through the split, and secure it.
- Repeat this process down the length of your hair.
- Pancake each “loop” to widen and fluff the braid.
This style is especially popular for special occasions because it photographs beautifully and holds up for hours.
6. The Side Braid

⏱ Time: 4–6 minutes
💪 Difficulty: Beginner
🎯 Best for: Medium to long hair, great for second-day hair
Sometimes the simplest repositioning of a classic style is all it takes to look intentional and put-together. A side braid — whether it’s a three-strand, fishtail, or rope twist — worn draped over one shoulder instantly transforms a basic style into something that looks styled [1][7].
How to do it:
- Sweep all your hair to one side.
- Apply a small amount of texturizing spray or pomade for grip.
- Braid using whichever technique you prefer.
- Secure and pull apart for texture.
- Use a few bobby pins to tuck away any flyaways near the face.
Accessory upgrade: Add a satin ribbon or decorative clip to the base of the braid for an instant elevated look.
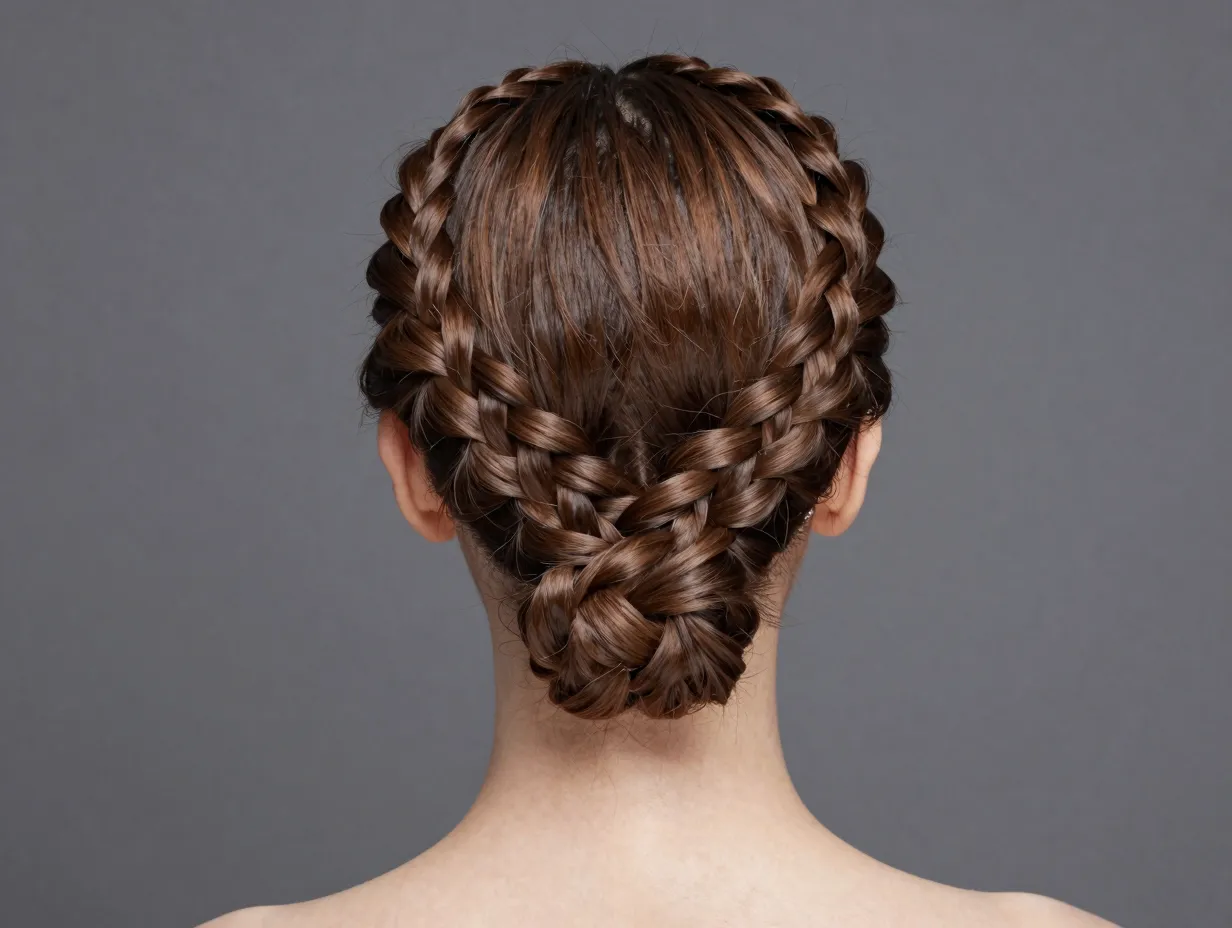
7. The Crown Braid
⏱ Time: 10–12 minutes
💪 Difficulty: Intermediate
🎯 Best for: Medium to long hair, all textures
The crown braid wraps around the head like a halo and looks like it took a professional to create. In reality, it’s two simple braids pinned into place — and it’s one of the most versatile styles on this list, working equally well for a job interview, a wedding, or a weekend brunch [3][5].
How to do it:
- Part your hair down the middle.
- Braid each side in a simple three-strand braid all the way to the ends.
- Take the right braid and drape it across the top of your head, pinning it in place with bobby pins.
- Take the left braid and drape it across in the opposite direction, tucking the end under the right braid.
- Secure all loose ends and adjust for symmetry.
Pro tip: Tuck the ends of each braid under the opposite braid so no elastics are visible. This gives the crown braid its signature seamless, elegant appearance.
8. The Half-Up Braid
⏱ Time: 5–7 minutes
💪 Difficulty: Beginner
🎯 Best for: All lengths, perfect for short to medium hair [1]
The half-up braid is the most versatile style on this list because it works on almost any hair length, including shorter styles that can’t be fully braided [1][5]. It keeps hair out of your face while still showing off the length and texture of your ends.
How to do it:
- Take a section of hair from each side of your head (temple to temple).
- Braid each section using a three-strand or rope twist technique.
- Bring both braids to the back of your head and secure them together with an elastic or clip.
- Alternatively, braid just one side for an asymmetrical look.
| Variation | Time | Vibe |
|---|---|---|
| Two mini braids pinned back | 5 min | Casual, everyday |
| Single side braid pinned back | 4 min | Romantic, effortless |
| Dutch braid half-up | 8 min | Polished, editorial |
| Fishtail half-up | 7 min | Boho, textured |
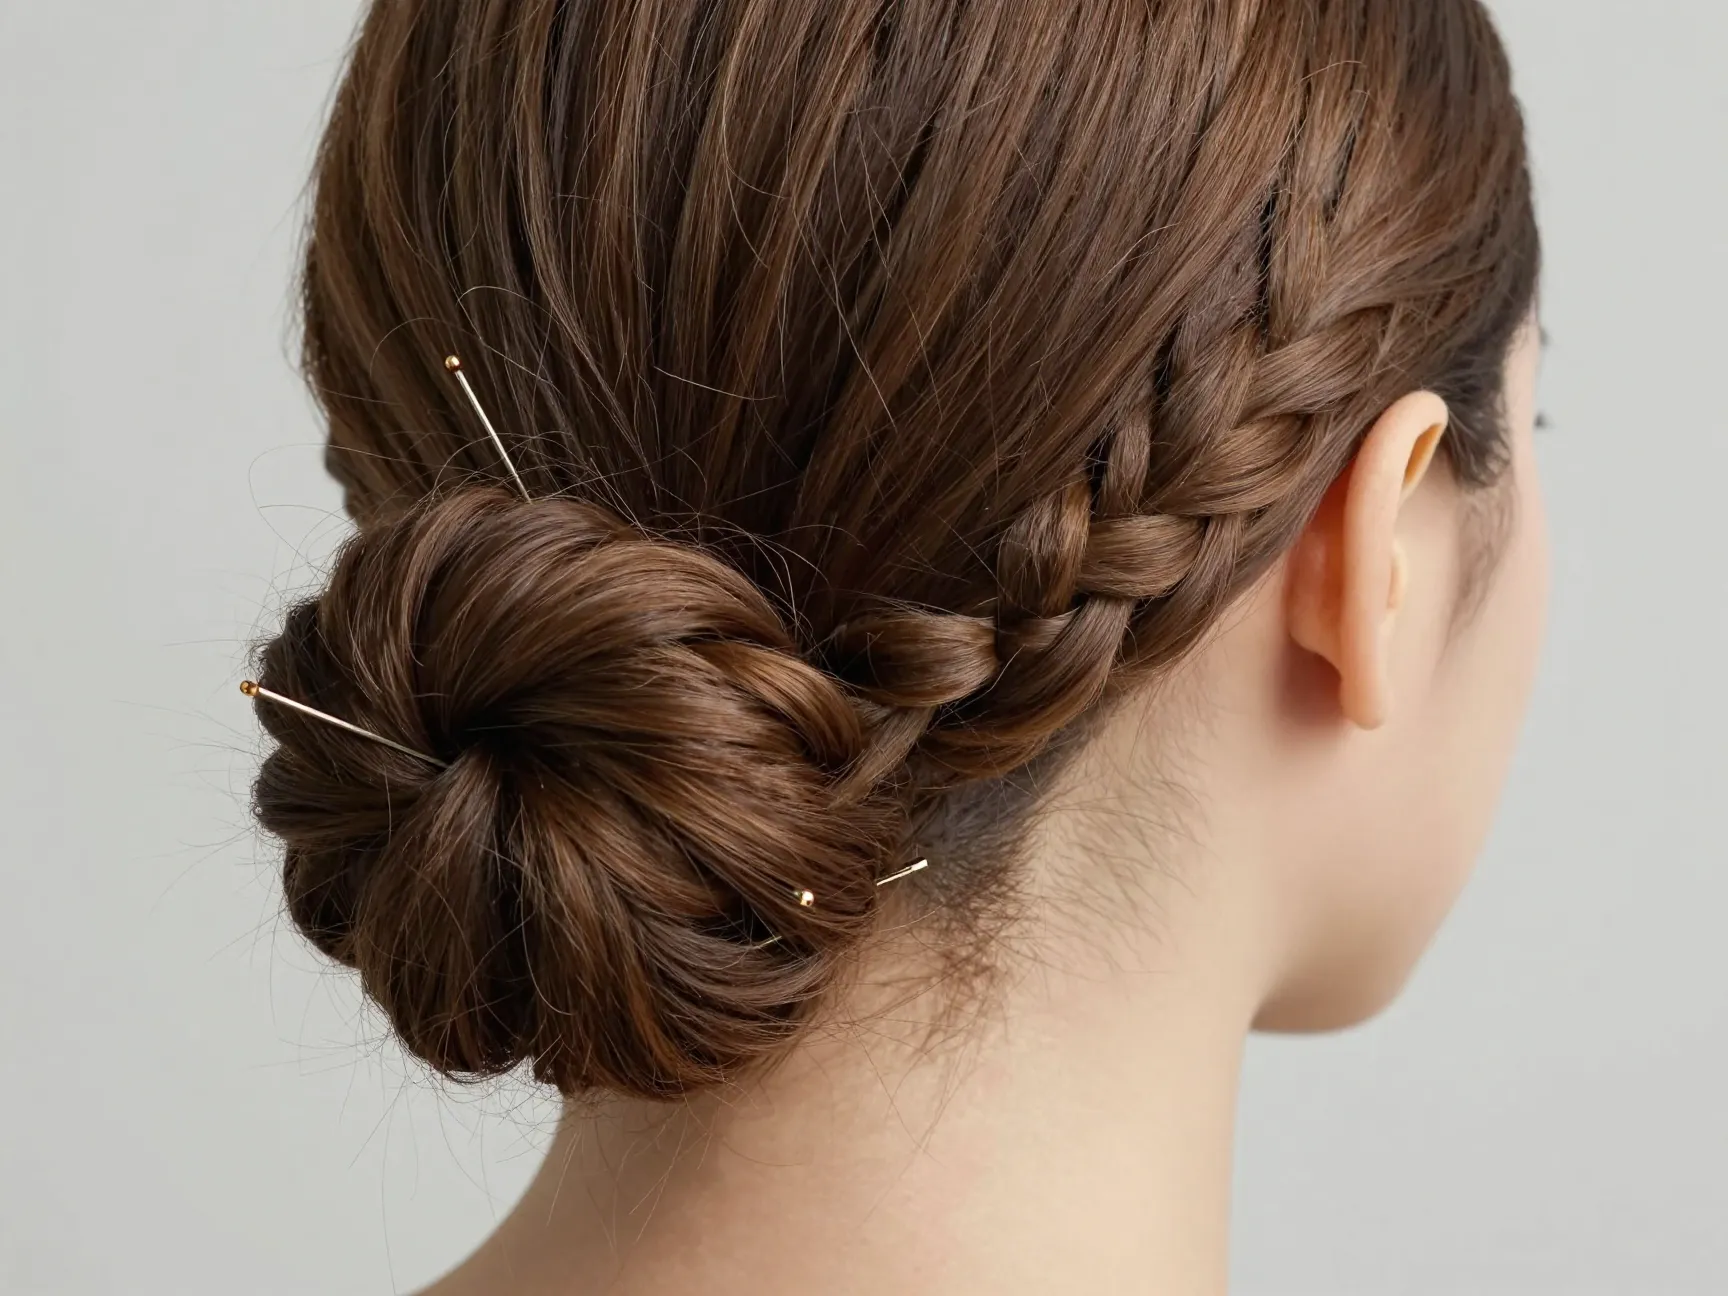
9. The Low Braid Bun
⏱ Time: 5–8 minutes
💪 Difficulty: Beginner
🎯 Best for: Medium to long hair, great for the office or formal settings
The low braid bun combines two classic styles into one elegant look. It’s the perfect choice when you need something that looks professional but don’t have time for anything elaborate [7].
How to do it:
- Create a low ponytail at the nape of your neck.
- Braid the ponytail loosely all the way to the ends.
- Coil the braid around the base of the ponytail in a circular motion.
- Tuck the ends under and secure with bobby pins.
- Mist with light-hold hairspray to keep everything in place.
Why it works: The braid adds texture and visual interest to what would otherwise be a plain bun. It also holds better than a smooth bun, especially on second-day hair, because the braid’s structure grips itself.
Essential Tools That Make These Styles Faster
Having the right tools on hand cuts your styling time significantly. Here’s what to keep within reach:
| Tool | Why You Need It |
|---|---|
| Fine-tooth rat-tail comb | Clean sections and precise parts |
| Clear elastics | Secure without visible bulk |
| Bobby pins | Tuck ends, control flyaways |
| Texturizing spray | Adds grip to slippery or fine hair |
| Light-hold hairspray | Locks style without stiffness |
| Detangling brush | Smooth prep before braiding |
💬 Pro tip: Keep a small braiding kit in your bag — a few elastics, a mini comb, and a travel-size texturizing spray. You can refresh or redo any of these styles in under five minutes, anywhere.
Tips for Making Braids Work on Short Hair
Short hair doesn’t have to be a barrier. Many of the styles above — particularly the half-up braid, rope twist, and side braid — work beautifully on shorter lengths [1][5][7].
Here are a few strategies specifically for shorter hair:
- Use texturizing spray or pomade to give shorter strands grip so they don’t slip out of the braid.
- Braid in sections rather than trying to gather all your hair at once.
- Bobby pins are your best friend — use them to secure the ends of braids that are too short to hold an elastic.
- Try micro-braids along the hairline or at the temples for a decorative touch that doesn’t require length.
- Embrace the undone look — shorter braids that aren’t perfectly tight actually look intentionally cool and editorial.
How to Make Your Braids Last Longer
Even the fastest style is worth protecting. These habits will extend the life of your braids:
- Sleep on a satin pillowcase to reduce friction and frizz overnight
- Apply a light oil (argan or jojoba) to the braid before bed to keep it moisturized
- Avoid touching the braid throughout the day — the more you handle it, the faster it loosens
- Use a small amount of edge control around the hairline to keep baby hairs smooth
- Mist with water in the morning to revive a style that’s slightly flattened overnight
Conclusion: Your New Morning Routine Starts Now
The 9 Quick and Easy Braided Hairstyles for When You’re Short on Time covered in this guide prove one thing clearly: you don’t need to sacrifice style for speed. From the beginner-friendly rope twist to the elegant crown braid, every style here is designed to fit into a real, busy morning — not an idealized one.
Here’s how to get started:
- Pick one style from this list that matches your current skill level and hair length.
- Practice it twice on a low-pressure day — a weekend morning or a work-from-home day.
- Build your braiding kit with the basic tools listed above.
- Add a second style to your rotation once the first feels automatic.
- Experiment with accessories — a ribbon, a clip, or a headband can make the same braid feel completely different.
The goal isn’t perfection. It’s a style that looks intentional, holds up all day, and takes less time than scrolling through your phone while deciding what to do with your hair. Start with style number one, and work your way through the list at your own pace. By the time you’ve tried all nine, you’ll have a full repertoire of fast, beautiful braided looks ready for any occasion.
References
[1] Easy Braids For Short Hair – https://www.allthingshair.com/en-us/hairstyles-haircuts/braids/easy-braids-for-short-hair/
[2] Easy Braids For Beginners 7 Styles You Can Do In Minutes – https://momgenerations.com/2021/11/easy-braids-for-beginners-7-styles-you-can-do-in-minutes/
[3] Watch – https://www.youtube.com/watch?v=11LghP_1TBw
[4] Watch – https://www.youtube.com/watch?v=hV5b8BHS6kw
[5] 16 Short Hair Braid Styles That Are Stunning – https://carolsdaughter.com/blogs/beauty-blog/16-short-hair-braid-styles-that-are-stunning
[6] Watch – https://www.youtube.com/watch?v=3xfqp8lLFfQ
[7] Braids For Short Hair – https://www.hair.com/braids-for-short-hair.html