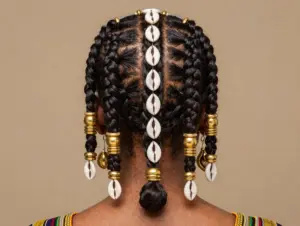
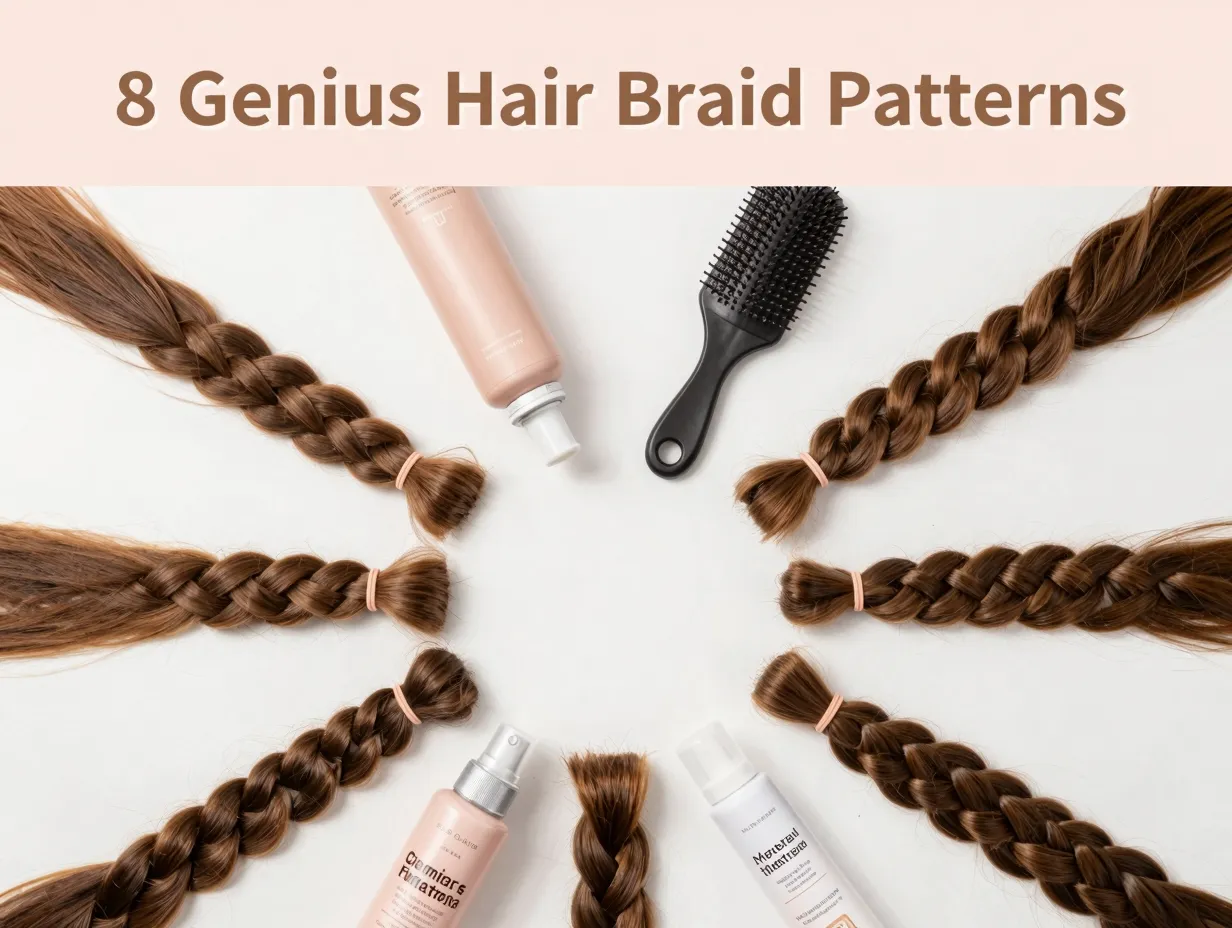
8 Genius Hair Braid Patterns That Look Complicated but Are Simple
Nearly 70% of people who attempt braided hairstyles give up after one try — not because braiding is hard, but because they start with the wrong pattern. The truth is, most styles that stop people in their tracks on Instagram or Pinterest are built on just a handful of basic moves repeated in a clever sequence. Once you understand the logic behind each pattern, the “complicated” label disappears fast.
That’s exactly why I put together this guide on the 8 Genius Hair Braid Patterns That Look Complicated but Are Simple. Whether you’re a total beginner or someone who’s been doing basic three-strand braids for years, these patterns will upgrade your styling game without requiring a cosmetology degree. From Dutch braids to zipper braids, each style here has been chosen because it delivers maximum visual impact for minimal effort. [1][3]
Key Takeaways 📌
- Most impressive-looking braids use just 2–3 core techniques repeated in different directions or sequences.
- Preparation matters more than skill — clean, slightly damp, or product-coated hair makes every braid easier.
- Protective braid styles can also benefit hair health when done correctly and not too tightly. [4]
- Practice on a mannequin head or a friend first before attempting complex patterns solo.
- The 8 patterns in this guide range from beginner-friendly to intermediate — all are achievable at home. [5]
Why Most People Overcomplicate Braiding
Before diving into the patterns themselves, it’s worth addressing the biggest myth in braiding: that you need special talent or years of experience to create stunning styles.
💬 “The most jaw-dropping braids are often just simple patterns executed with confidence and the right hair prep.”
The reality? Every braid — no matter how intricate it looks — is a variation of crossing strands over or under each other. The difference between a basic braid and a “genius” braid is usually just direction, tension, and repetition. [5]
What Makes a Braid Pattern “Genius”?
A genius braid pattern has three qualities:
| Quality | What It Means |
|---|---|
| High visual payoff | Looks complex and impressive to others |
| Simple mechanics | Built on moves you can learn in minutes |
| Versatility | Works on multiple hair types and lengths |
With that framework in mind, let’s get into the patterns.
The 8 Genius Hair Braid Patterns That Look Complicated but Are Simple
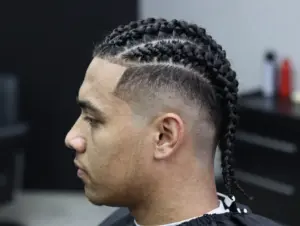
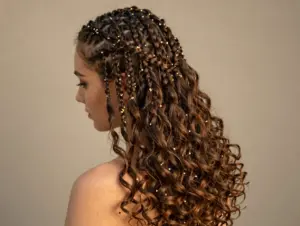
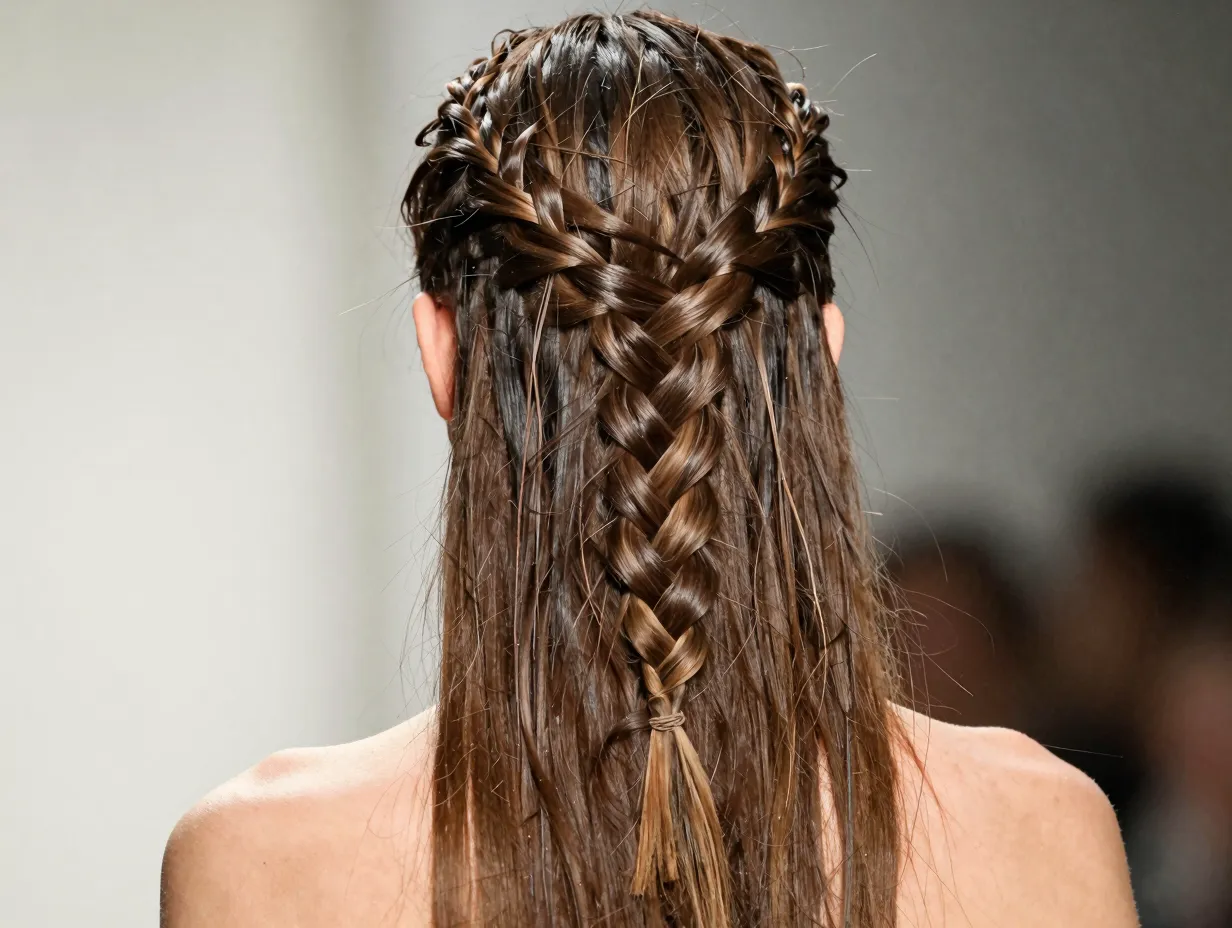
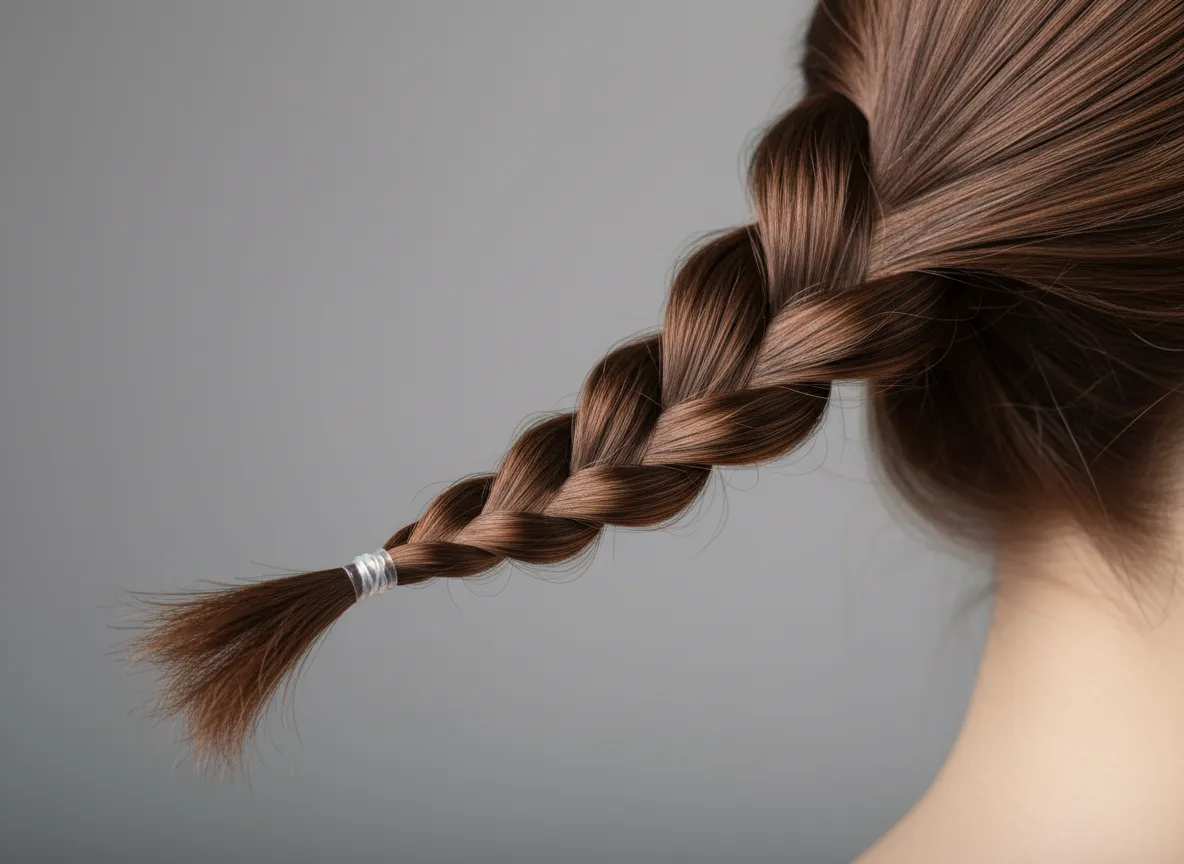
1. 🌀 The Dutch Braid (Reverse French Braid)
Difficulty: Beginner–Intermediate
Time: 10–15 minutes
The Dutch braid is often called the “inside-out French braid,” and that description is almost all you need to know. Instead of crossing strands over the middle section (as in a standard French braid), you cross them under. This single change creates a braid that pops off the scalp in 3D relief — giving it that bold, sculptural look that makes people assume it’s difficult. [3]
How to do it:
- Divide hair at the crown into three equal sections.
- Cross the right strand under the middle.
- Cross the left strand under the new middle.
- As you move down, add small sections of hair from each side before crossing under.
- Continue to the nape, then finish with a standard three-strand braid.
Pro tip: Dutch braids look even more dramatic when you gently tug the loops outward (called “pancaking”) after finishing. This makes the braid appear fuller and more intricate. [1]
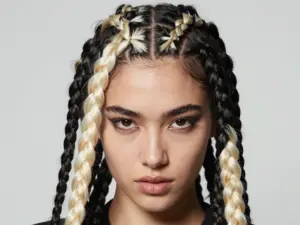
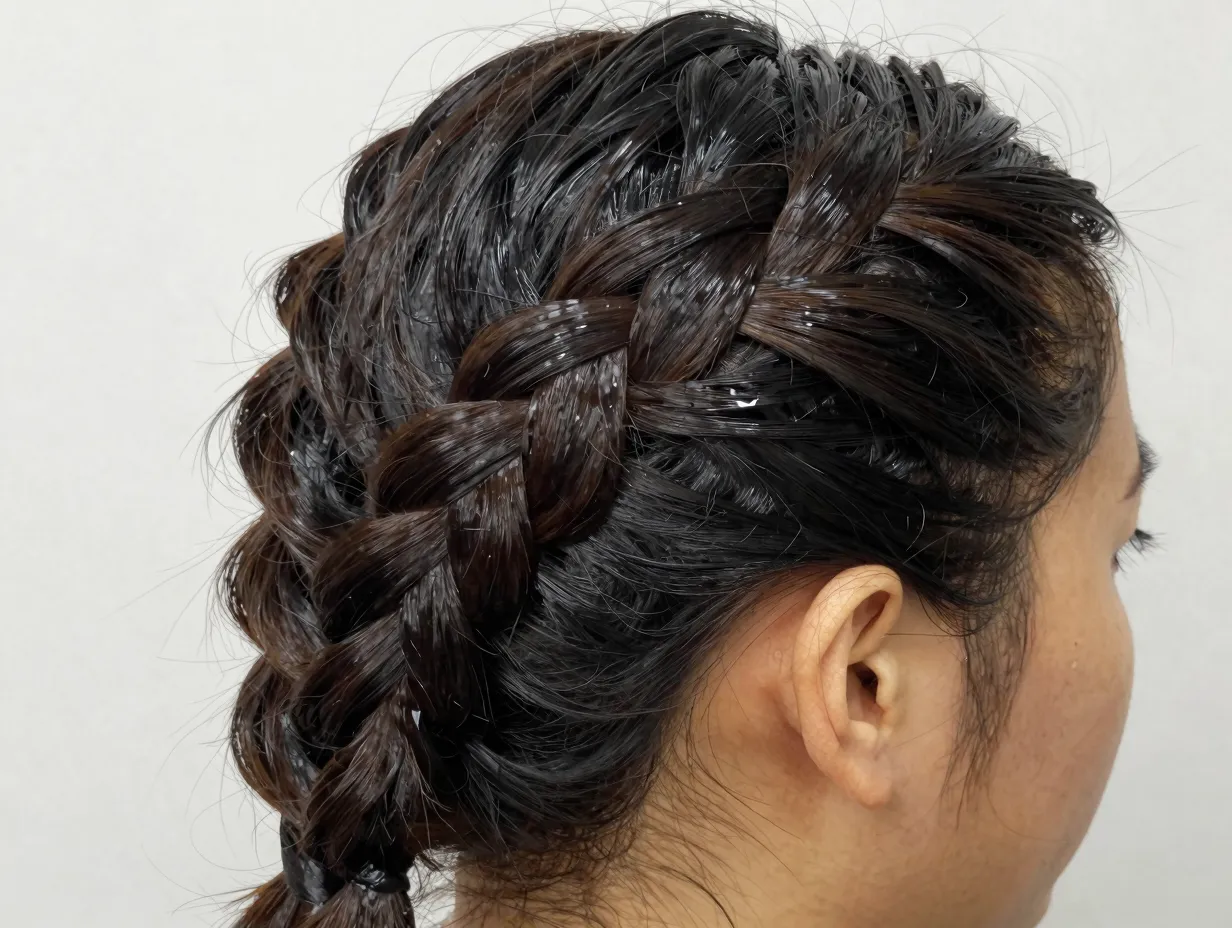
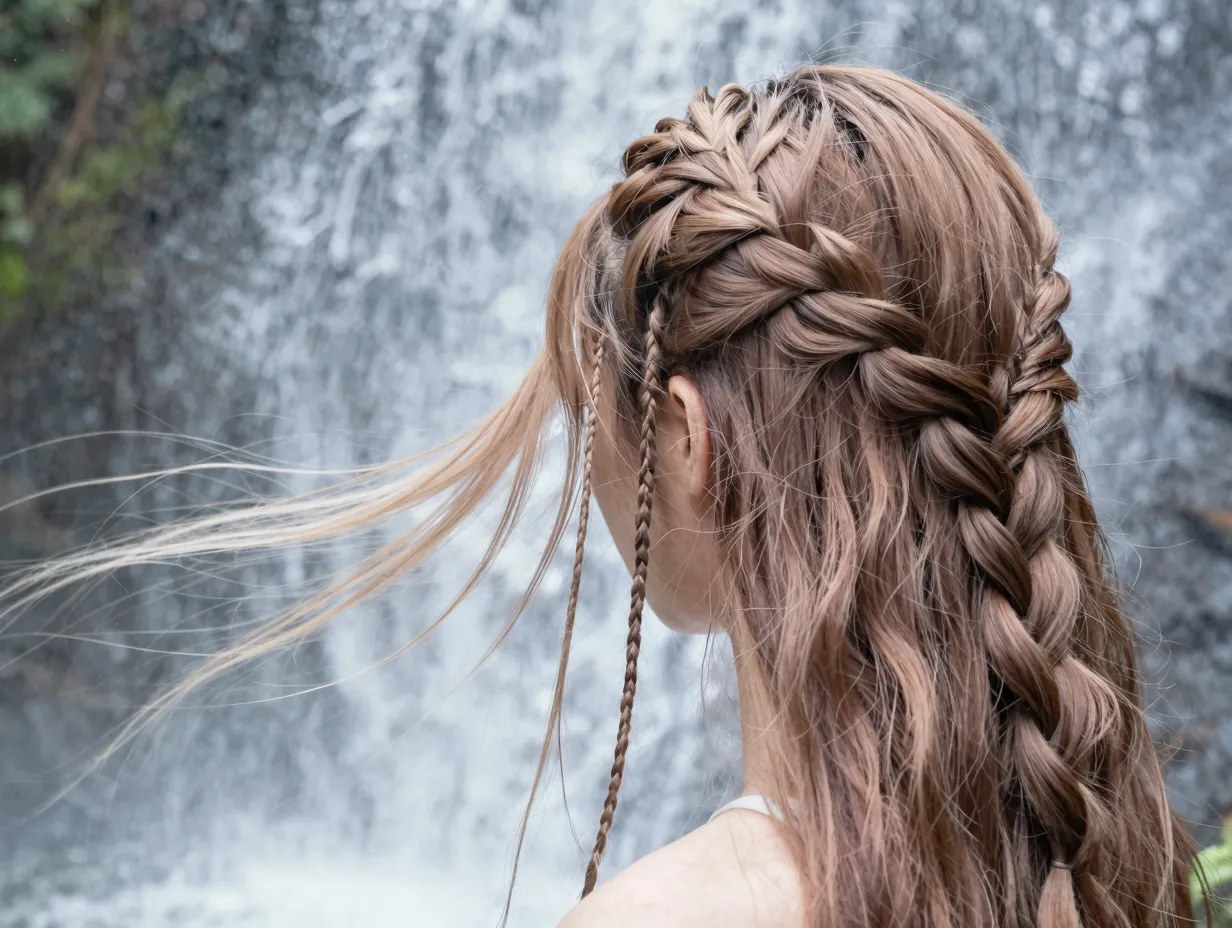
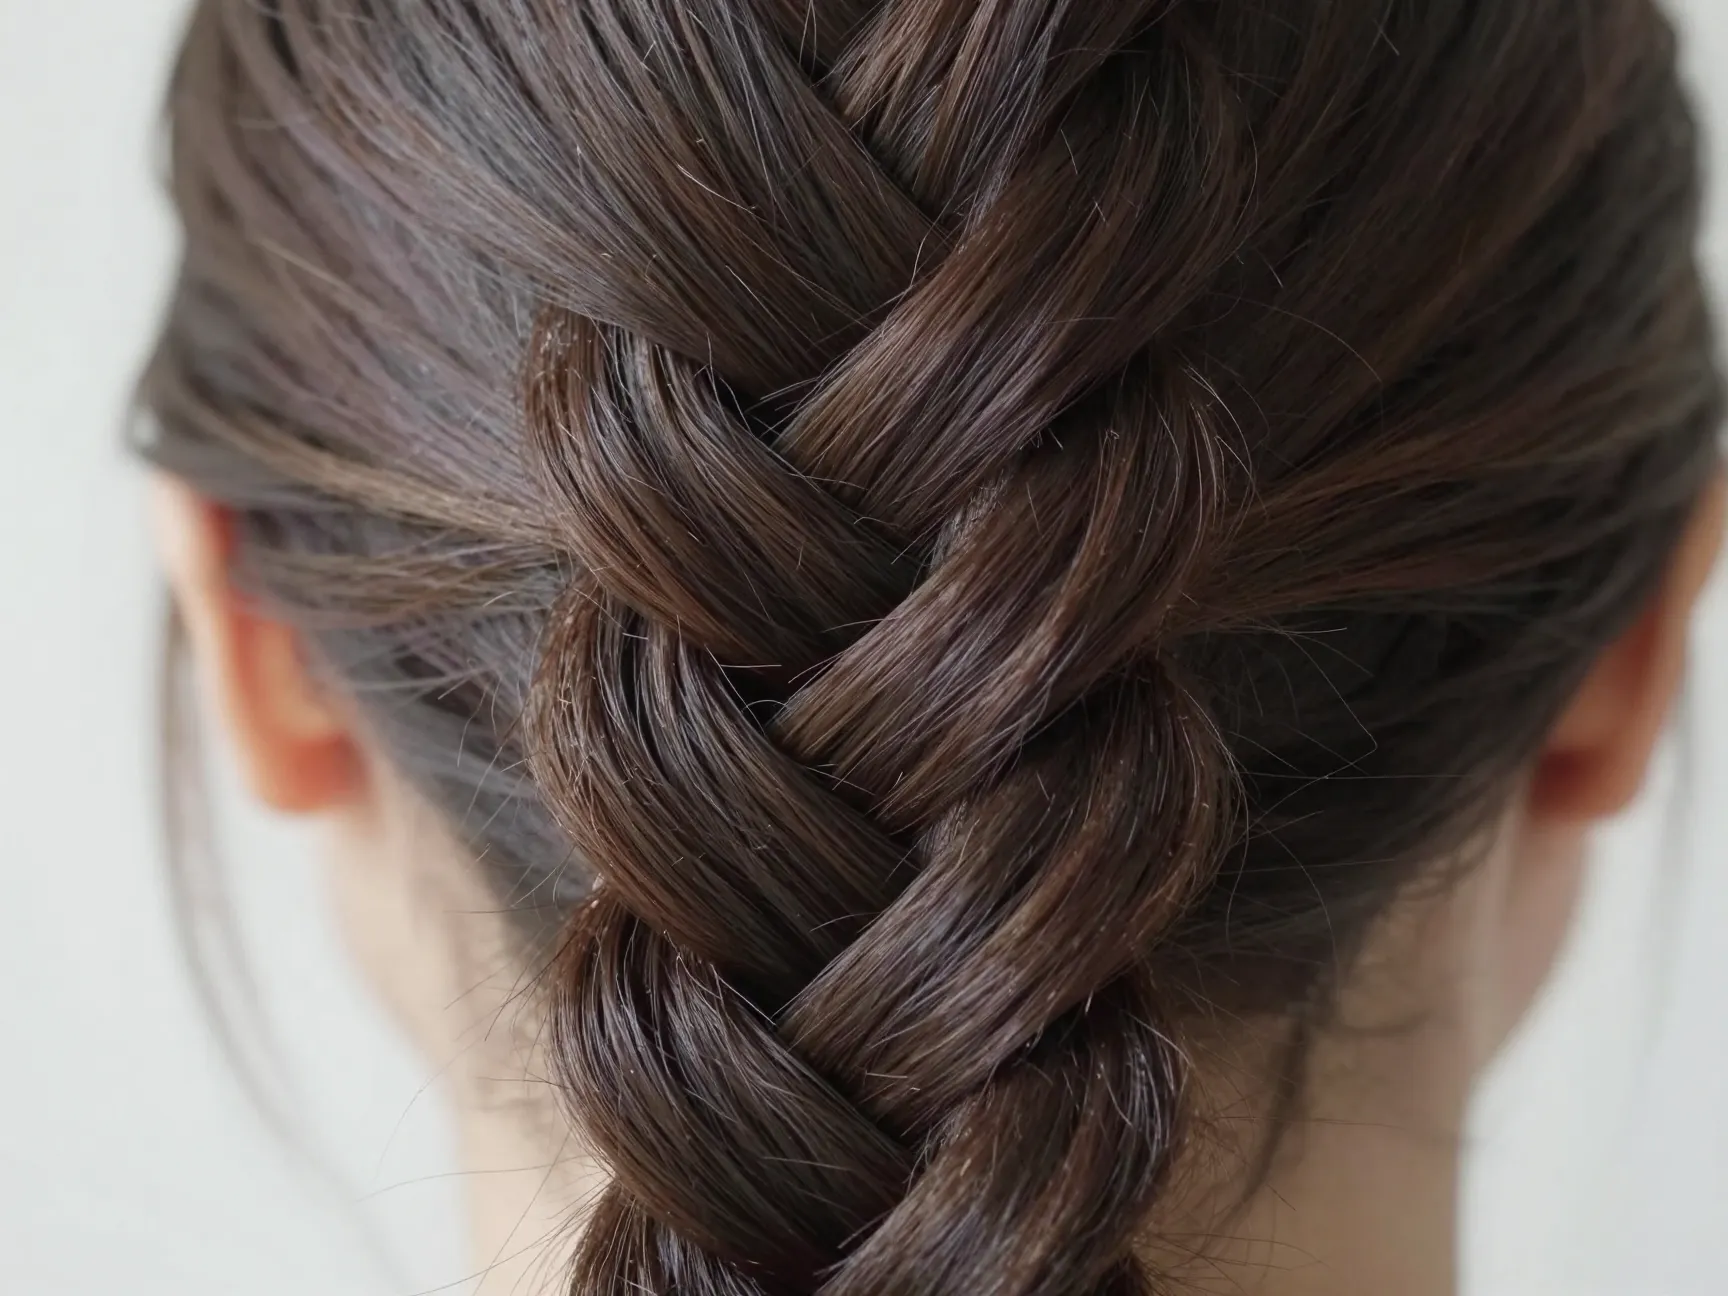
2. 🐟 The Fishtail Braid
Difficulty: Beginner
Time: 8–12 minutes
The fishtail braid looks like it belongs on a runway model, but it’s arguably the easiest braid on this list once you drop the assumption that you need three strands. You only use two.
How to do it:
- Split hair into two equal sections.
- Take a thin strand from the outer edge of the right section.
- Cross it over and add it to the left section.
- Take a thin strand from the outer edge of the left section.
- Cross it over and add it to the right section.
- Repeat until you reach the ends.
The key to a stunning fishtail is using thin strands — the thinner the pieces you pull, the more intricate the woven pattern appears. [2]
💡 Quick Tip: Fishtail braids work beautifully on slightly unwashed hair because natural oils give it grip and texture.
3. 💧 The Waterfall Braid
Difficulty: Intermediate
Time: 12–18 minutes
The waterfall braid is one of those styles that genuinely looks like magic — strands seem to cascade down through the braid like flowing water. The secret? You’re simply dropping one strand instead of incorporating it as you move across the head.
How to do it:
- Start a standard French braid at the temple.
- After the first two crossings, instead of keeping the dropped strand, let it fall freely.
- Pick up a new strand from above to replace it.
- Continue across the head, always releasing the bottom strand and replacing it with a fresh one from the top.
This creates the signature “waterfall” of loose hair falling through the braid. It’s a French braid with one rule changed — that’s it. [3]
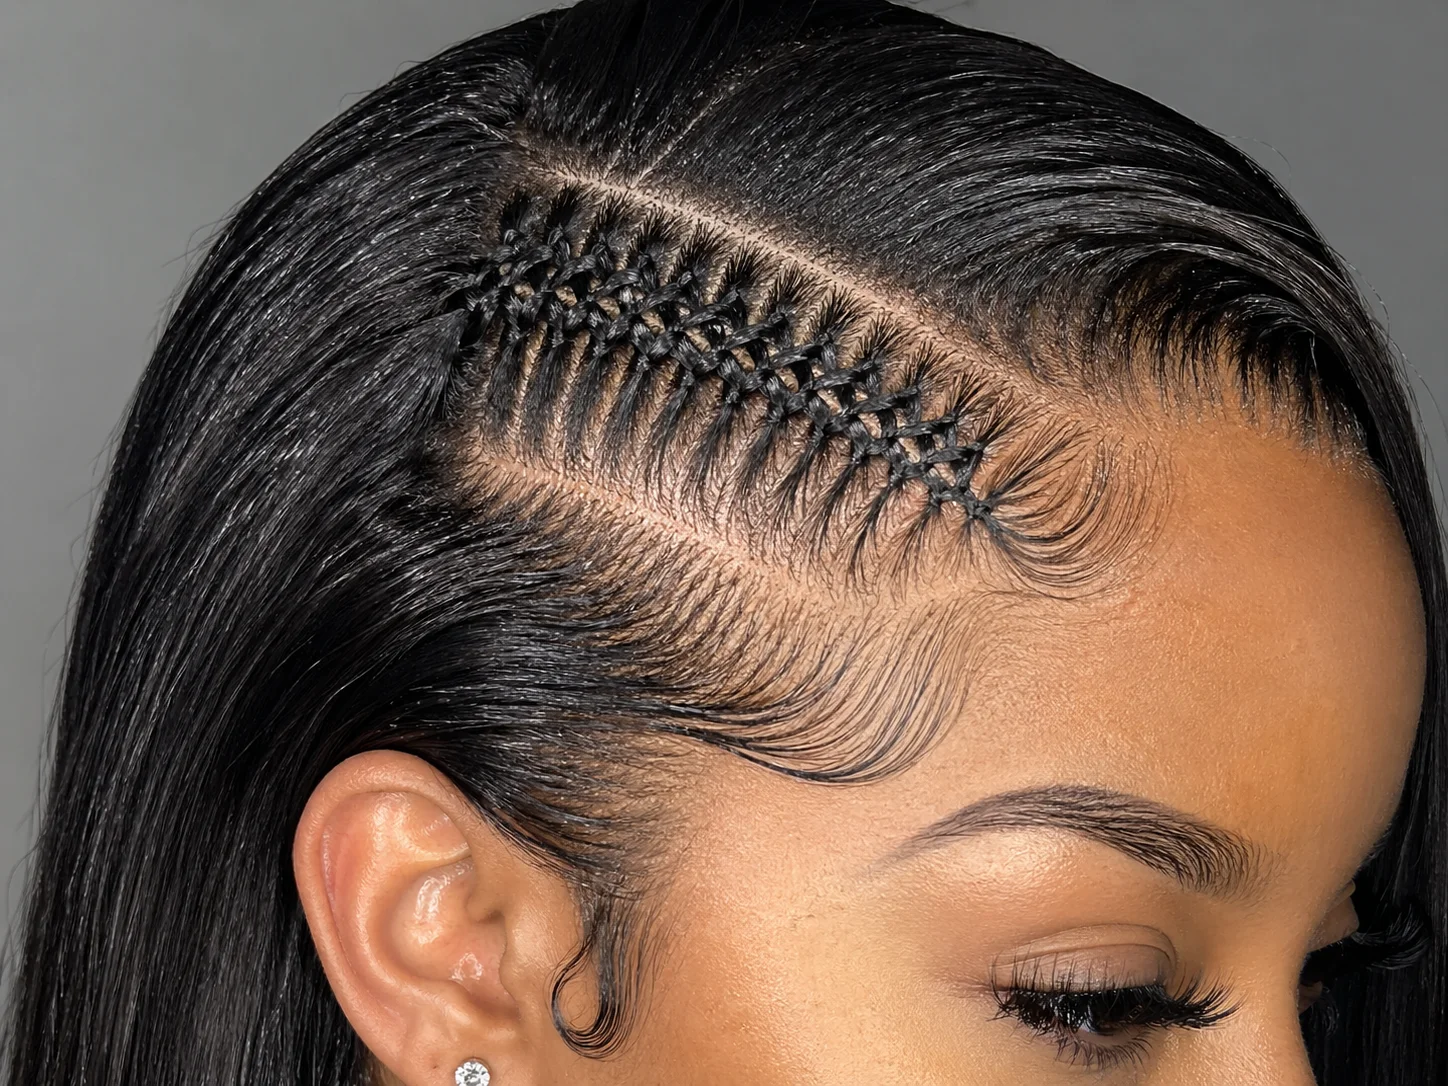
4. 🔗 The Zipper Braid (Lace Braid Variation)
Difficulty: Beginner–Intermediate
Time: 10–15 minutes
The zipper braid gets its name from the interlocking pattern it creates, which looks almost identical to the teeth of a zipper. It’s a lace braid variation where you only add hair from one side instead of both. [3]
How to do it:
- Take a section at the hairline and divide into three strands.
- Begin a standard braid, but only add new hair from the top section (not the bottom).
- The bottom strand simply gets incorporated without adding new hair.
- Continue down the side of the head.
The result is a braid that hugs the scalp on one side while the other side shows a clean, geometric edge — that zipper effect. [5]
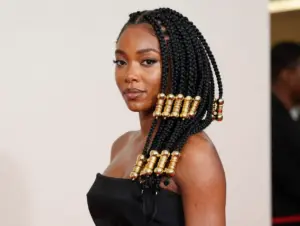
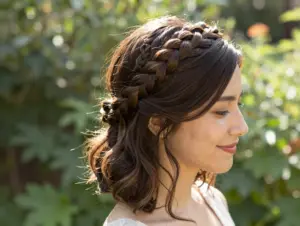
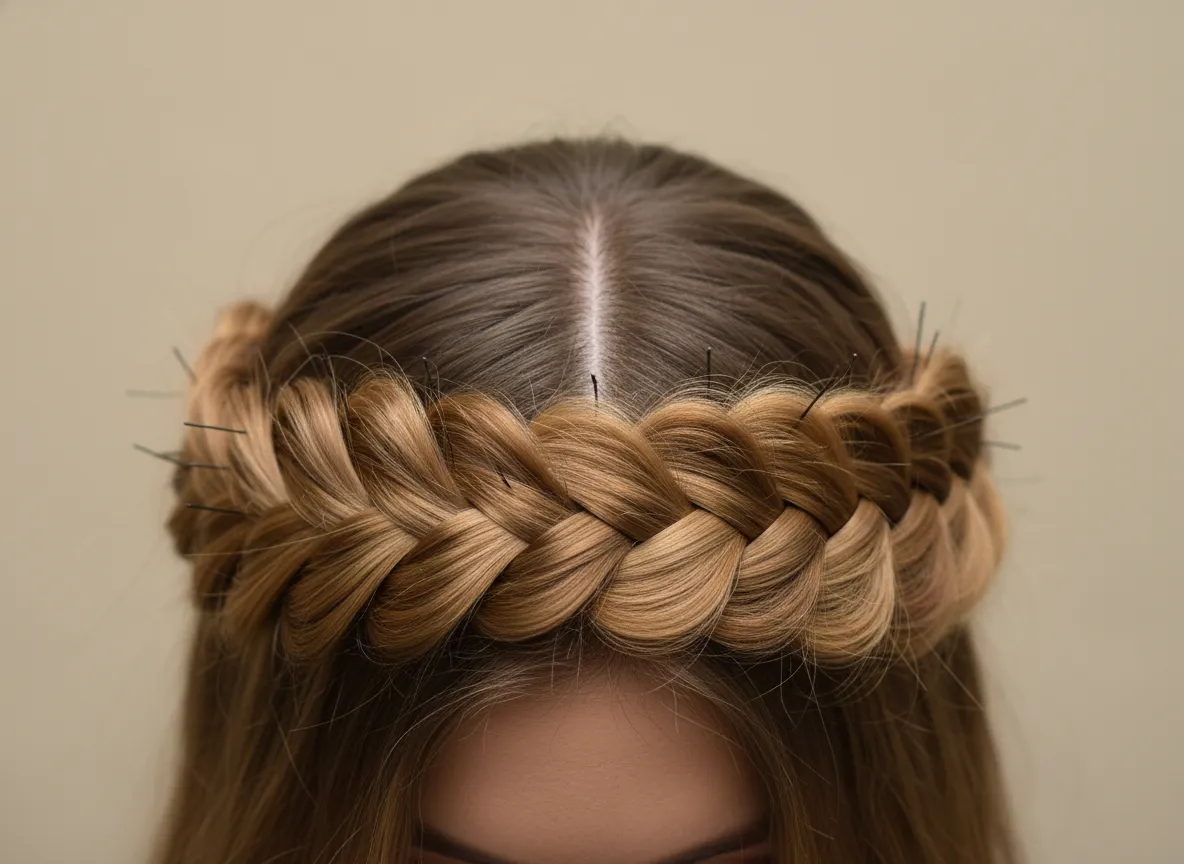
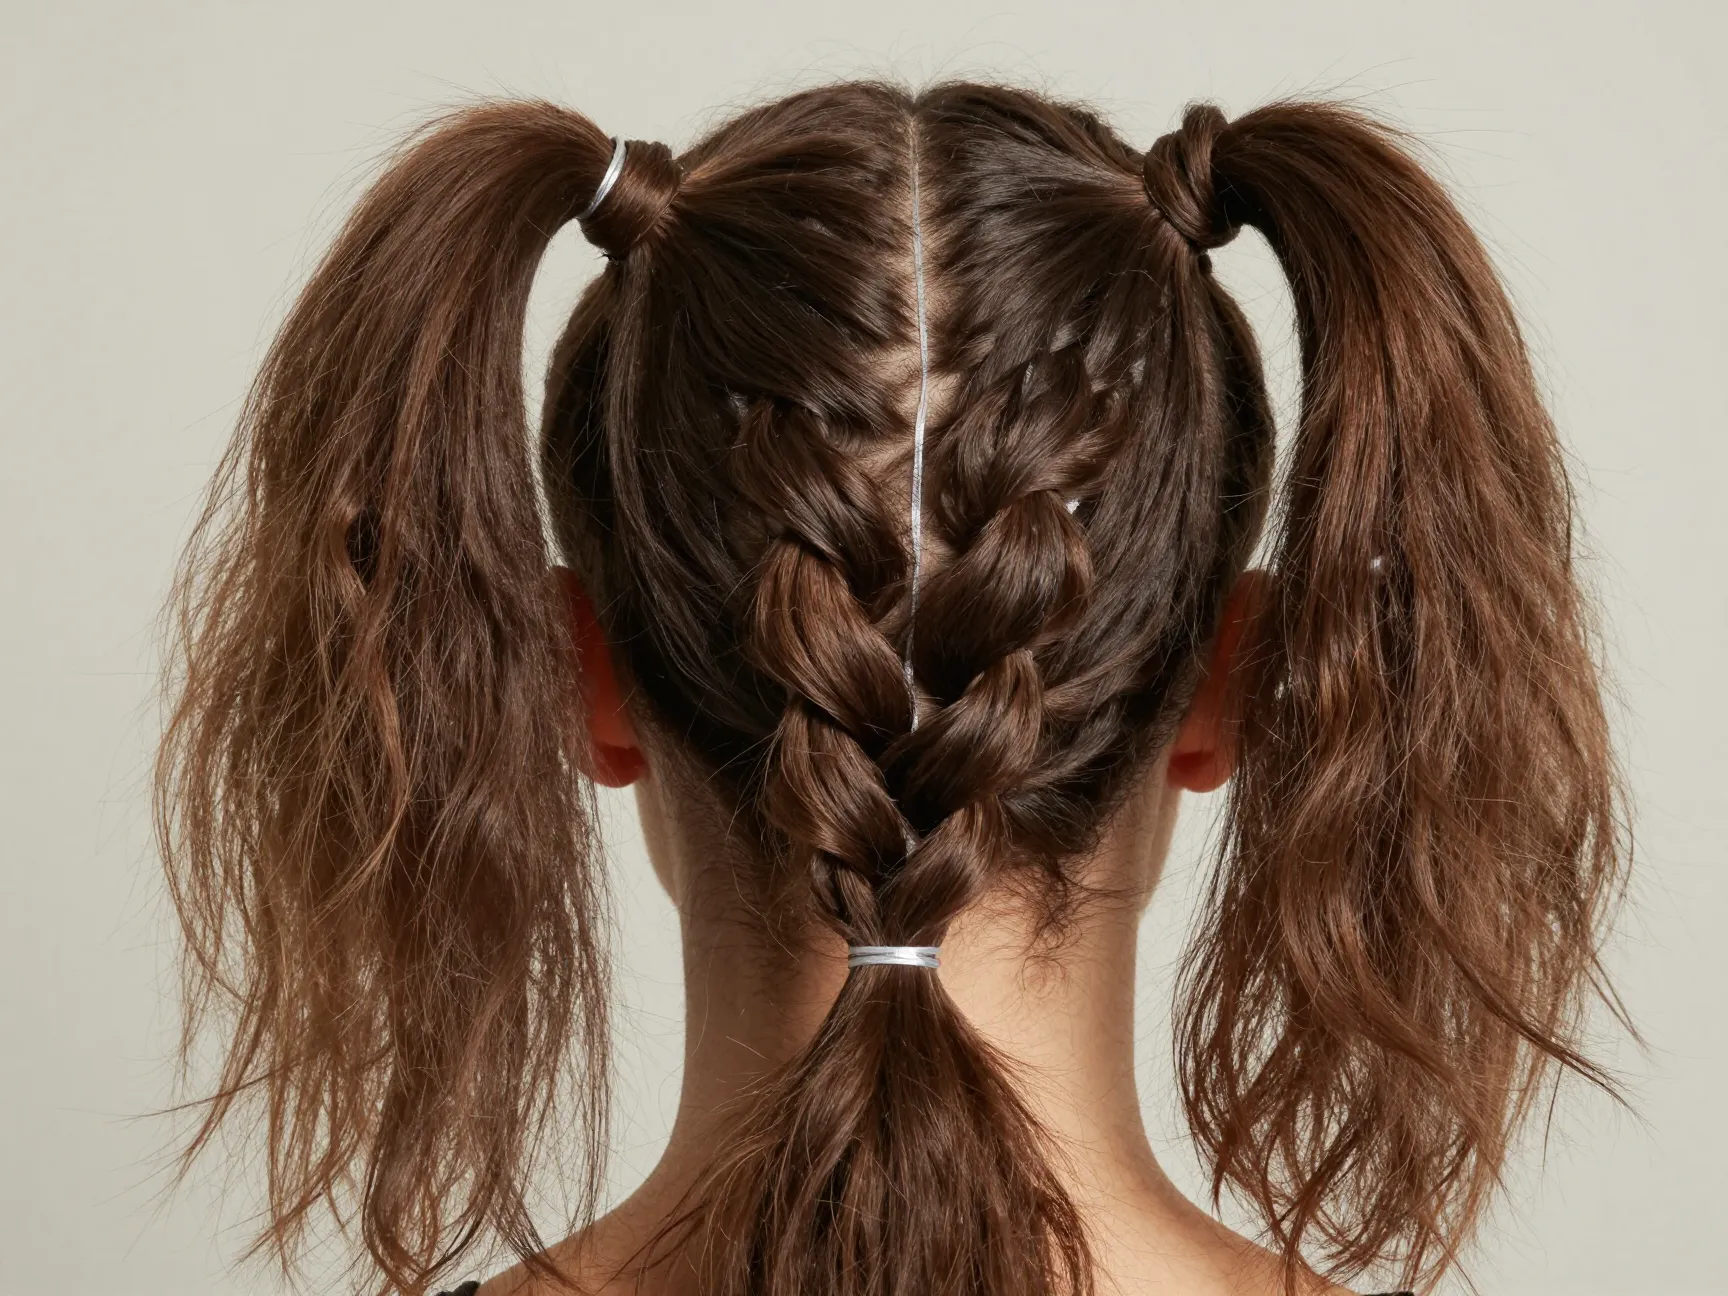
5. 👑 The Crown Braid
Difficulty: Intermediate
Time: 15–20 minutes
The crown braid frames the entire head like a halo and looks like it took a professional stylist an hour. In reality, it’s just two Dutch braids pinned together.
How to do it:
- Part hair down the middle.
- Create a Dutch braid on each side, starting at the front and braiding toward the nape.
- Take the right braid and pin it across the top of the head.
- Take the left braid and pin it across, overlapping slightly.
- Tuck the ends under the opposite braid and secure with bobby pins.
Pro tip: Pancake both braids before pinning to make the crown look fuller and more regal. [1]
6. 🌿 The Rope Twist Braid
Difficulty: Beginner
Time: 5–8 minutes
The rope twist is the fastest style on this list and one of the most underrated. It uses only two strands twisted in the same direction, then wrapped around each other in the opposite direction. The opposing tension keeps it locked in place. [2]
How to do it:
- Divide hair into two sections.
- Twist each section clockwise (or both counterclockwise — just be consistent).
- Wrap the two twisted sections around each other in the opposite direction (counterclockwise if you twisted clockwise).
- Secure at the end.
The result looks like an elegant twisted rope — sophisticated, clean, and done in under 10 minutes.
💬 “The rope twist is proof that the simplest techniques often produce the most elegant results.”
7. 🪜 The Ladder Braid
Difficulty: Intermediate
Time: 15–20 minutes
The ladder braid is a showstopper. It features a central braid with horizontal “rungs” crossing through it — like a ladder laid flat against the hair. Despite looking incredibly intricate, it’s a fishtail braid with a twist. [5]
How to do it:
- Take a section of hair and divide into two parts.
- Begin a fishtail braid, but before crossing each strand over, loop it through the opposite section first.
- This looping creates the horizontal rungs.
- Maintain even tension throughout for clean, uniform rungs.
The ladder braid is best demonstrated visually — watching a tutorial alongside reading instructions makes a significant difference for this one. [6][7]
8. 🌸 The Pull-Through Braid
Difficulty: Beginner
Time: 10–15 minutes
The pull-through braid is the ultimate cheat code in braiding. It looks like a thick, complex Dutch braid but uses no actual braiding at all — just elastics and a simple pulling technique. [1][2]
How to do it:
- Tie a small ponytail at the crown with a clear elastic.
- Tie another ponytail just below it, incorporating new hair.
- Split the first ponytail in half and pull the second ponytail up through the split.
- Repeat: add a new ponytail below, split the previous one, pull through.
- Continue to the nape.
The result is a braid that looks full, dimensional, and complex — but every single step takes about 30 seconds.
💡 Quick Tip: Use clear elastics and pancake each “bubble” section for maximum volume and drama.
Choosing the Right Braid Pattern for Your Hair Type
Not every braid works equally well on every hair type. Here’s a quick reference guide:
| Hair Type | Best Braid Patterns | Tips |
|---|---|---|
| Fine/Straight | Fishtail, Pull-Through, Rope Twist | Add texturizing spray for grip |
| Wavy | Dutch Braid, Crown Braid, Waterfall | Work with natural texture |
| Curly | Pull-Through, Crown Braid, Rope Twist | Stretch hair gently before braiding |
| Thick/Coarse | All 8 patterns work well | Divide into smaller sections |
| Short (chin–shoulder) | Rope Twist, Zipper Braid, Dutch Braid | Use clips to secure loose ends |
Hair Health Considerations for Braided Styles 🌿
Braiding is one of the best ways to protect your hair — but only when done thoughtfully. Protective braiding styles can reduce daily manipulation and shield ends from damage, but tension is the critical variable. [4]
Key rules for healthy braiding:
- ✅ Never braid too tightly — traction alopecia (hair loss from pulling) is a real risk with overly tight styles.
- ✅ Moisturize before braiding — dry hair is more prone to breakage during manipulation.
- ✅ Take breaks between styles — give your scalp and edges rest periods between braided looks.
- ✅ Avoid heavy extensions on fine hair — the weight can stress follicles over time. [4]
- ✅ Seal ends with a light oil or butter to prevent fraying while braided.
💬 “A protective style is only protective if it’s done gently. The goal is to give your hair a rest, not put it under more stress.” [4]
Essential Tools and Products for Easier Braiding
Having the right tools makes every pattern on this list significantly easier to execute. Here’s what I recommend keeping on hand:
🧰 Must-Have Tools
- Rat-tail comb — for clean, precise parts
- Clear elastics — essential for pull-through braids and crown braids
- Bobby pins — for securing crown braids and finishing touches
- Sectioning clips — keeps unbraided hair out of the way
- Fine-tooth comb — for smoothing sections before braiding
💧 Must-Have Products
| Product Type | Purpose | When to Use |
|---|---|---|
| Texturizing spray | Adds grip for fine hair | Before braiding |
| Edge control | Smooths flyaways | Around hairline |
| Light hold gel | Keeps braids neat | On damp hair |
| Argan or coconut oil | Adds shine and moisture | After braiding |
| Dry shampoo | Refreshes braids between washes | Day 2–3 of wear |
Common Mistakes to Avoid with These Braid Patterns
Even the simplest braid can go sideways with these common errors:
❌ Mistake 1: Uneven Tension
Inconsistent tension creates lumpy, uneven braids. Practice keeping the same pressure throughout each crossing.
❌ Mistake 2: Sections That Are Too Large
Thick sections make braids look sloppy. Thinner, more precise sections create cleaner, more defined patterns — especially for fishtail and ladder braids.
❌ Mistake 3: Skipping Hair Prep
Braiding on dirty, dry, or freshly washed (too slippery) hair makes every technique harder. Aim for day-two hair or use a light texturizing product.
❌ Mistake 4: Rushing the Learning Curve
Each of these 8 genius hair braid patterns that look complicated but are simple will take a few attempts before they feel natural. Give yourself three practice sessions before judging the result. [5]
❌ Mistake 5: Ignoring Mirror Angles
Use a second mirror or your phone camera to check the back of your head. Many braiding mistakes happen because you can’t see what you’re doing from the right angle.
How to Practice These Patterns Efficiently
Speed and quality both improve with smart practice. Here’s a simple progression plan:
Week 1: Master the rope twist and pull-through braid (no actual braiding required).
Week 2: Add the fishtail and Dutch braid to your repertoire.
Week 3: Practice the waterfall braid and zipper braid.
Week 4: Attempt the crown braid and ladder braid.
By working through the patterns in order of complexity, you build the muscle memory and spatial awareness needed for the more advanced styles. [6][7]
Frequently Asked Questions
Can I do these braid patterns on short hair?
Yes — several patterns work well on shorter lengths. The rope twist, zipper braid, and Dutch braid are all achievable on hair that’s chin-length or longer. For very short hair, focus on partial styles (braiding just the front or sides).
How long do these braided styles last?
Most of these styles last 1–3 days with proper care. Sleep with a silk or satin bonnet or pillowcase to preserve the braid overnight. The pull-through braid and crown braid tend to hold the longest.
Do I need braiding hair or extensions?
No — all 8 patterns in this guide work on natural hair. However, adding braiding hair can create more volume and length for styles like the pull-through braid or crown braid if desired. [1]
What’s the best braid for a beginner?
Start with the pull-through braid or the rope twist. Neither requires actual braiding technique, and both produce impressive results quickly.
Conclusion: Start Simple, Think Big 🎯
The 8 Genius Hair Braid Patterns That Look Complicated but Are Simple in this guide prove one thing clearly: visual complexity and technical difficulty are not the same thing. The Dutch braid, fishtail, waterfall, zipper, crown, rope twist, ladder, and pull-through braid each deliver stunning results through smart, repeatable mechanics — not advanced skill.
Your Actionable Next Steps:
- Choose one pattern from this list that excites you most — don’t try to learn all eight at once.
- Gather your tools — a rat-tail comb, clear elastics, and a texturizing spray are enough to start.
- Watch a video tutorial alongside this guide for the pattern you’ve chosen. [6][7]
- Practice three times before evaluating your results — muscle memory takes repetition.
- Share your progress — post your braids and see what feedback you get. Community encouragement accelerates learning.
Braiding is a skill that compounds. Every pattern you learn makes the next one easier. Start with one braid this week, and by next month you could be confidently rotating through all eight. The only thing standing between you and show-stopping hair is the first attempt. 💪
References
[1] Watch – https://www.youtube.com/watch?v=11LghP_1TBw
[2] Braid Hairstyles – https://www.luxyhair.com/blogs/hair-blog/braid-hairstyles
[3] Braids Hair Styles – https://www.lorealparisusa.com/beauty-magazine/hair-style/braid-hairstyles/braids-hair-styles
[4] 8 Protective Styles That Are Gentler Than Box Braids And Passion Twists – https://www.beautycon.com/article/8-protective-styles-that-are-gentler-than-box-braids-and-passion-twists
[5] Braided Hairstyles That Seem Unachievable – https://ilesformula.com/blogs/news/braided-hairstyles-that-seem-unachievable
[6] Watch – https://www.youtube.com/watch?v=vOmKiP3_s0c
[7] Watch – https://www.youtube.com/watch?v=yJS4QDZrtNg