8 Simple Cornrow Ideas for When You Want Beauty Without the Fuss
Cornrows have protected Black hair for over 3,000 years — yet in 2026, they remain one of the most searched protective styles on the internet, with millions of tutorials viewed every month. That staying power is no accident. These styles are durable, versatile, and genuinely low-effort once you know what you are doing. If you have been scrolling through style boards wondering where to start, this guide on 8 Simple Cornrow Ideas for When You Want Beauty Without the Fuss is exactly what you need. We break down eight achievable looks, share pro-level prep tips, and give you the tools to walk away with a style you are proud of — no salon appointment required.
Key Takeaways
- 🧴 Prep is everything: Clean, conditioned, and detangled hair is the foundation of every great cornrow style [2].
- 🪮 Sectioning makes or breaks the look: Neat, even parts create defined, professional-looking patterns [2].
- 💧 Moisture keeps your hair healthy while cornrows are installed — do not skip scalp care [2].
- ✨ Edge control and a toothbrush are your best friends for a polished, sleek finish [1].
- 🎯 Beginners can absolutely do this at home with the right guidance and a little patience [5].
Why Cornrows Are the Ultimate Low-Maintenance Style in 2026
Before we dive into the specific looks, let’s talk about why cornrows deserve a permanent spot in your hair rotation.
Cornrows are a true protective style. They tuck your ends away, reduce daily manipulation, and give your natural hair a real break from heat and tension. Because they lie flat against the scalp, they are also incredibly versatile — you can wear them under wigs, beneath hats, or completely on their own as a statement look [1].
“Cornrows serve as low-maintenance protective styles suitable for natural hair — they protect your strands while keeping you looking polished every single day.” [1]
Here is a quick comparison of cornrows versus other popular protective styles:
| Style | Average Install Time | Longevity | DIY-Friendly? | Scalp Access |
|---|---|---|---|---|
| Cornrows | 1–3 hours | 2–6 weeks | ✅ Yes | ✅ Easy |
| Box Braids | 4–8 hours | 4–8 weeks | ⚠️ Moderate | ⚠️ Limited |
| Twists | 1–3 hours | 1–3 weeks | ✅ Yes | ✅ Easy |
| Faux Locs | 6–10 hours | 4–8 weeks | ❌ Harder | ❌ Difficult |
| Wigs | 30–60 min | Variable | ✅ Yes | ✅ Easy |
Cornrows sit in a sweet spot: relatively fast to install, long-lasting, and easy enough for beginners to attempt at home [5].
Essential Prep: The Foundation of Every Great Cornrow Style
No matter which of the 8 Simple Cornrow Ideas for When You Want Beauty Without the Fuss you choose, your results will only be as good as your prep work. Skipping this step is the number one reason home cornrows look messy.
Step 1: Wash and Condition Your Hair
Start with clean, conditioned hair [2]. Dirty or product-heavy hair is harder to braid smoothly, and buildup can cause scalp irritation under braids. Use a clarifying shampoo followed by a moisturizing conditioner. If your hair is particularly dry, add a deep conditioning treatment.
Step 2: Detangle Thoroughly
This step cannot be rushed. Work through your hair in sections using a wide-tooth comb, starting from the ends and working upward. Thoroughly detangled hair makes the braiding process significantly smoother and reduces breakage [2].
Step 3: Apply a Leave-In and Stretch (Optional)
For natural hair, applying a leave-in conditioner and then blow-drying on low heat (or banding your hair) can make sectioning much easier. This is especially helpful for 4C hair types.
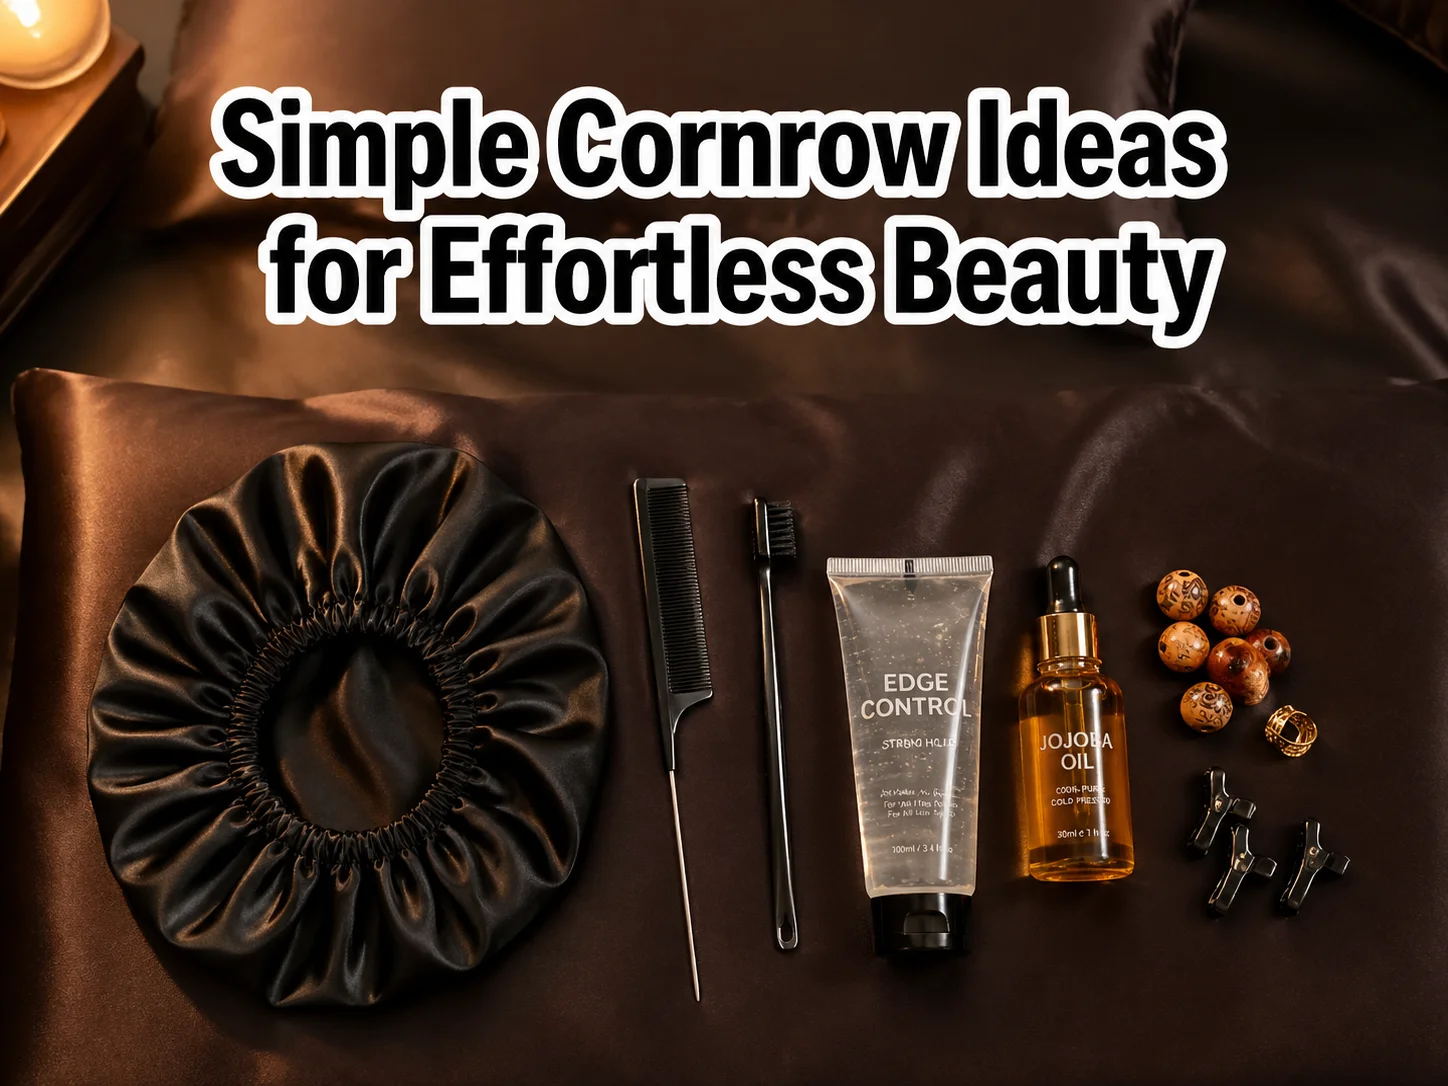
Step 4: Gather Your Tools
You will need:
- 🪮 Rat-tail comb (for clean parts)
- 💧 Edge control or strong-hold styling gel
- 🪥 A toothbrush (for smoothing edges) [1]
- 🧴 Light oil (for scalp moisture)
- 🧵 Small rubber bands or hair clips
Pro tip: The tutorial community widely recommends Pattern Beauty Stronghold Gel for keeping edges sleek and defined throughout the braiding process [1]. A toothbrush gives you precision that your fingers simply cannot match when laying down baby hairs and edges [1].
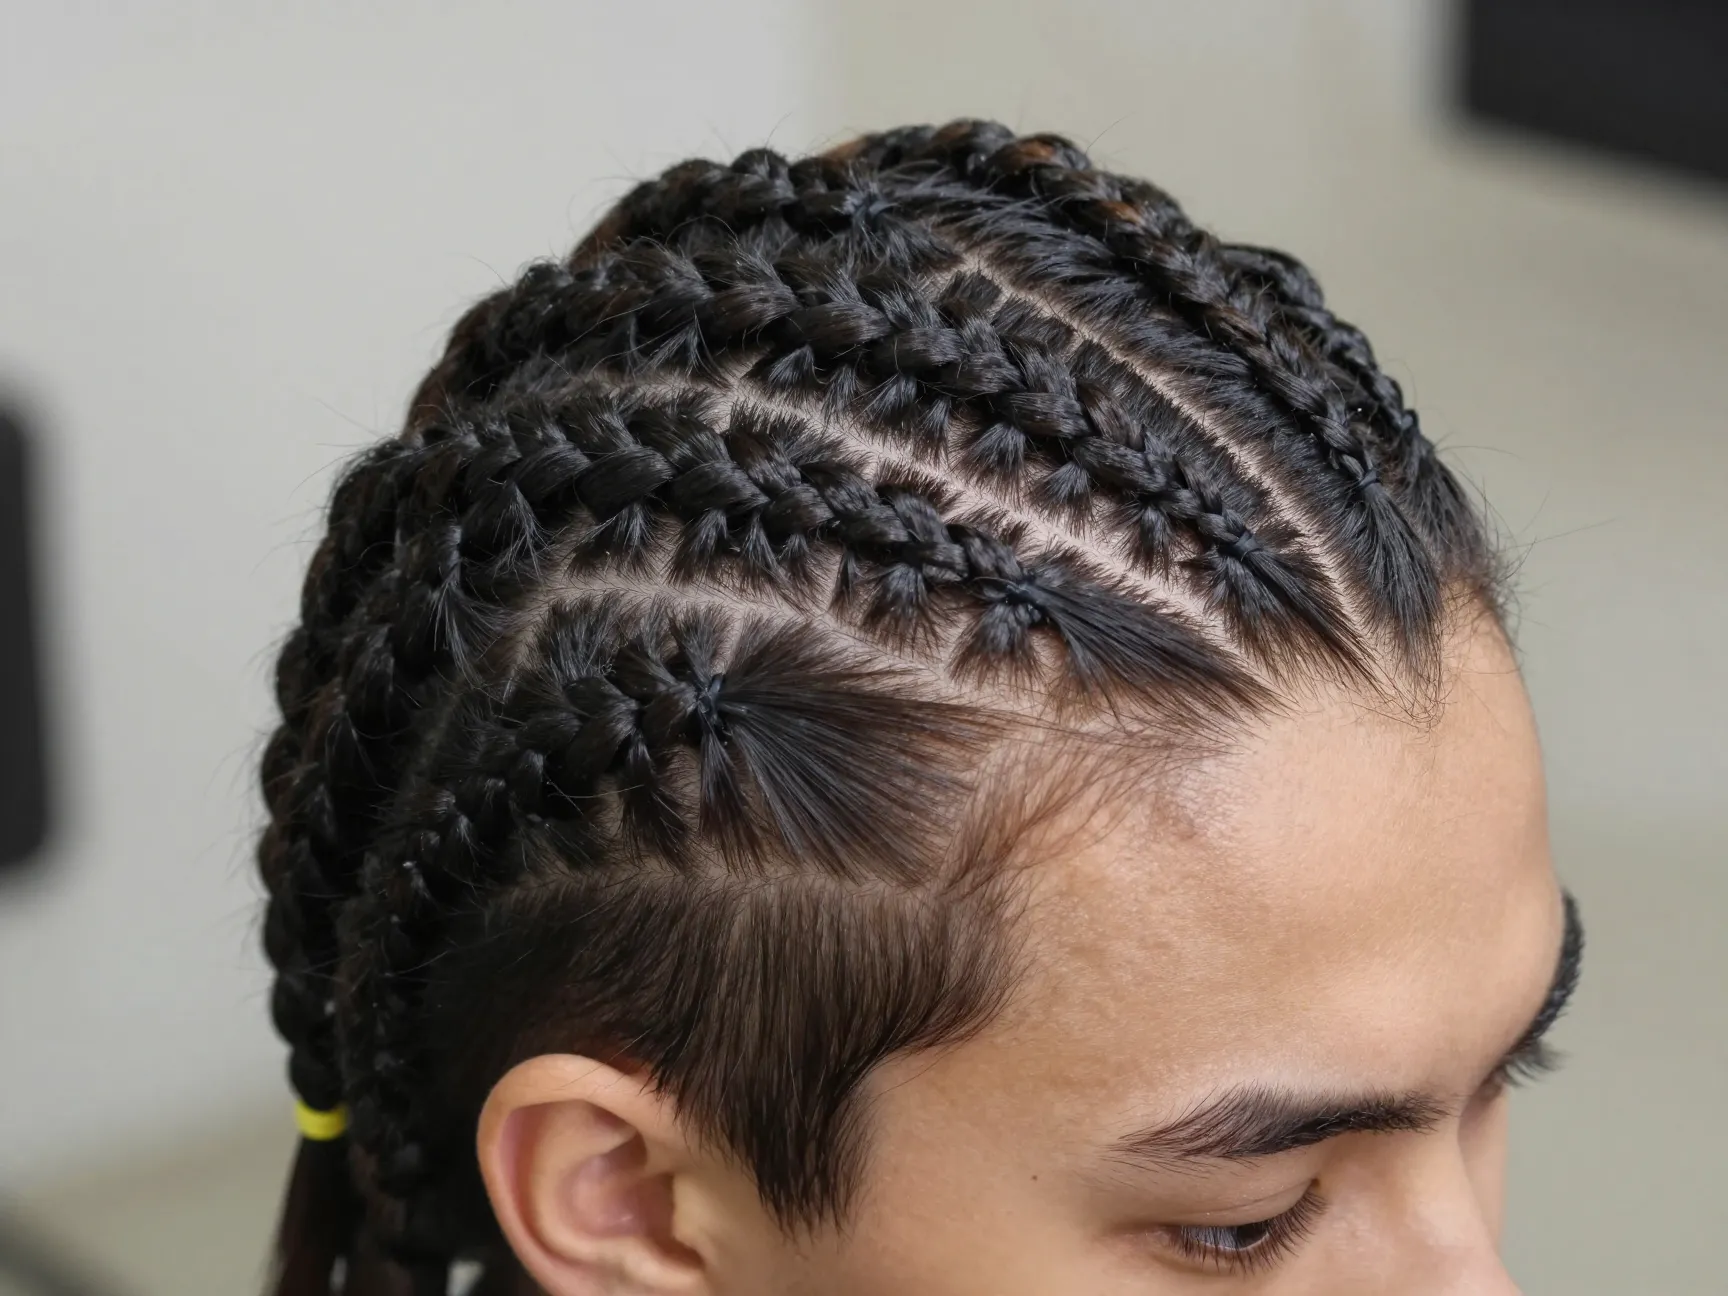
Step 5: Section with Intention
Neat, even sectioning is critical to achieving beautiful, defined cornrow patterns [2]. Use your rat-tail comb to create clean parts before you begin braiding. Uneven sections are immediately visible in the finished style, so take your time here.
8 Simple Cornrow Ideas for When You Want Beauty Without the Fuss
Now for the main event. Each style below is chosen for its simplicity, wearability, and visual impact. They range from truly beginner-friendly to slightly more advanced — but none require professional training to pull off.
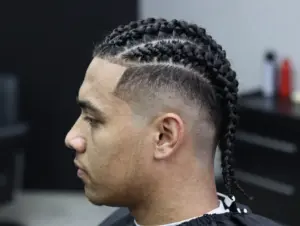
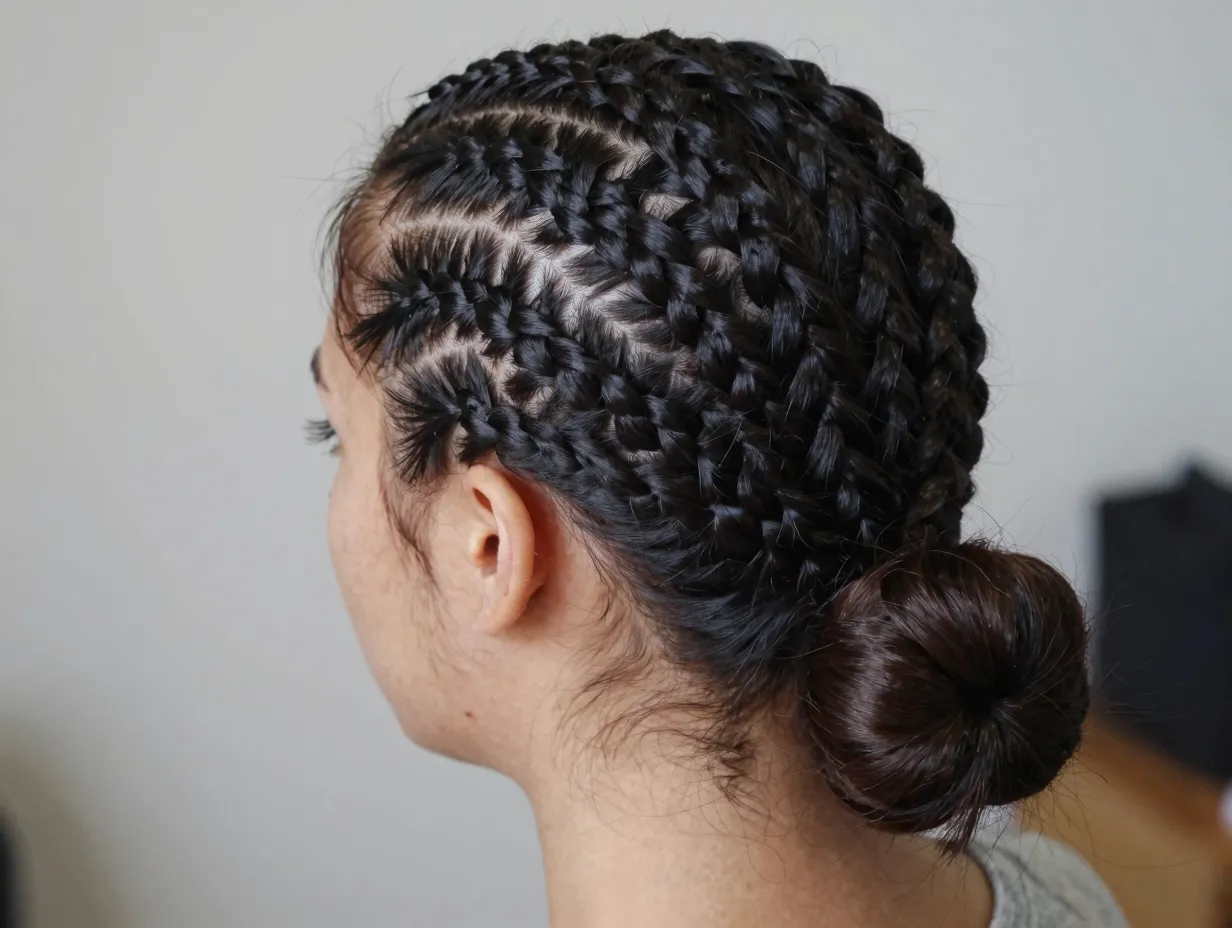
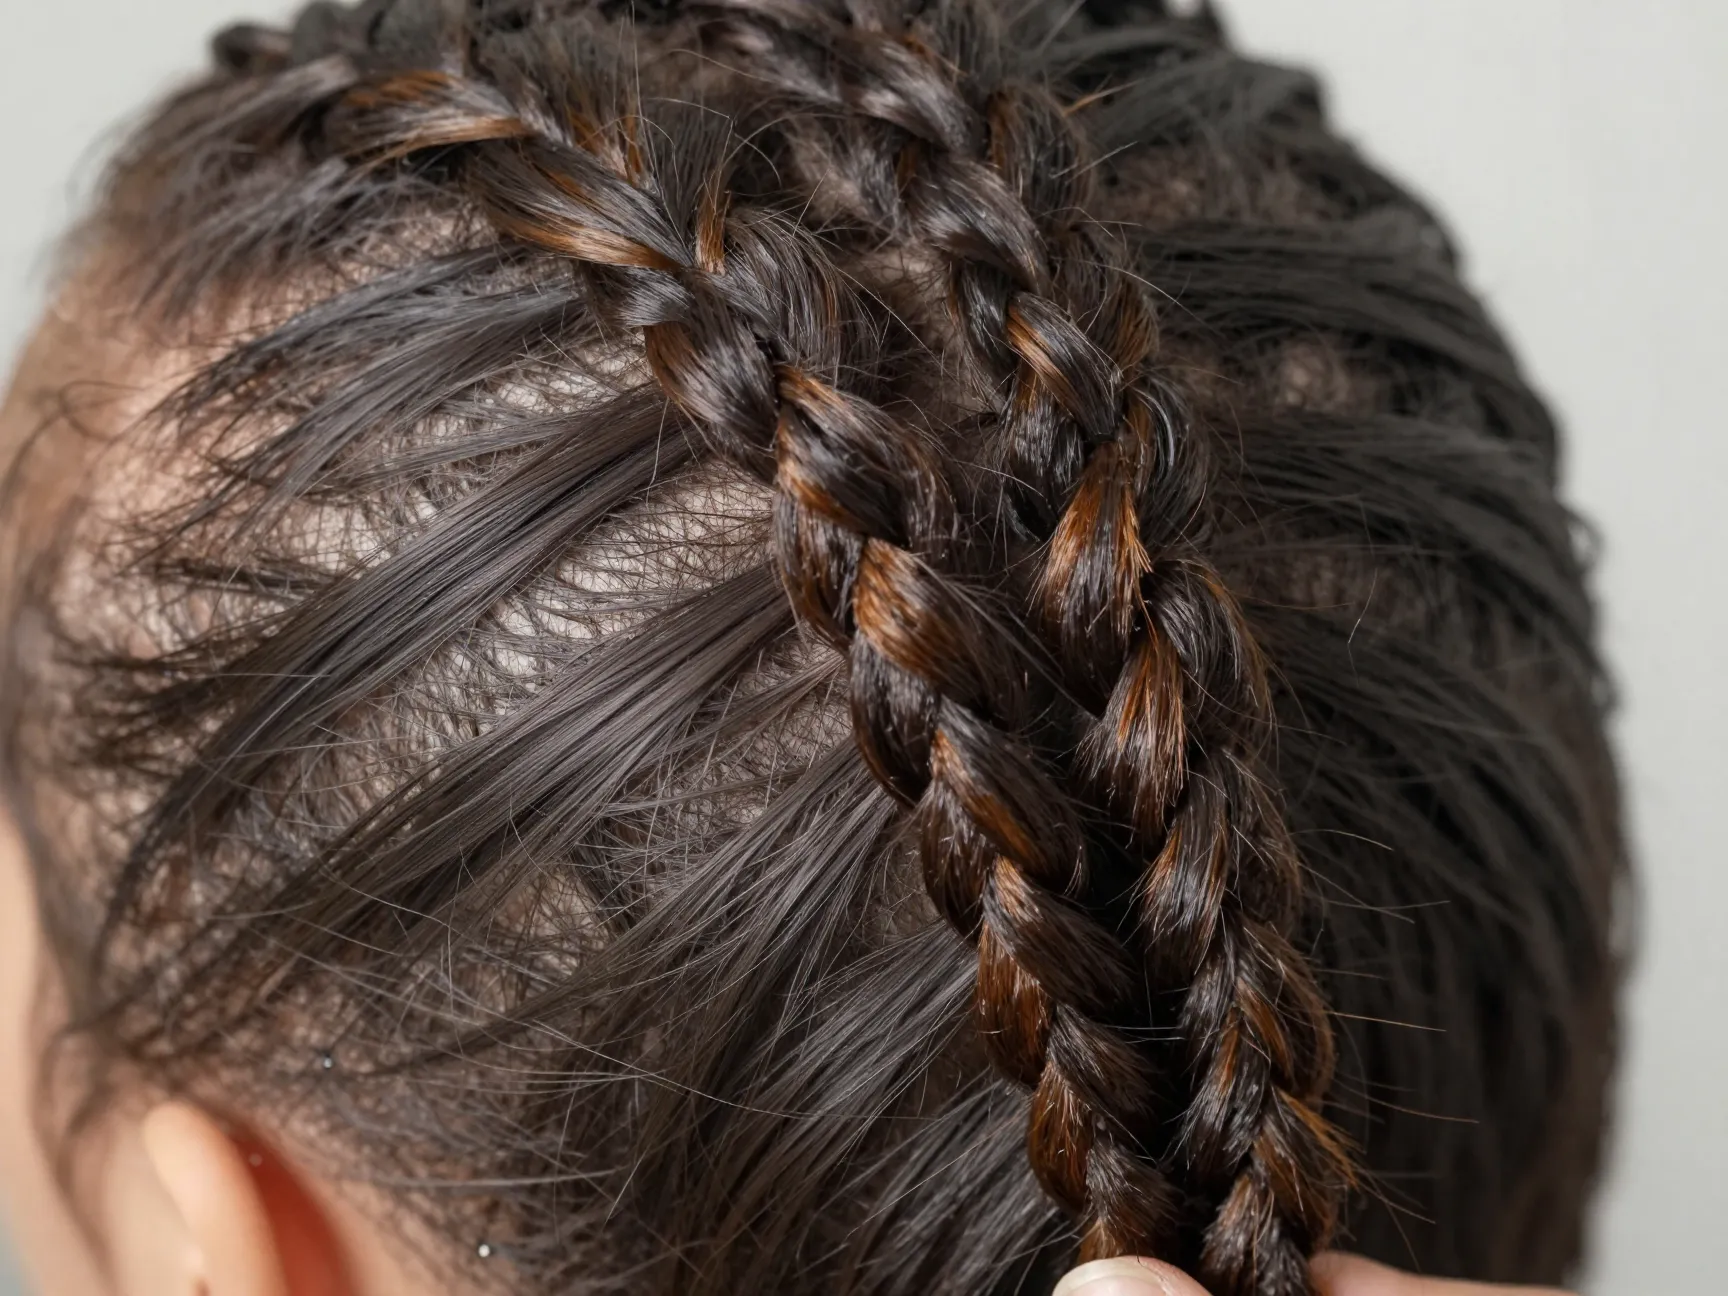
1. 🖤 Classic Straight-Back Cornrows
Best for: Beginners | Time: 45–90 minutes
This is the OG cornrow style — and for good reason. Straight-back cornrows run parallel from the front hairline to the nape of the neck. They are clean, timeless, and work on virtually every face shape.
How to do it:
- Part your hair into even vertical sections from front to back
- Braid each section flat against the scalp, incorporating hair as you go
- Secure ends with small rubber bands
- Apply edge control along the hairline and use a toothbrush to smooth [1]
Style tip: The number of braids changes the entire look. Three to five large braids feel bold and modern. Eight to twelve smaller braids look more intricate and detailed.
2. 💫 Side-Swept Cornrows
Best for: Oval and round face shapes | Time: 60–90 minutes
Instead of running straight back, these cornrows sweep diagonally across the head toward one side. The result is a style that feels more dynamic and fashion-forward than the classic version.
Key difference: Your parts run at an angle rather than straight back. Start each section near the opposite temple and guide the braid toward the ear or nape on the dominant side.
This style pairs beautifully with a low bun or ponytail at the end for added elegance.
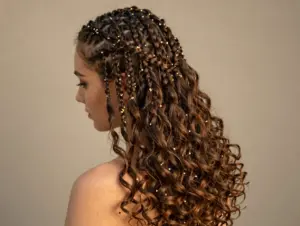
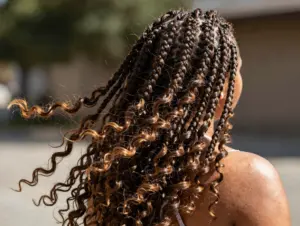
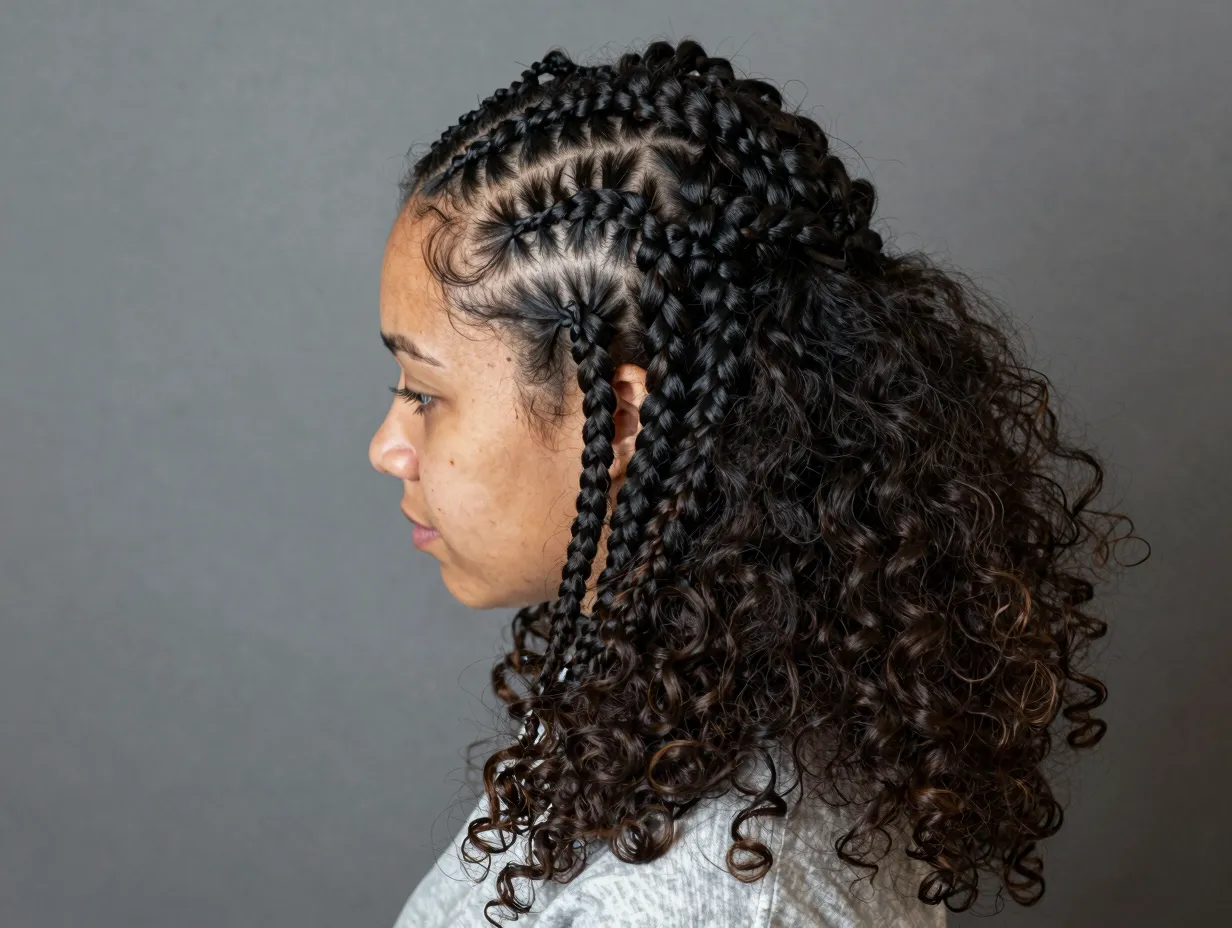
3. 🌟 Feed-In Cornrows
Best for: Those who want a fuller, more seamless look | Time: 90–120 minutes
Feed-in cornrows use additional braiding hair that is gradually added into each braid as you work down the scalp. This technique creates a natural-looking, tapered effect at the roots rather than a sudden thickness from added hair.
Why they are worth the extra effort:
- Look incredibly natural and polished
- Last longer than cornrows without extensions
- Allow for more length and styling options at the ends [7]
Feed-in cornrows are a staple recommendation for natural hair because they add minimal tension at the root while still delivering a full, beautiful style [7].
4. 🌀 Cornrow Updo
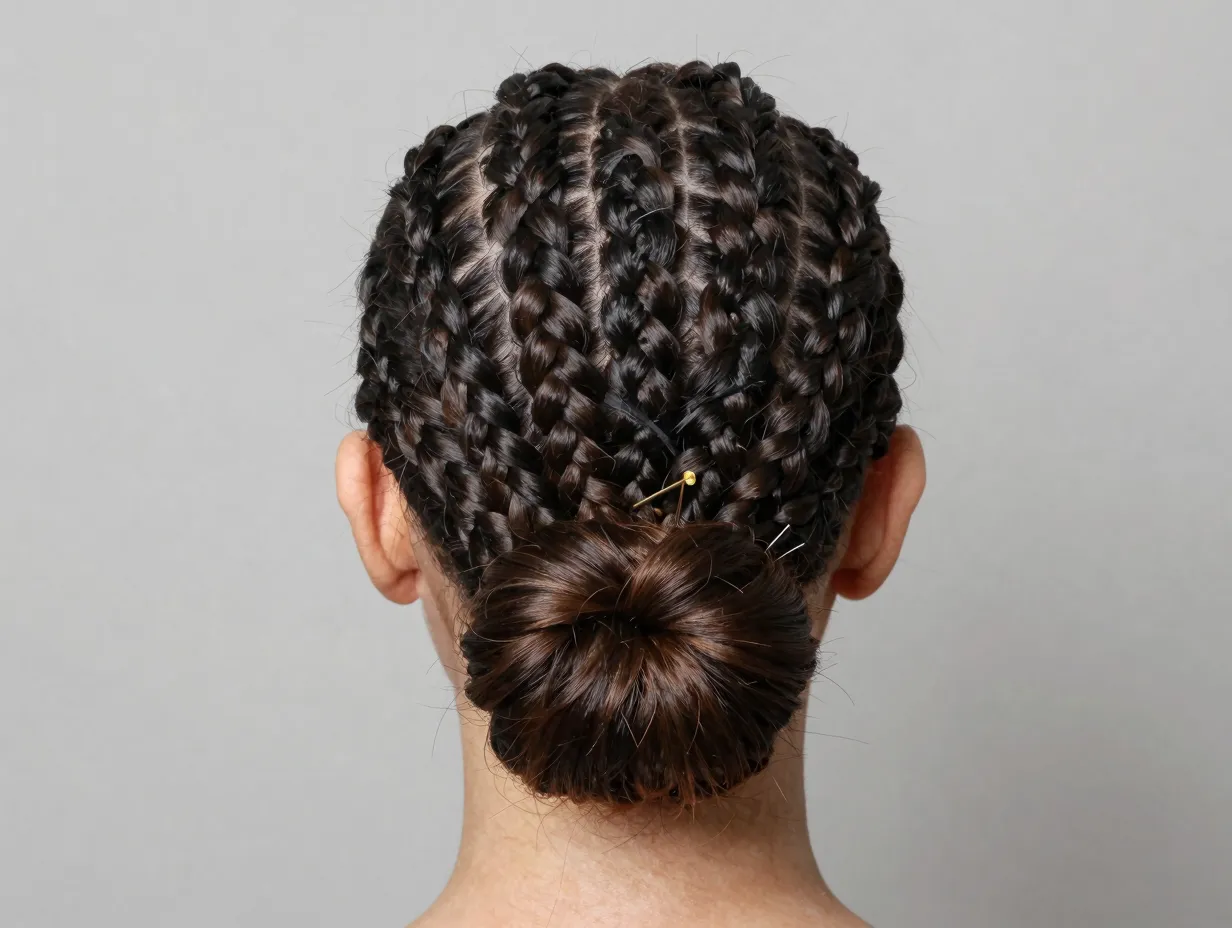
Best for: Special occasions or work environments | Time: 60–90 minutes
Take your straight-back or side-swept cornrows and instead of letting the ends hang free, tuck them into a sleek bun, a twisted updo, or a braided crown at the nape. This instantly elevates the style from casual to polished.
Quick method:
- Complete straight-back cornrows
- Gather all braid ends at the nape
- Coil them into a bun and secure with bobby pins
- Wrap one braid around the base of the bun to hide the pins
This look works brilliantly for job interviews, weddings, or any event where you want to look put-together without spending hours in a salon.
5. 🌸 Half-Up, Half-Down Cornrows
Best for: Casual everyday wear | Time: 45–75 minutes
Cornrow the top half of your hair (from the temples forward) and leave the back half loose in its natural texture. This style is effortlessly cool and gives you the best of both worlds — structure up top and freedom at the back.
Variation: Add two or three cornrows along the hairline as a “crown” while leaving the rest of your hair in a puff or twist-out. This is one of the most popular styles for beginners because it requires fewer braids and less precision [6].
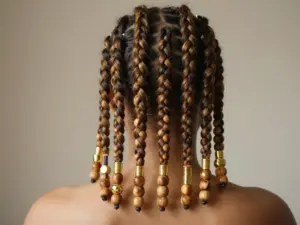
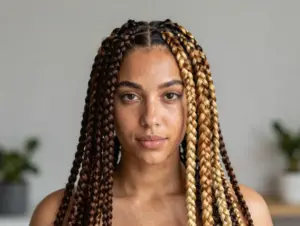
6. 💎 Cornrows with Beads
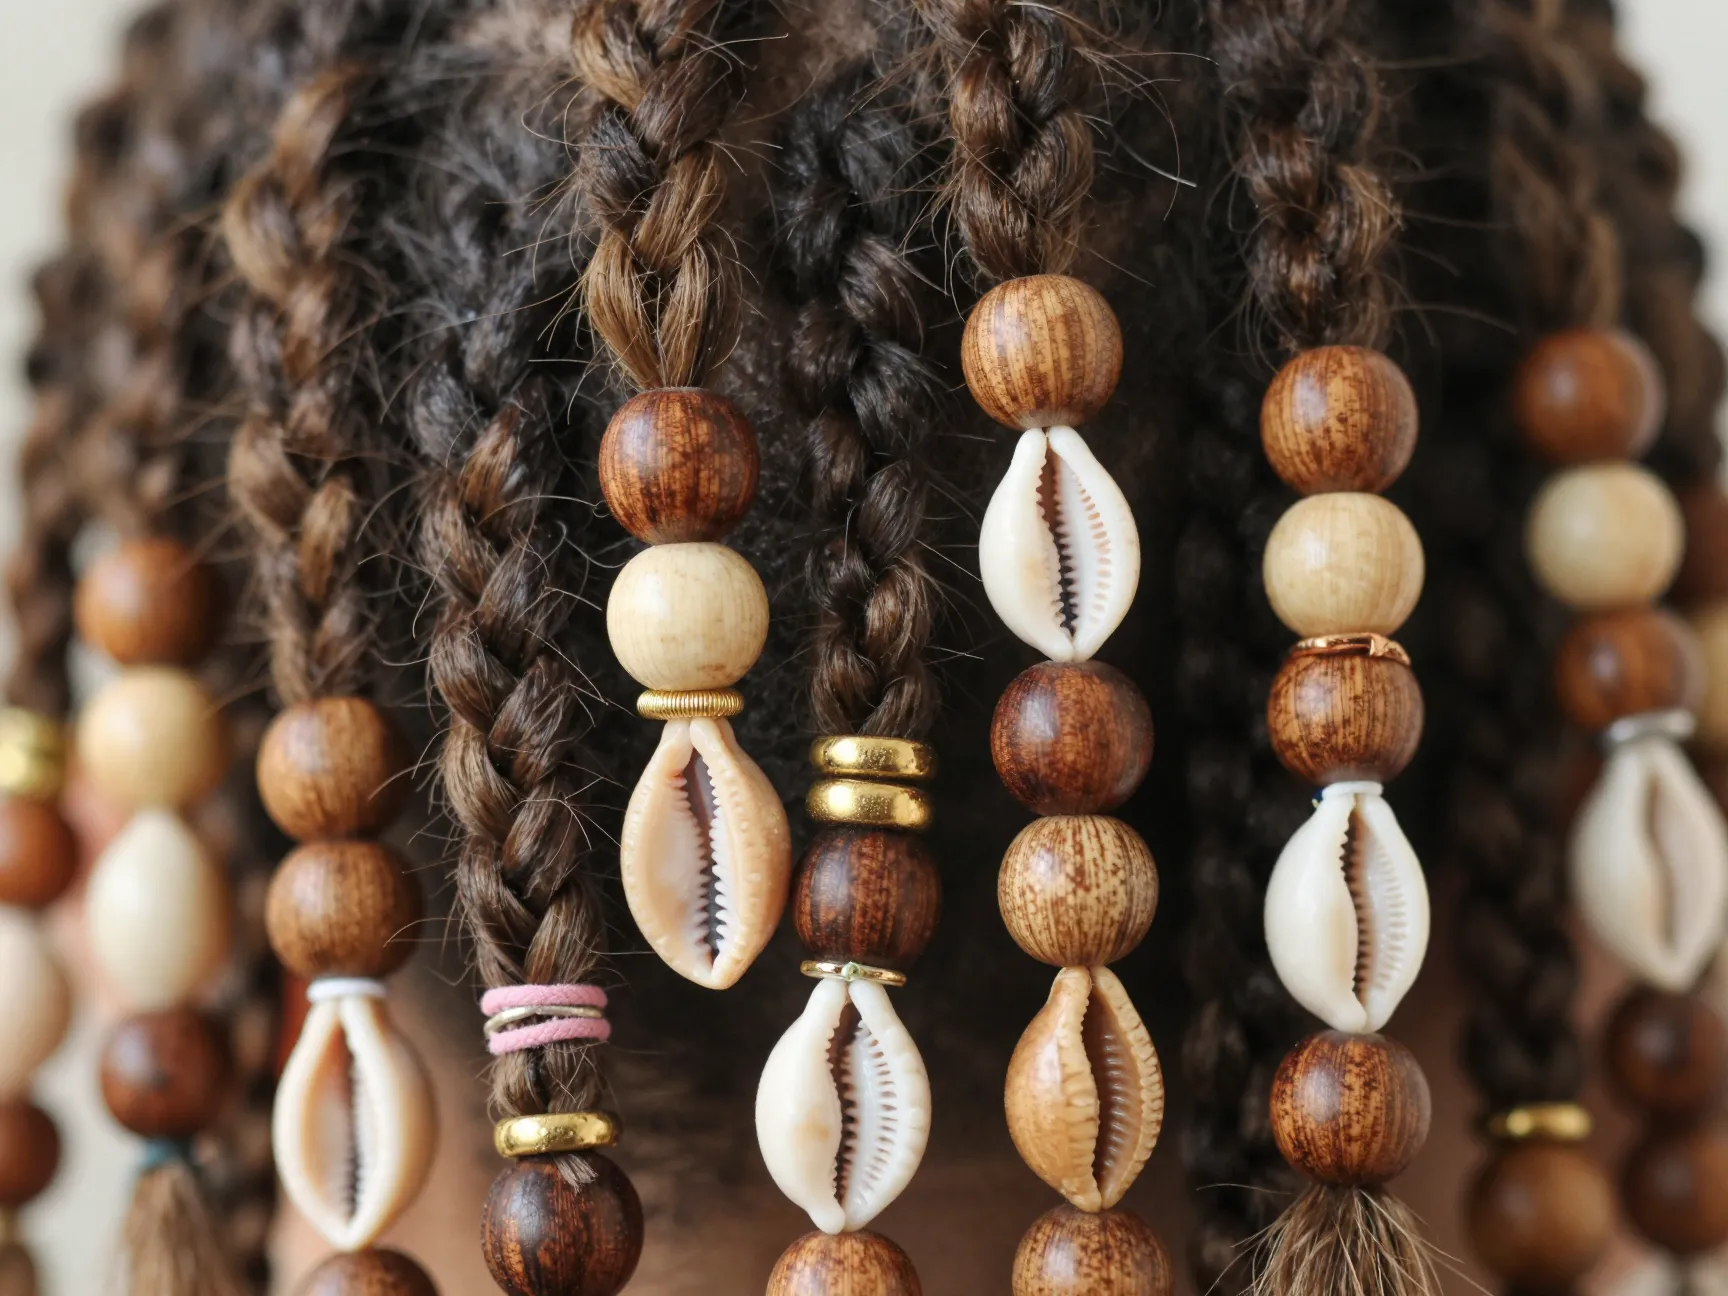
Best for: Adding personality and flair | Time: 60–90 minutes + bead time
Any of the styles above can be elevated simply by adding wooden beads, gold cuffs, or cowrie shells to the ends of your braids. This is a deeply cultural styling tradition and also one of the easiest ways to make a simple style feel intentional and unique.
How to add beads:
- Thread a small rubber band through the bead
- Loop the bead over the braid end
- Secure the rubber band around the braid tip
Mix bead sizes and colors for a more playful look, or stick to gold tones for something more refined.
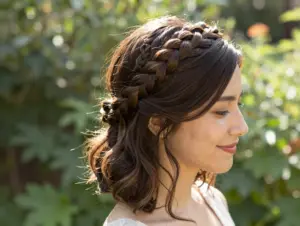
7. 🌿 Halo Cornrow Crown
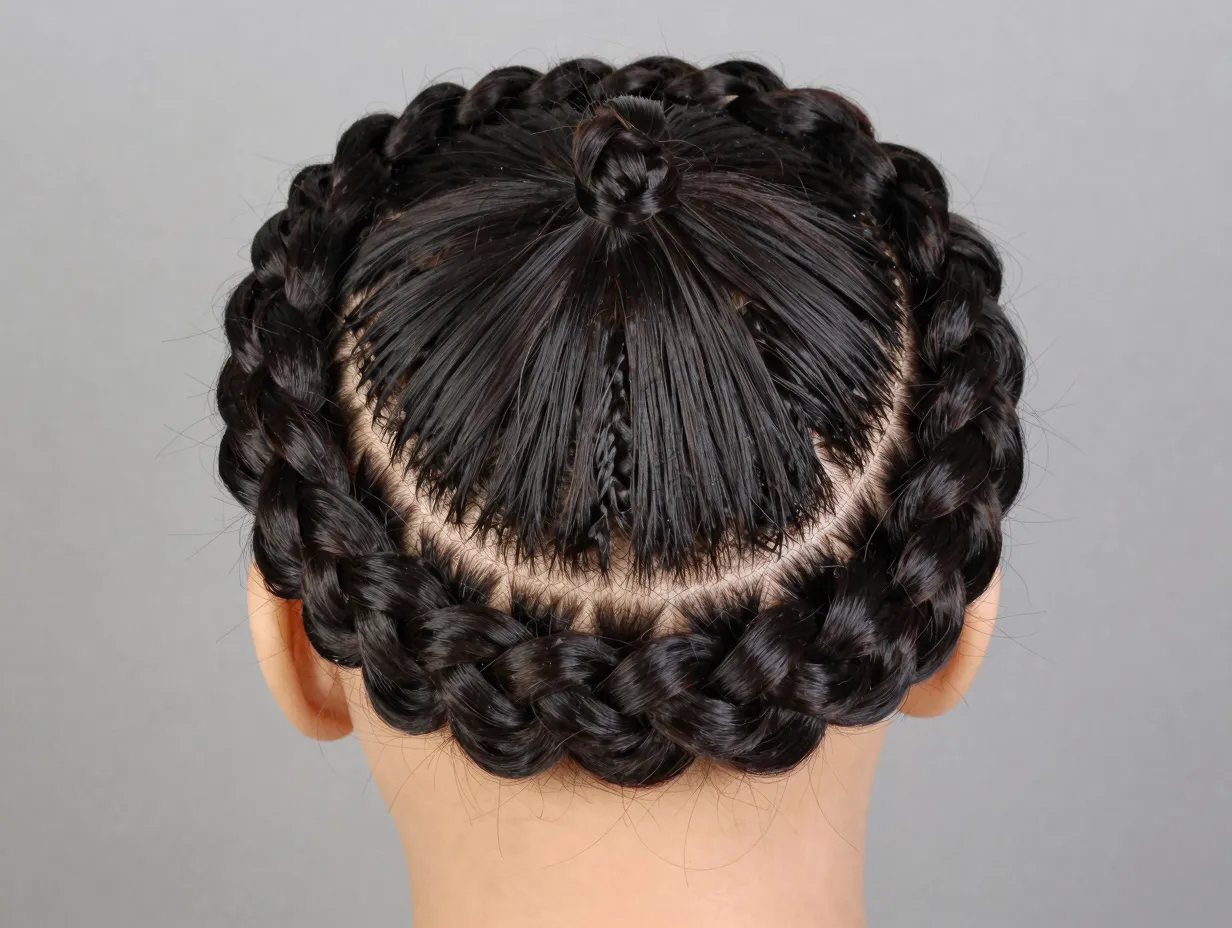
Best for: Round and oval faces | Time: 60–90 minutes
A halo cornrow wraps around the entire perimeter of your head like a crown. It is one of the most striking simple cornrow styles you can wear and requires only one continuous braid (or two braids that meet in the back).
How to achieve it:
- Start at one temple and braid along the hairline
- Continue around the head, incorporating hair as you go
- When you reach the starting point, tuck the end under the braid
- Secure with pins and smooth edges with gel [1]
This style is particularly stunning on natural hair because the texture adds visual interest to the halo shape.
8. ⚡ Geometric or Zigzag Parts

Best for: Those who want something eye-catching | Time: 90–120 minutes
This is the most advanced style on our list, but it is still very achievable at home with patience. Instead of straight parts, you create zigzag, curved, or diamond-shaped sections before braiding. The parts themselves become part of the design.
Tips for success:
- Use a rat-tail comb for maximum precision
- Work slowly — the part is the art
- Keep a spray bottle of water nearby to re-dampen hair as you work
- Use a mirror to check symmetry as you go [5]
Beginner-friendly video tutorials walk through each step of this process in detail, making it much more accessible than it looks [5].
Maintaining Your Cornrows: Keep Them Fresh Longer
Getting the style is only half the battle. Here is how to make your cornrows last:
Daily Care Routine
| Task | Frequency | Product |
|---|---|---|
| Moisturize scalp | Daily | Light oil (jojoba, castor) |
| Re-lay edges | As needed | Edge control gel + toothbrush |
| Protect at night | Every night | Satin bonnet or pillowcase |
| Refresh braids | Weekly | Light braid spray |
Moisturize your scalp and hair regularly after cornrows are installed [2]. Dry scalp under braids leads to itching, flaking, and potential breakage. A light oil applied directly to the scalp with an applicator bottle is the most effective method.
Signs It Is Time to Take Them Down
- ⚠️ Significant new growth causing tension at the roots
- ⚠️ Frizz that cannot be smoothed down
- ⚠️ Scalp irritation or soreness
- ⚠️ Braids older than 6–8 weeks
Taking cornrows down gently (with a detangling spray and patience) is just as important as the install. Rushing the takedown causes breakage.
Common Mistakes to Avoid
Even with the best intentions, a few common errors can derail your cornrow results. Here is what to watch for:
- Braiding dirty hair — Product buildup makes hair slippery and harder to grip [2]
- Skipping the detangle step — Knots in the hair create lumpy, uneven braids [2]
- Braiding too tightly — Tension at the root causes traction alopecia over time
- Uneven sections — Take your time with the rat-tail comb [2]
- Ignoring edges — Edge control and a toothbrush are non-negotiable for a polished finish [1]
- No nighttime protection — Without a satin bonnet, frizz sets in within days
Frequently Asked Questions
Q: How long do simple cornrows last?
Depending on your hair type and how well you maintain them, simple cornrows typically last 2 to 6 weeks. Feed-in styles with extensions tend to last on the longer end of that range.
Q: Can I do cornrows on my own hair without extensions?
Absolutely. Styles 1 through 5 on our list work beautifully on natural hair without any added hair. Extensions simply give you more length and fullness at the ends.
Q: Do cornrows damage your hair?
When installed correctly (not too tight) and maintained properly, cornrows are a protective style that actually supports hair health and growth [1]. The key is avoiding excessive tension and keeping your scalp moisturized [2].
Q: How do I learn if I am a complete beginner?
Start with classic straight-back cornrows and watch step-by-step beginner tutorials that guide you through each part of the process [5]. Practice on a mannequin head before working on your own hair if possible.
Conclusion: Your Next Steps to Effortless Cornrow Style
The beauty of these 8 Simple Cornrow Ideas for When You Want Beauty Without the Fuss is that they meet you exactly where you are — whether you are a complete beginner trying your first straight-back braid or someone ready to experiment with geometric parts and beaded ends. Every single style on this list is achievable at home with the right prep, the right tools, and a little patience.
Here is your action plan:
- ✅ Wash, condition, and detangle your hair before you start [2]
- ✅ Gather your tools: rat-tail comb, edge control, toothbrush, and light oil [1]
- ✅ Choose one style from the eight above that matches your skill level
- ✅ Watch a beginner tutorial to see the technique in motion before you start [5]
- ✅ Set up a daily moisture routine to keep your scalp healthy while your braids are in [2]
- ✅ Protect your hair at night with a satin bonnet every single time
Cornrows have endured for thousands of years because they work. They protect your hair, celebrate your culture, and look undeniably beautiful — all without demanding hours of daily maintenance. Pick your style, prep your hair, and braid with confidence. 🖤
References
[1] Watch – https://www.youtube.com/watch?v=7ahJeBgFd8M
[2] lemon8-app – https://www.lemon8-app.com/@nexthoustonbraids/7526383749781668407?region=us
[3] Watch – https://www.youtube.com/watch?v=DTwkahlWvzw
[4] Watch – https://www.youtube.com/watch?v=qLWJNoXqZX0
[5] Watch – https://www.youtube.com/watch?v=afHq1tNvi2Y
[6] lemon8-app – https://www.lemon8-app.com/pfrmdas/7268315090376770053?region=us
[7] Top 5 Easy Showy Protective Hairstyles For Natural Hair – https://therighthairstyles.com/top-5-easy-showy-protective-hairstyles-for-natural-hair/