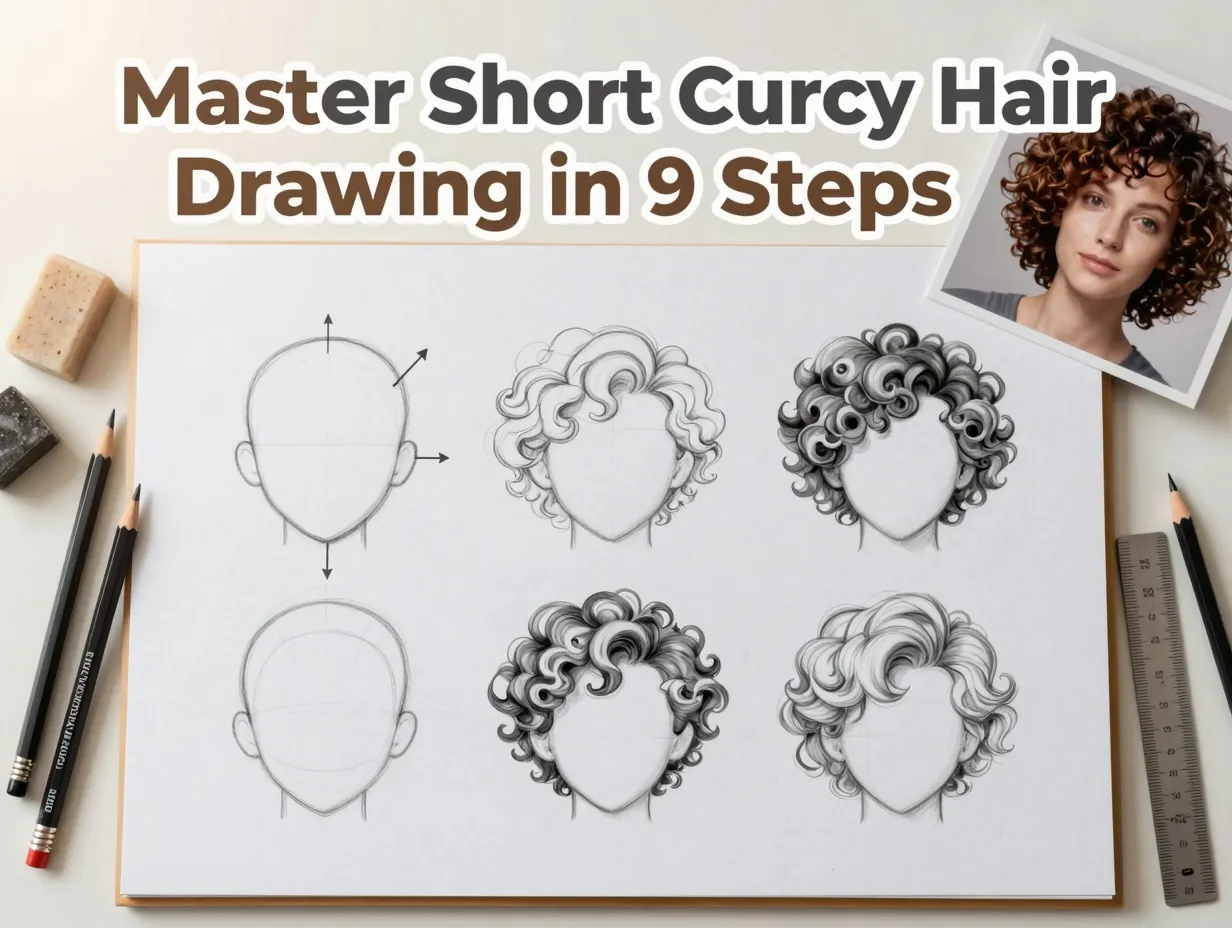
9 Steps to Master a Short Curly Hair Drawing (Easy Tutorial)
Short curly hair is one of the most searched drawing challenges among beginner and intermediate artists — and yet most tutorials skip the foundational steps that actually make curls look believable. Whether you’re sketching character portraits, practicing figure drawing, or building your illustration portfolio, mastering short curly hair is a skill that pays dividends across every style.
This guide walks you through 9 Steps to Master a Short Curly Hair Drawing (Easy Tutorial) in a clear, logical sequence. Each step builds on the last, so by the time you reach the final touches, your curls will have depth, movement, and texture that looks natural rather than stiff. I’ve pulled together insights from leading art tutorial resources [3][4] and proven video-based techniques [1][2] to give you the most complete roadmap available in 2026.
Key Takeaways 🎯
- Start with structure first — boundary lines and head shape before any curl detail
- Flow direction is everything — curls must follow a consistent movement path to look natural
- Layering is the secret — build shading and texture in multiple passes, not all at once
- Flyaway hairs add realism — small stray strands transform flat drawings into lifelike portraits
- Common mistakes are avoidable — knowing the “don’ts” before you start saves hours of frustration [1]
Why Short Curly Hair Is Uniquely Challenging to Draw
Straight hair follows gravity in predictable lines. Curly hair defies it. Each strand spirals, overlaps, and catches light differently depending on its curl pattern, density, and length. Short curly hair compounds this challenge because there’s less length to “hide” mistakes — every curl is visible and close to the scalp.
💬 “The biggest mistake artists make with curly hair is drawing individual curls first. You need the big picture before the details.” — A principle echoed across every expert tutorial reviewed for this guide [3]
Many artists also struggle with making curls look three-dimensional rather than flat. The solution lies in understanding how light, shadow, and layering interact with the unique geometry of a curl cluster. Once you grasp that, everything else clicks into place.
Tools You’ll Need Before Starting
Before diving into the 9 Steps to Master a Short Curly Hair Drawing (Easy Tutorial), gather these supplies:
| Tool | Purpose |
|---|---|
| HB pencil | Light construction lines and outlines |
| 2B–4B pencils | Mid-tone shading and curl definition |
| 6B pencil | Deep shadows and darkest areas |
| Kneaded eraser | Lifting highlights without damaging paper |
| Blending stump or cotton bud | Smooth shadow transitions [1] |
| Fine-tip pen (optional) | Inking final linework |
| Smooth drawing paper | Allows clean pencil layering |
Having the right tools ready means you won’t break your creative flow mid-step.
The Complete Guide: 9 Steps to Master a Short Curly Hair Drawing (Easy Tutorial)
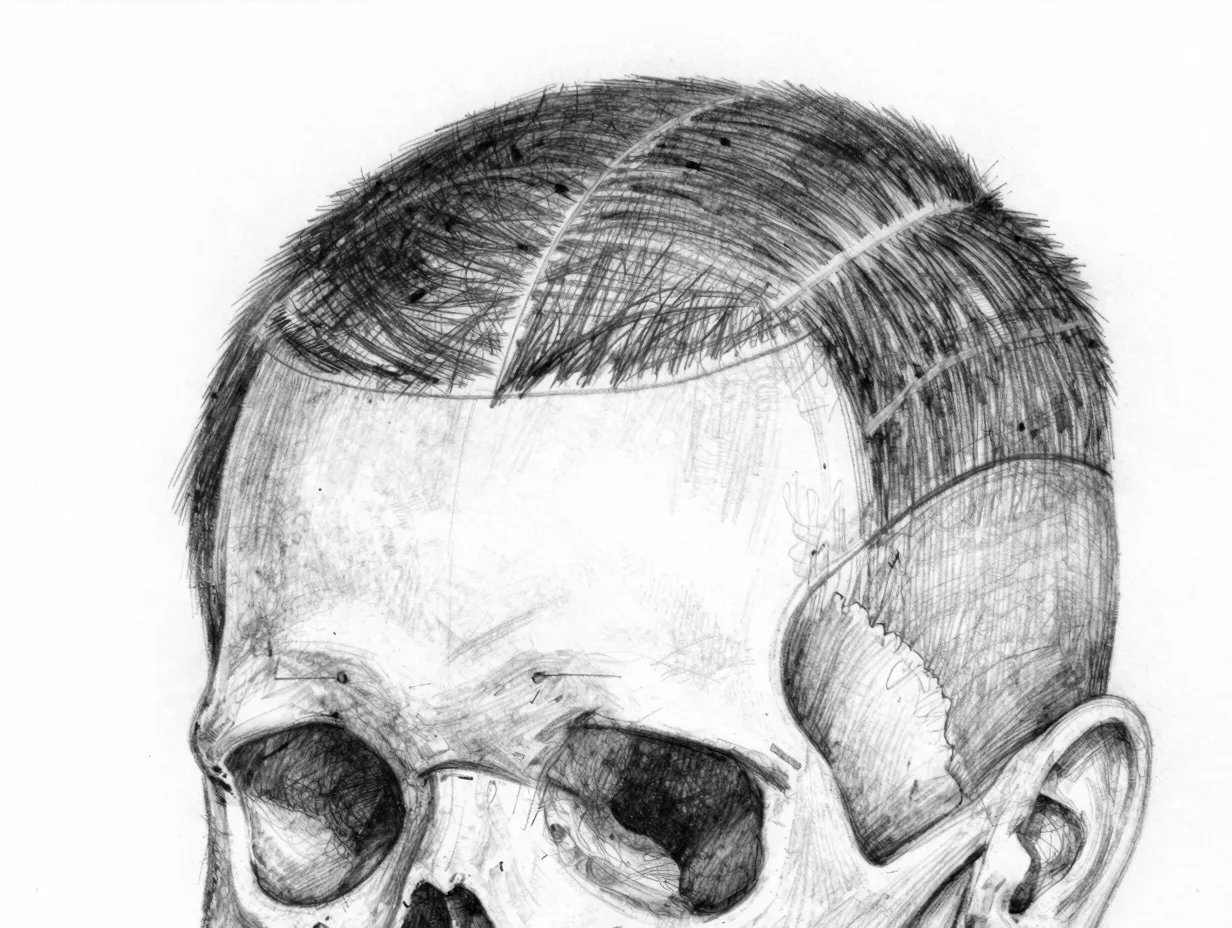
1. Sketch the Head Shape and Hairline
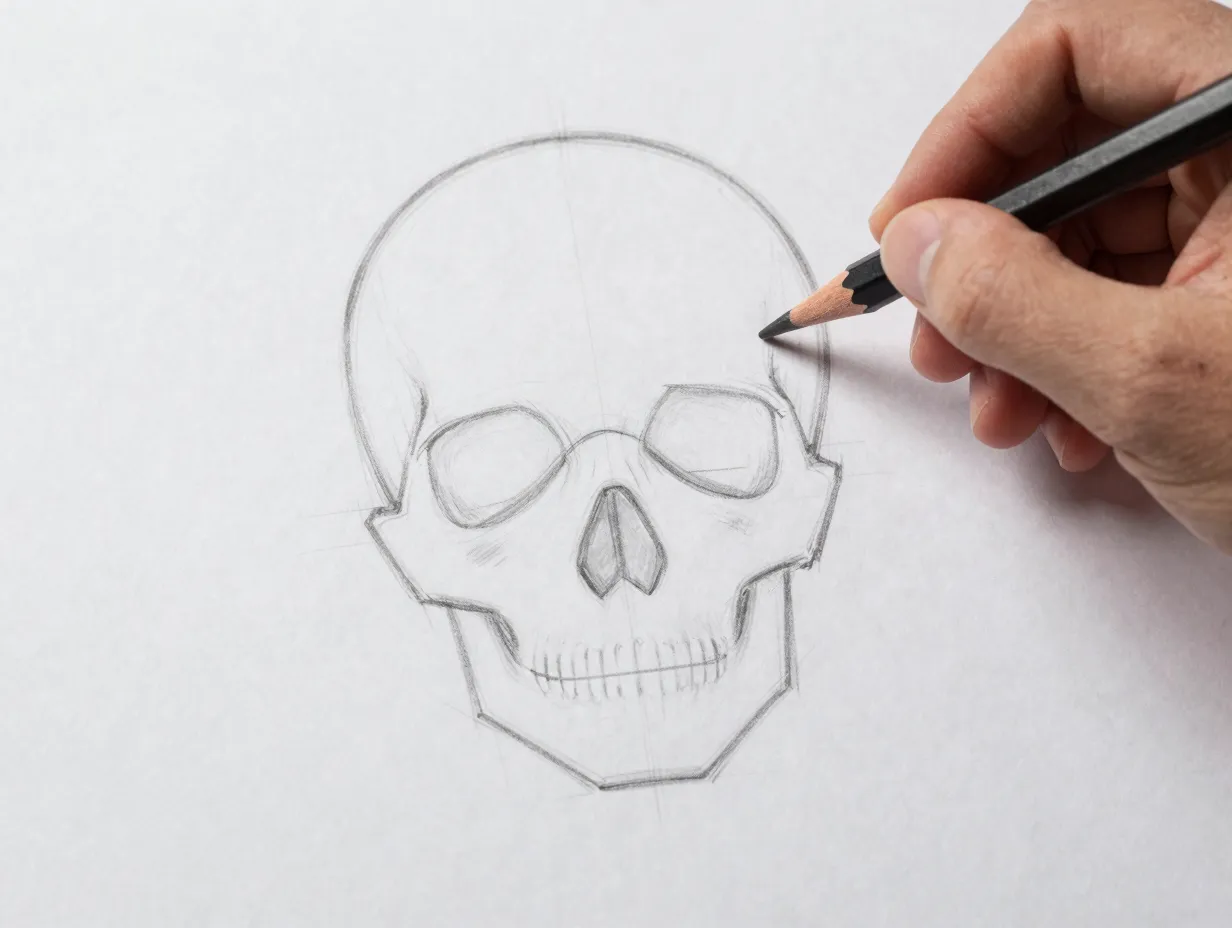
Every great hair drawing starts with the head, not the hair. Lightly sketch an oval or egg shape for the skull. Then define the hairline — the boundary where hair meets skin.
For short curly hair, the hairline matters more than it does for long styles because the hair doesn’t extend far from the head. Common hairline shapes include:
- Rounded (most common)
- M-shaped or widow’s peak
- Receding or high forehead
Use your lightest pencil (HB) and keep these lines feather-light. You’ll erase most of them later. Getting the head proportions right at this stage prevents distortion in every subsequent step [4].
Pro tip: Mark the center line of the face vertically and the eye line horizontally. These reference points help you position the hair correctly relative to facial features.
2. Establish Boundary Lines for the Hair Volume
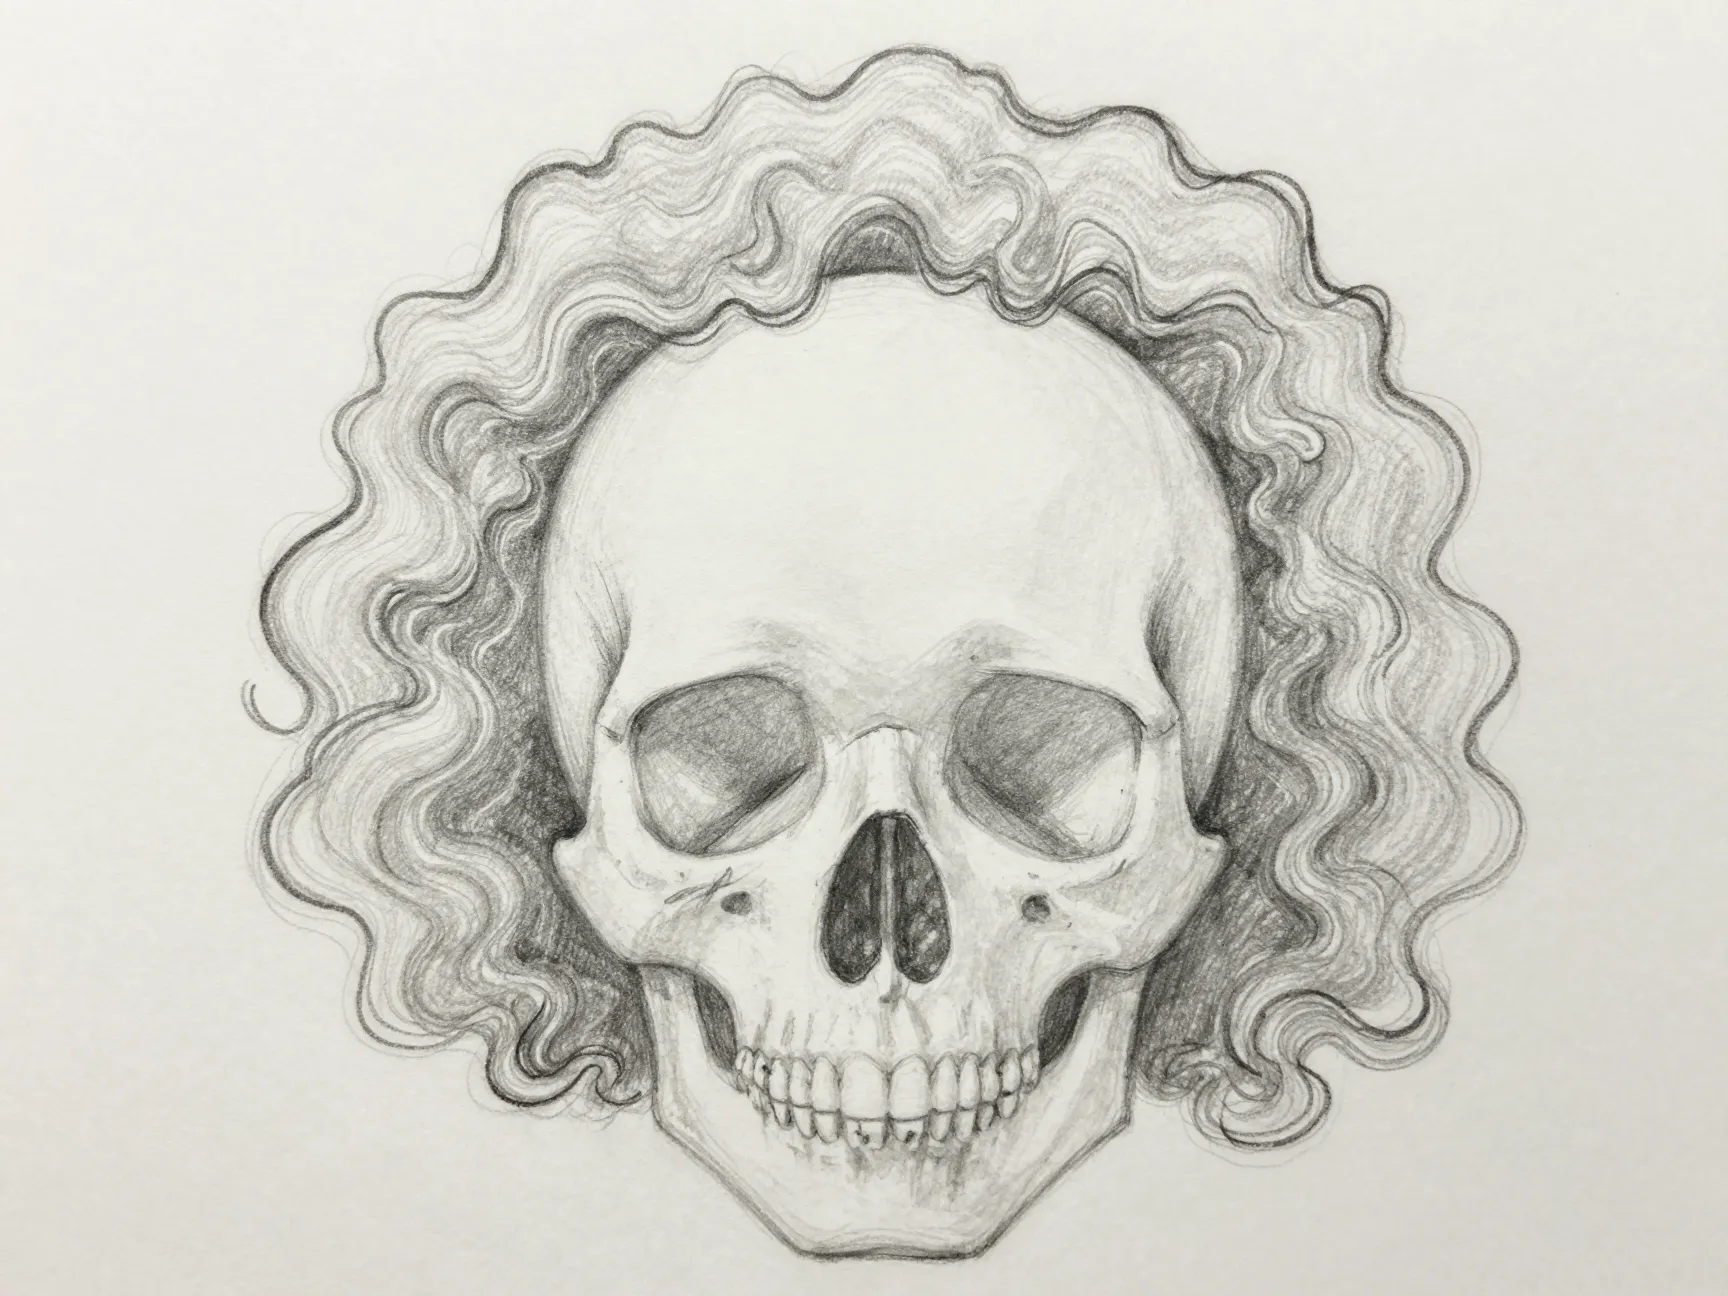
This is the step most beginners skip — and it’s the reason their curly hair drawings look flat. Before drawing a single curl, sketch the outer boundary of the entire hair mass.
Short curly hair sits close to the head but has volume. Draw a loose, slightly bumpy silhouette around the skull that represents the full extent of where the hair will reach. Think of it as the “hair helmet” shape.
Key considerations for this boundary:
- Short natural curls typically add 1–2 cm of volume above the scalp
- The boundary should be irregular, not perfectly smooth — curls create a naturally textured edge
- The silhouette shape hints at the character’s curl pattern (tight coils vs. loose waves)
This boundary line acts as your guardrail for all the curl work that follows [3].
3. Identify the Flow Direction of the Curls
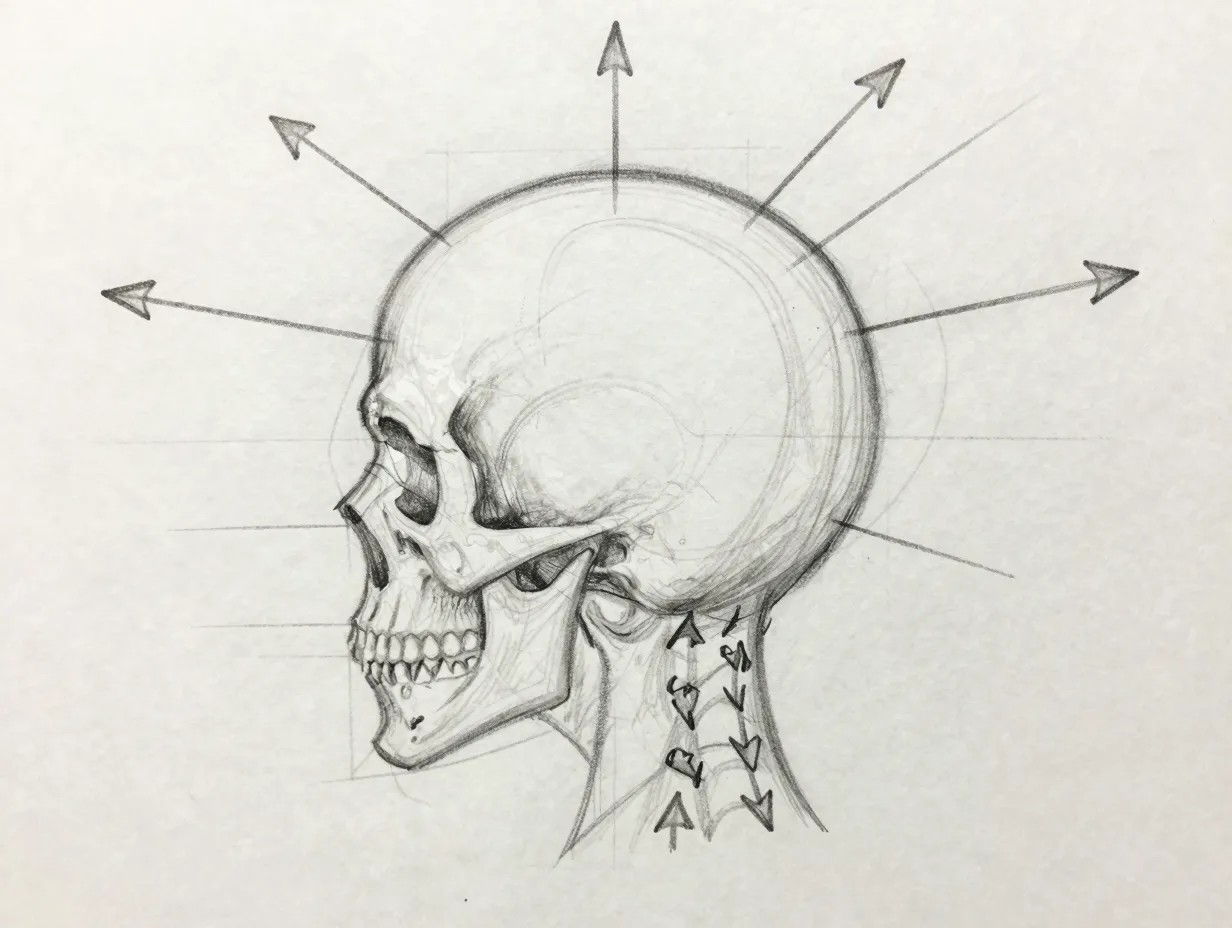
Before adding any curl shapes, decide on the flow direction — the general path that the hair moves across the head. This is the single most important decision you’ll make in this entire tutorial [2].
Flow direction for short curly hair typically radiates outward from a crown point at the top of the head. Think of it like spokes on a wheel, with the crown at the center.
Draw light directional arrows or guide lines showing:
- The crown point (where flow originates)
- The direction curls travel toward the temples
- The direction curls travel toward the nape of the neck
- Any side-swept or asymmetrical flow choices
💡 Finding the flow first and then applying shading and highlighting techniques creates a cohesive, believable result that no amount of detail work can fix after the fact. [2]
These flow lines don’t appear in the final drawing — they’re your invisible scaffolding.
4. Divide the Hair Into Front and Back Sections
Now divide the hair mass into two primary zones: the front section (what faces the viewer) and the back section (what recedes from view). This technique is borrowed from professional illustration workflows [3].
Why does this matter? Because these two zones receive different levels of detail and shading:
- Front section: More defined curls, higher contrast, sharper edges
- Back section: Softer edges, less detail, darker overall tone
Lightly sketch a dividing line that follows the natural contour of the head. This line will later become a subtle tonal shift that creates the illusion of depth and roundness.
This front-back division is what makes curly hair look like it wraps around a three-dimensional head rather than sitting on a flat surface.
5. Sketch the Basic Curl Shapes
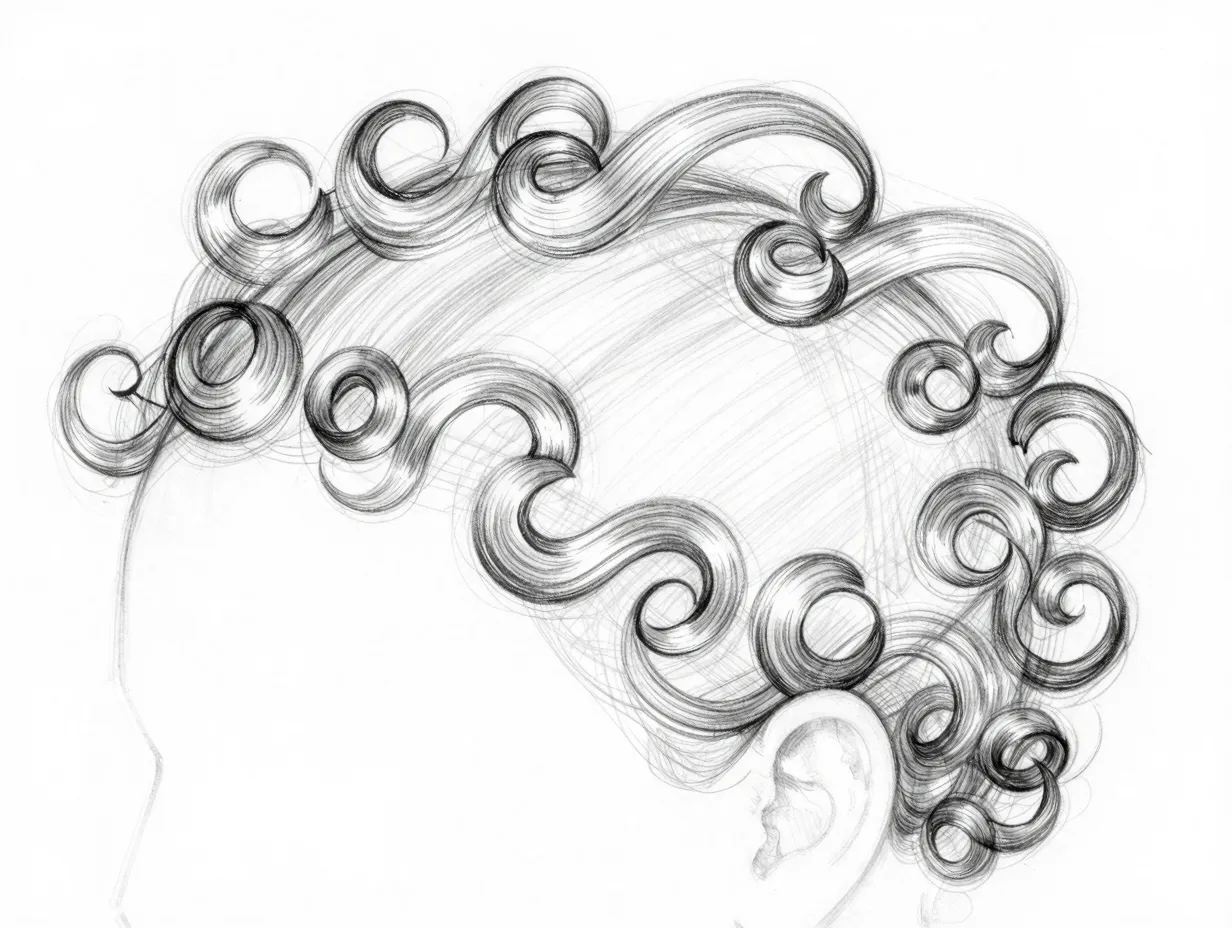
Now — and only now — do you start drawing actual curls. Using your HB or 2B pencil, sketch loose S-curves and C-curves within the boundary you established in Step 2, following the flow direction from Step 3.
Guidelines for sketching curl shapes:
- Vary the size of curls — not all curls are identical
- Overlap curls — some should tuck behind others to create depth
- Follow the flow — every curl should feel like it’s moving in the direction you established
- Keep it loose — these are rough shapes, not final linework
For short curly hair specifically, focus on tighter curl clusters near the scalp that loosen slightly at the tips. Craftsy’s guidance on length variation is useful here — varying curl length within the same drawing prevents a monotonous, uniform look [4].
A common mistake at this stage is making every curl the same size and spacing. Real curly hair is beautifully chaotic — embrace that.
6. Add the First Layer of Shading
With your curl shapes in place, it’s time to build tonal depth. This is where your drawing transforms from a flat sketch into something with real dimension.
Using a 2B pencil, apply your first shading layer following these principles:
Shadow placement rules for curly hair:
| Area | Shading Level | Reasoning |
|---|---|---|
| Back section of hair | Darkest | Farthest from light source |
| Underside of each curl | Medium-dark | Curl blocks light from below |
| Areas between curl clusters | Dark | Depth between overlapping strands |
| Top surfaces of curls | Light or none | Catches direct light |
Use hatching or circular strokes that follow the curl direction rather than shading in random directions. This reinforces the curl shape even within the shadow areas [3].
Don’t rush this step. A well-built first shading layer makes every subsequent step easier and more effective.
7. Blend and Refine the Shadows
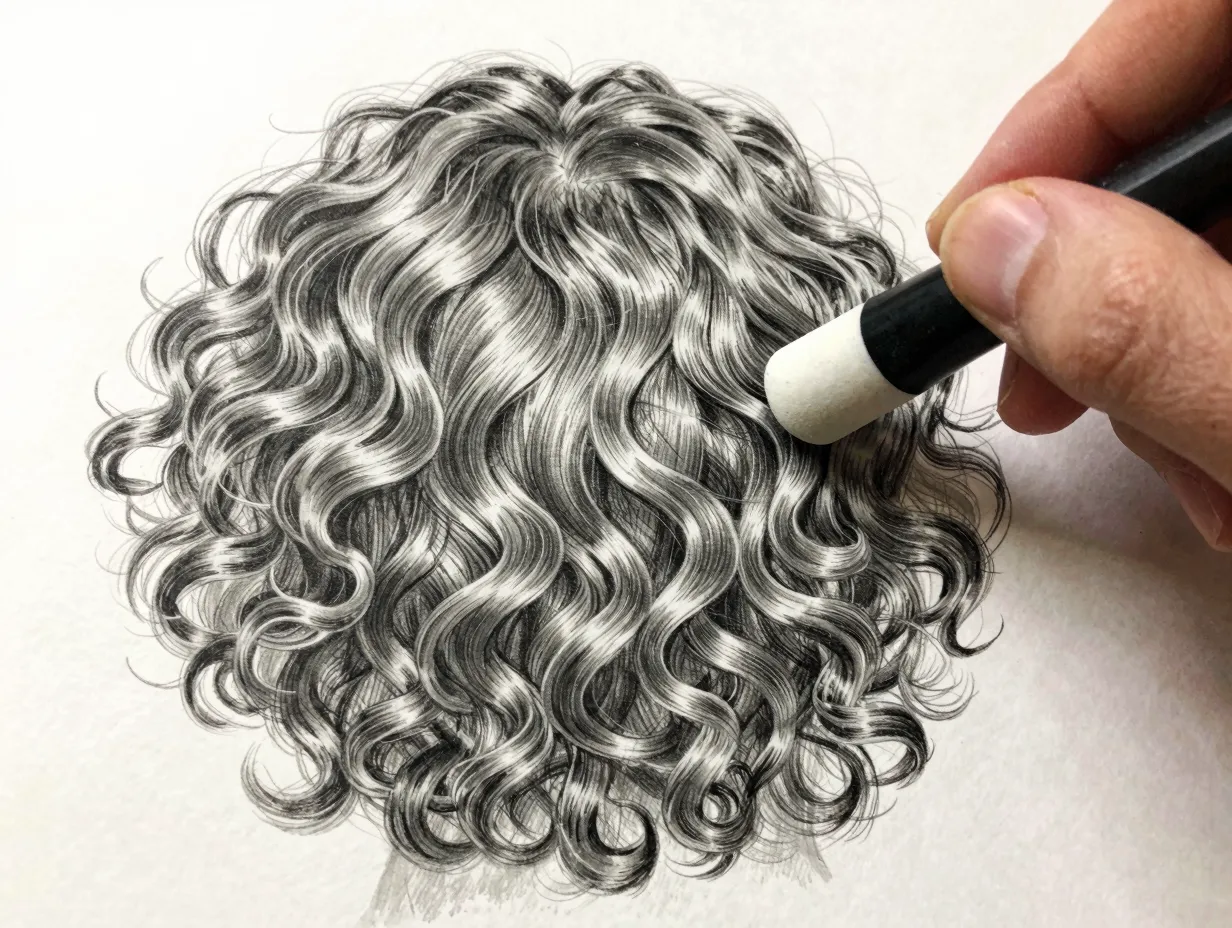
Once your first shading layer is down, use a blending stump or cotton bud to smooth the transitions between tones [1]. This step is what separates amateur drawings from polished ones.
Blending technique for curly hair:
- Work from light areas into dark areas (not the reverse)
- Use small circular motions within each curl cluster
- Blend along the curl direction, not across it
- Leave the darkest shadow areas relatively unblended for maximum contrast
After blending, your pencil marks may look too smooth. That’s fine — you’ll add texture back in Step 8. The goal here is to establish a clean tonal foundation without harsh lines between values.
Pencil pressure variation is critical throughout this step [1]. Light pressure for mid-tones, heavier pressure for the deepest shadows near the scalp and between curl clusters.
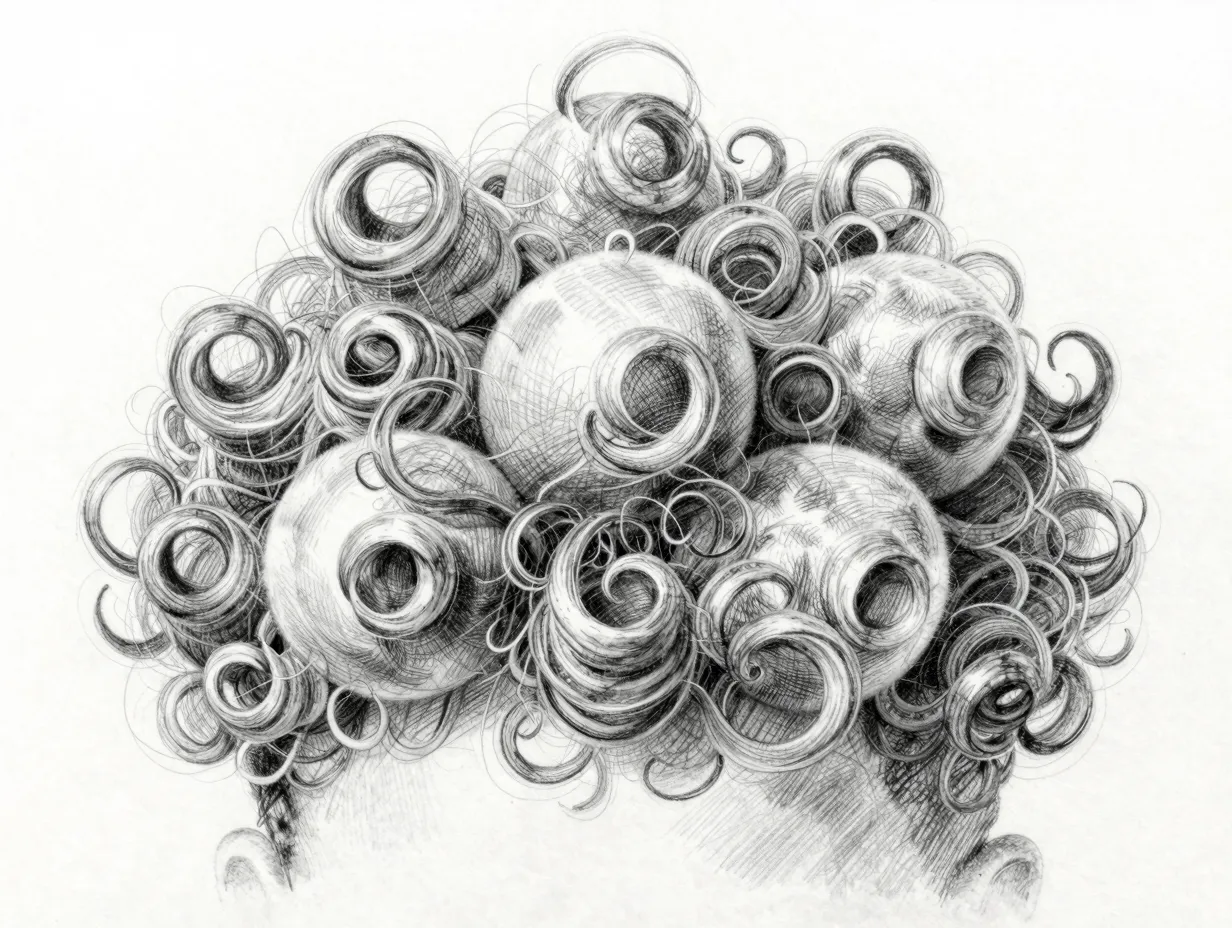
8. Add Curl Definition, Texture, and Strand Details

This is the most satisfying step — where your drawing truly comes alive. Using a sharp 2B or 4B pencil, go back in and define individual curl edges, add strand lines within curl clusters, and build the texture that makes curly hair recognizable.
Techniques to apply in this step:
Curl edge definition:
- Darken the shadow side of each curl with a crisp line
- Leave the light side of each curl soft or lifted with a kneaded eraser
Strand details:
- Draw thin, flowing lines within each curl cluster that follow the curl’s direction
- These lines don’t need to be perfectly uniform — variation adds realism
Flyaway hairs: ✨
Add small, fine stray hairs extending beyond the boundary line you drew in Step 2. These flyaway hairs are one of the most powerful realism techniques available [1]. They break the artificial perfection of the silhouette and signal to the viewer’s brain that this is real hair, not a helmet.
Draw flyaways with your lightest touch — a barely-there line that catches the light differently from the main hair mass.
9. Apply Final Highlights and Finishing Touches
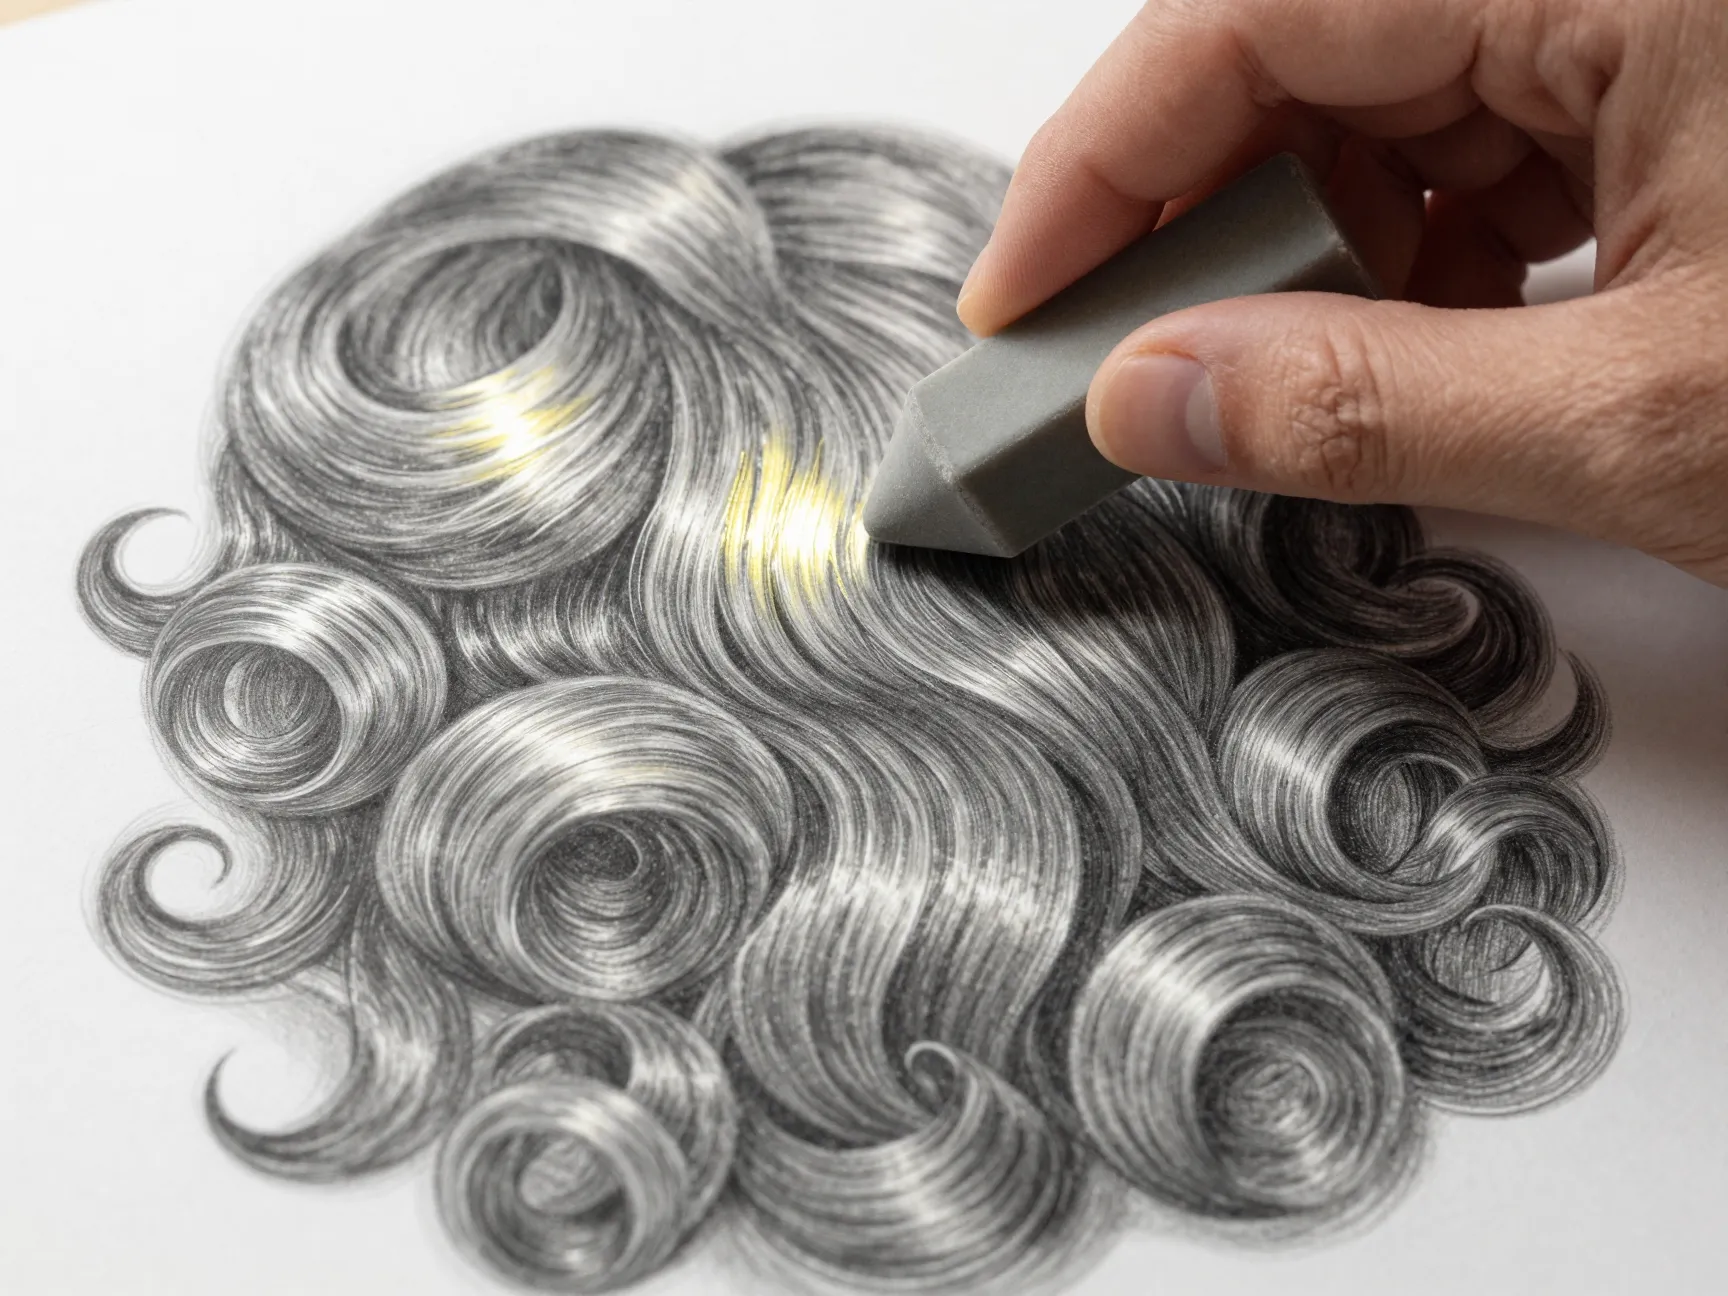
The final step in this 9 Steps to Master a Short Curly Hair Drawing (Easy Tutorial) process is adding highlights — the bright areas where light hits the top surfaces of curls most directly [2].
Methods for adding highlights:
- Kneaded eraser: Mold it to a fine point and gently lift graphite from the top surfaces of curl clusters
- White gel pen or white pencil: Draw thin highlight lines along the uppermost edge of prominent curls
- Eraser pen: For precise, controlled highlight placement
Highlight placement tips:
- Highlights should follow the same flow direction as your curls
- Place the brightest highlight at the crown or wherever your light source is strongest
- Use secondary highlights on individual curls throughout the hair mass for depth
Finally, step back and assess the overall drawing. Check that:
✅ The boundary silhouette looks natural and varied
✅ Front section has more detail than the back section
✅ Shadows and highlights create clear three-dimensional form
✅ Flyaway hairs are present but not overdone
✅ The curl flow feels consistent and intentional
Common Mistakes to Avoid 🚫
Even with a solid tutorial, certain pitfalls catch artists repeatedly. Here’s what to watch for:
- Drawing curls before establishing flow — always set direction first [2]
- Making all curls identical in size — variation is essential for realism [4]
- Skipping the boundary line — leads to hair that looks uncontrolled rather than voluminous [3]
- Over-blending shadows — destroys the texture that makes curls readable
- Forgetting flyaway hairs — the single fastest way to add realism [1]
- Using the same pencil pressure throughout — vary pressure to create tonal range [1]
- Ignoring the front/back section distinction — results in flat, one-dimensional hair
How to Adapt These Steps for Different Curl Patterns
The 9 Steps to Master a Short Curly Hair Drawing (Easy Tutorial) framework works across all curl types. Here’s how to adapt the core steps:
| Curl Pattern | Boundary Shape | Curl Size | Shading Intensity |
|---|---|---|---|
| Loose waves (Type 2) | Smooth, close to head | Large S-curves | Subtle gradients |
| Defined curls (Type 3) | Moderately bumpy | Medium spirals | Clear contrast |
| Tight coils (Type 4) | Very textured, high volume | Tiny, dense clusters | High contrast |
The fundamental steps remain the same — only the scale and tightness of your curl shapes change.
Practice Exercises to Accelerate Your Progress
Learning to draw short curly hair gets dramatically faster with targeted practice. Try these exercises:
- Curl shape drills: Fill a page with nothing but S-curves and C-curves of varying sizes. Do this for 10 minutes before every drawing session.
- Silhouette studies: Draw only the outer boundary of curly hair references without any interior detail. This trains your eye for natural volume shapes.
- Value studies: Draw the same curl cluster three times — once with only light values, once with only mid-tones, once with only darks. Then combine them.
- Copy master studies: Find professional curly hair illustrations and replicate them step by step using this framework [5].
- Timed sketches: Set a 5-minute timer and complete a rough curly hair sketch. Speed forces you to prioritize the most important elements.
Consistent, focused practice with these exercises will compress months of trial-and-error into weeks of genuine progress.
Conclusion: Your Next Steps After Mastering the Basics
The 9 Steps to Master a Short Curly Hair Drawing (Easy Tutorial) framework gives you a repeatable, reliable process for drawing short curly hair at any skill level. The key insight is that great curly hair drawings are built in layers — structure first, flow second, shapes third, shading fourth, and detail last.
Here are your actionable next steps starting today:
- Complete one full practice drawing using all 9 steps before modifying anything
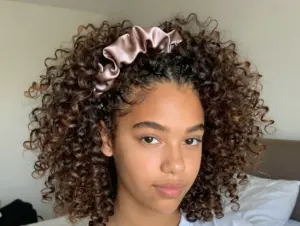
- Study reference photos of real short curly hair to train your eye for natural variation
- Watch the video tutorials linked in the references below for visual demonstrations of blending and pressure techniques [1][2]
- Join a drawing community or playlist series [5] to get feedback on your work
- Experiment with ink over your pencil sketches once you’re comfortable with the pencil process [6]
Every expert illustrator who draws curly hair convincingly went through the same frustrating early stages you’re in now. The difference between those who improve and those who plateau is simple: they follow a system, practice it consistently, and study their mistakes. You now have the system. The rest is up to you. 🎨
References
[1] Watch – https://www.youtube.com/watch?v=f6-3yntGIoM
[2] Watch – https://www.youtube.com/watch?v=DVnuKo2uKyE
[3] How To Draw Curls In 7 Easy Steps – https://rapidfireart.com/2022/10/28/how-to-draw-curls-in-7-easy-steps/
[4] Drawing Curly Hair – https://www.craftsy.com/post/drawing-curly-hair
[5] Playlist – https://www.youtube.com/playlist?list=PLWW3Ft5EzuzmTH7Ovu7MH_x4ijgX8CZH3
[6] Watch – https://www.youtube.com/watch?v=lUZmxYHkZJQ