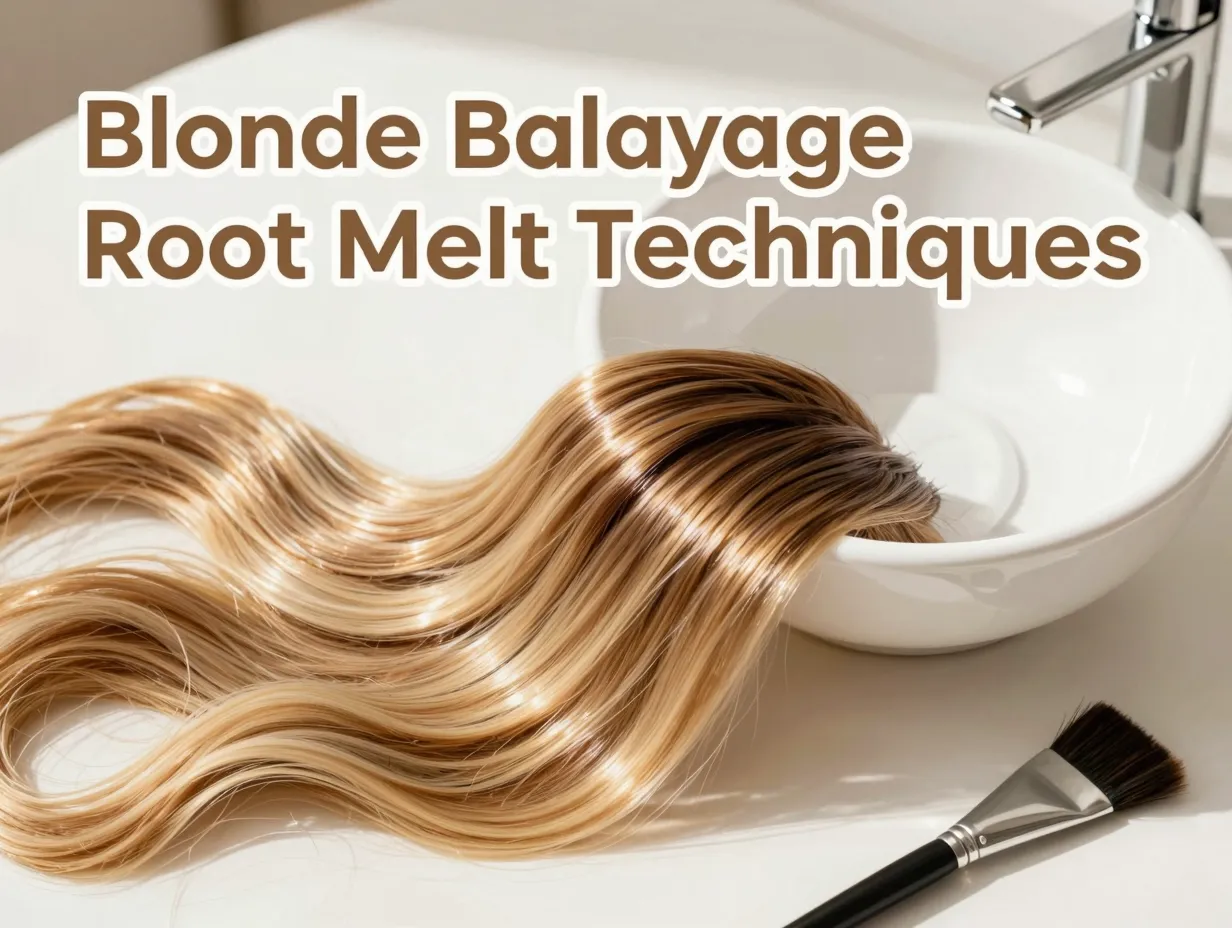
9 Root Melt Blonde Balayage Techniques for a Seamless, Natural Blend
Over 70% of salon clients who request blonde color services specifically ask for a “natural-looking grow-out” — and yet, harsh lines and brassy roots remain the most common complaint colorists hear at the chair. The gap between what clients want and what they walk out with often comes down to one missing skill: the root melt.
Mastering the 9 Root Melt Blonde Balayage Techniques for a Seamless, Natural Blend covered in this guide can transform your color work from flat and obvious to dimensional and effortless. Whether you’re a working colorist looking to level up or a color-savvy client who wants to walk into your next appointment armed with knowledge, these techniques will help you understand exactly how a perfect blonde balayage blend is achieved — and why some methods work better than others depending on hair type, base color, and lifestyle.
Key Takeaways 📌
- Root melts create a soft, gradient transition between natural roots and blonde balayage, eliminating harsh demarcation lines.
- The right technique depends on your client’s base color, hair texture, and how often they can visit the salon.
- Toning is a non-negotiable final step in every root melt — it unifies color and neutralizes unwanted warmth.
- Some techniques (like smudging and glossing) are ideal for low-maintenance clients, while others (like foilayage) suit those who want maximum brightness.
- Proper sectioning and product placement are the foundation of every seamless blend — rushing either will compromise the result.
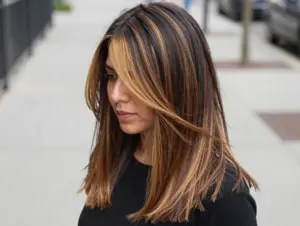
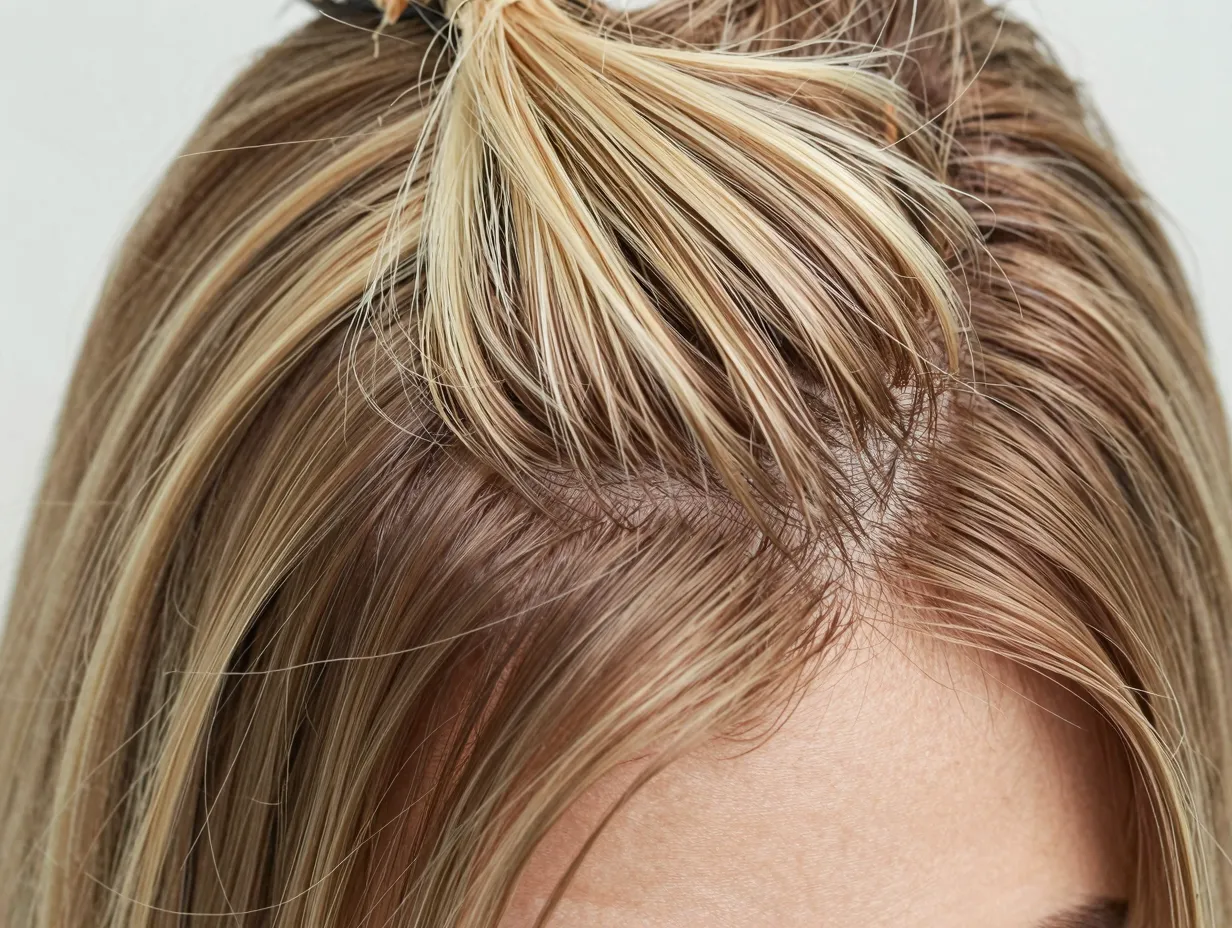
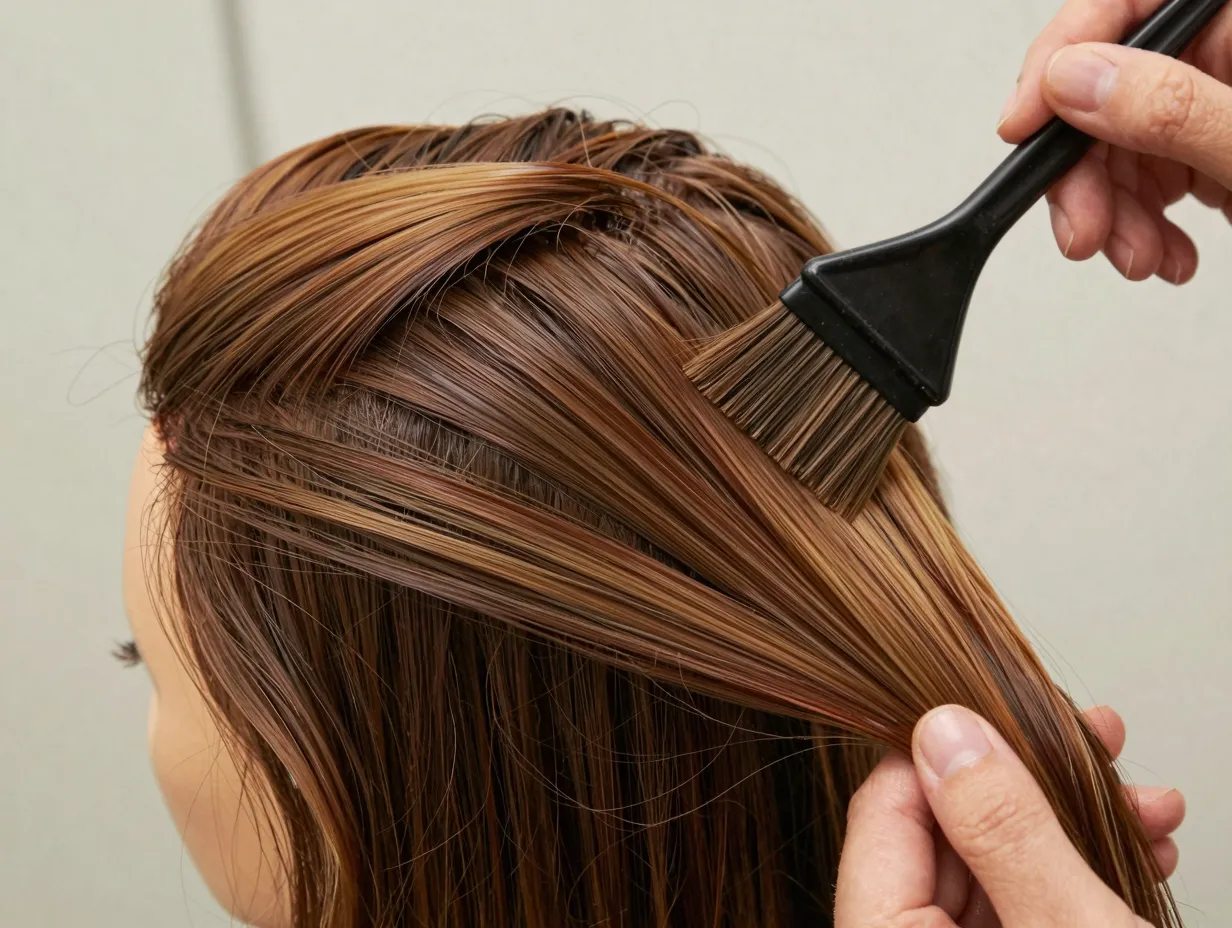
What Is a Root Melt and Why Does It Matter?
A root melt is a color technique that blends the natural root area into lightened or highlighted hair using a gradient of color — typically a demi-permanent or permanent formula applied at the root zone and feathered downward. When combined with balayage, it creates a sun-kissed effect that looks like hair grew out perfectly on its own.
💬 “The root melt is the bridge between where your hair is and where you want it to go. Without it, even the most beautiful balayage can look disconnected.” — Common wisdom among master colorists
Without a root melt, balayage can look patchy, especially on clients with very dark or very light natural bases. The technique is especially critical for:
- Clients with Level 1–4 base colors who want significant blonde lift
- Anyone with previous color that created banding or lines
- Clients who want 6–12 weeks between appointments
- Those transitioning from full highlights to a more natural balayage look
The 9 Root Melt Blonde Balayage Techniques for a Seamless, Natural Blend
Each of the following nine techniques serves a specific purpose. Some can be combined. All of them, when executed correctly, produce that coveted seamless blend that keeps clients coming back.
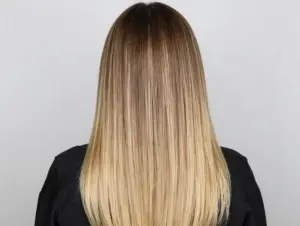
1. The Shadow Root Technique
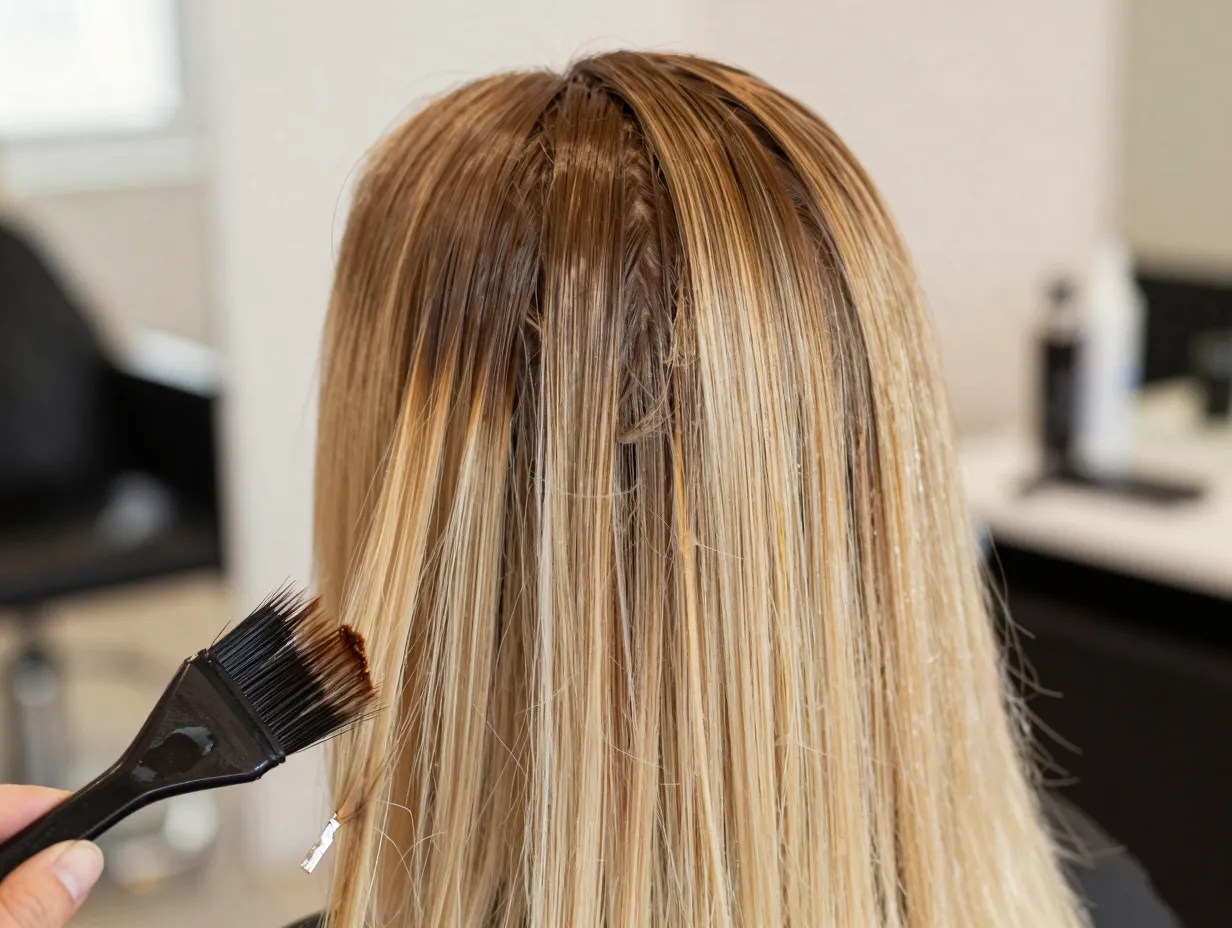
The shadow root is the most classic root melt approach. A colorist applies a darker demi-permanent formula — usually 1–2 levels deeper than the client’s natural base — directly at the root zone, then feathers it into the lightened mid-lengths.
Best for: Clients with fine hair, those who want low-maintenance color, or anyone transitioning from heavy highlights.
How it works:
- Apply a demi-permanent color (no lift) at the root, approximately 1–2 inches down
- Use a brush to feather the edges downward in soft, sweeping strokes
- Process for 20–25 minutes, then rinse before toning
Pro tip: Use a shade that’s slightly warmer than the client’s natural base to mimic how roots naturally grow in — this adds realism to the blend.
2. The Smudge Root Technique
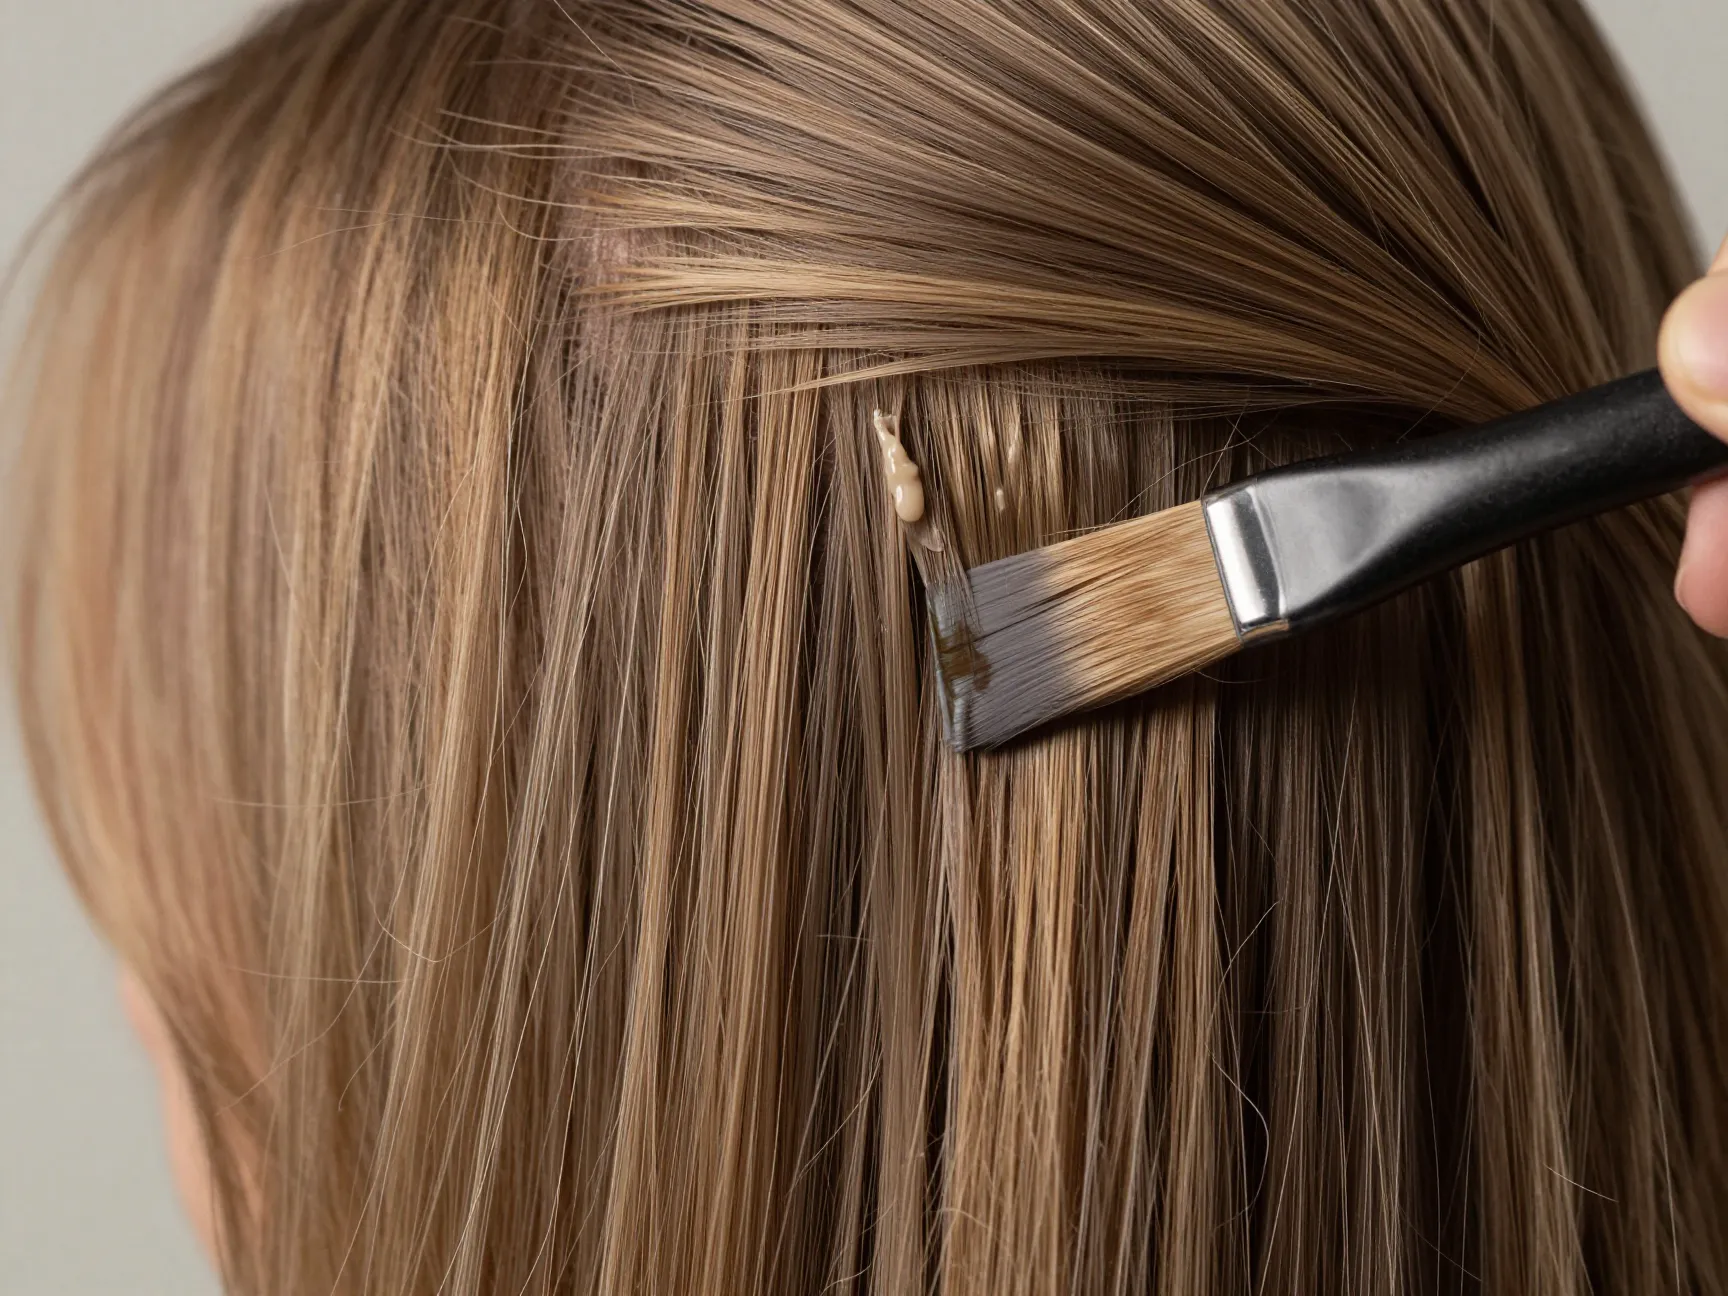
The smudge technique uses a small amount of leftover lightener or a diluted color formula to physically smudge the line of demarcation after balayage is applied. It’s done while the lightener is still processing.
Best for: Clients with a very sharp contrast between their roots and lightened lengths, or anyone who previously had box dye.
How it works:
- After painting balayage sections, take a clean brush with a tiny amount of lightener
- Gently smudge the root edge of each painted section in a downward motion
- This softens the “start line” of the balayage without lifting the root area
Key difference from shadow root: The smudge technique blurs the balayage edge; the shadow root adds depth. They can be used together for maximum softness. 🎨
3. The Glossing Root Melt
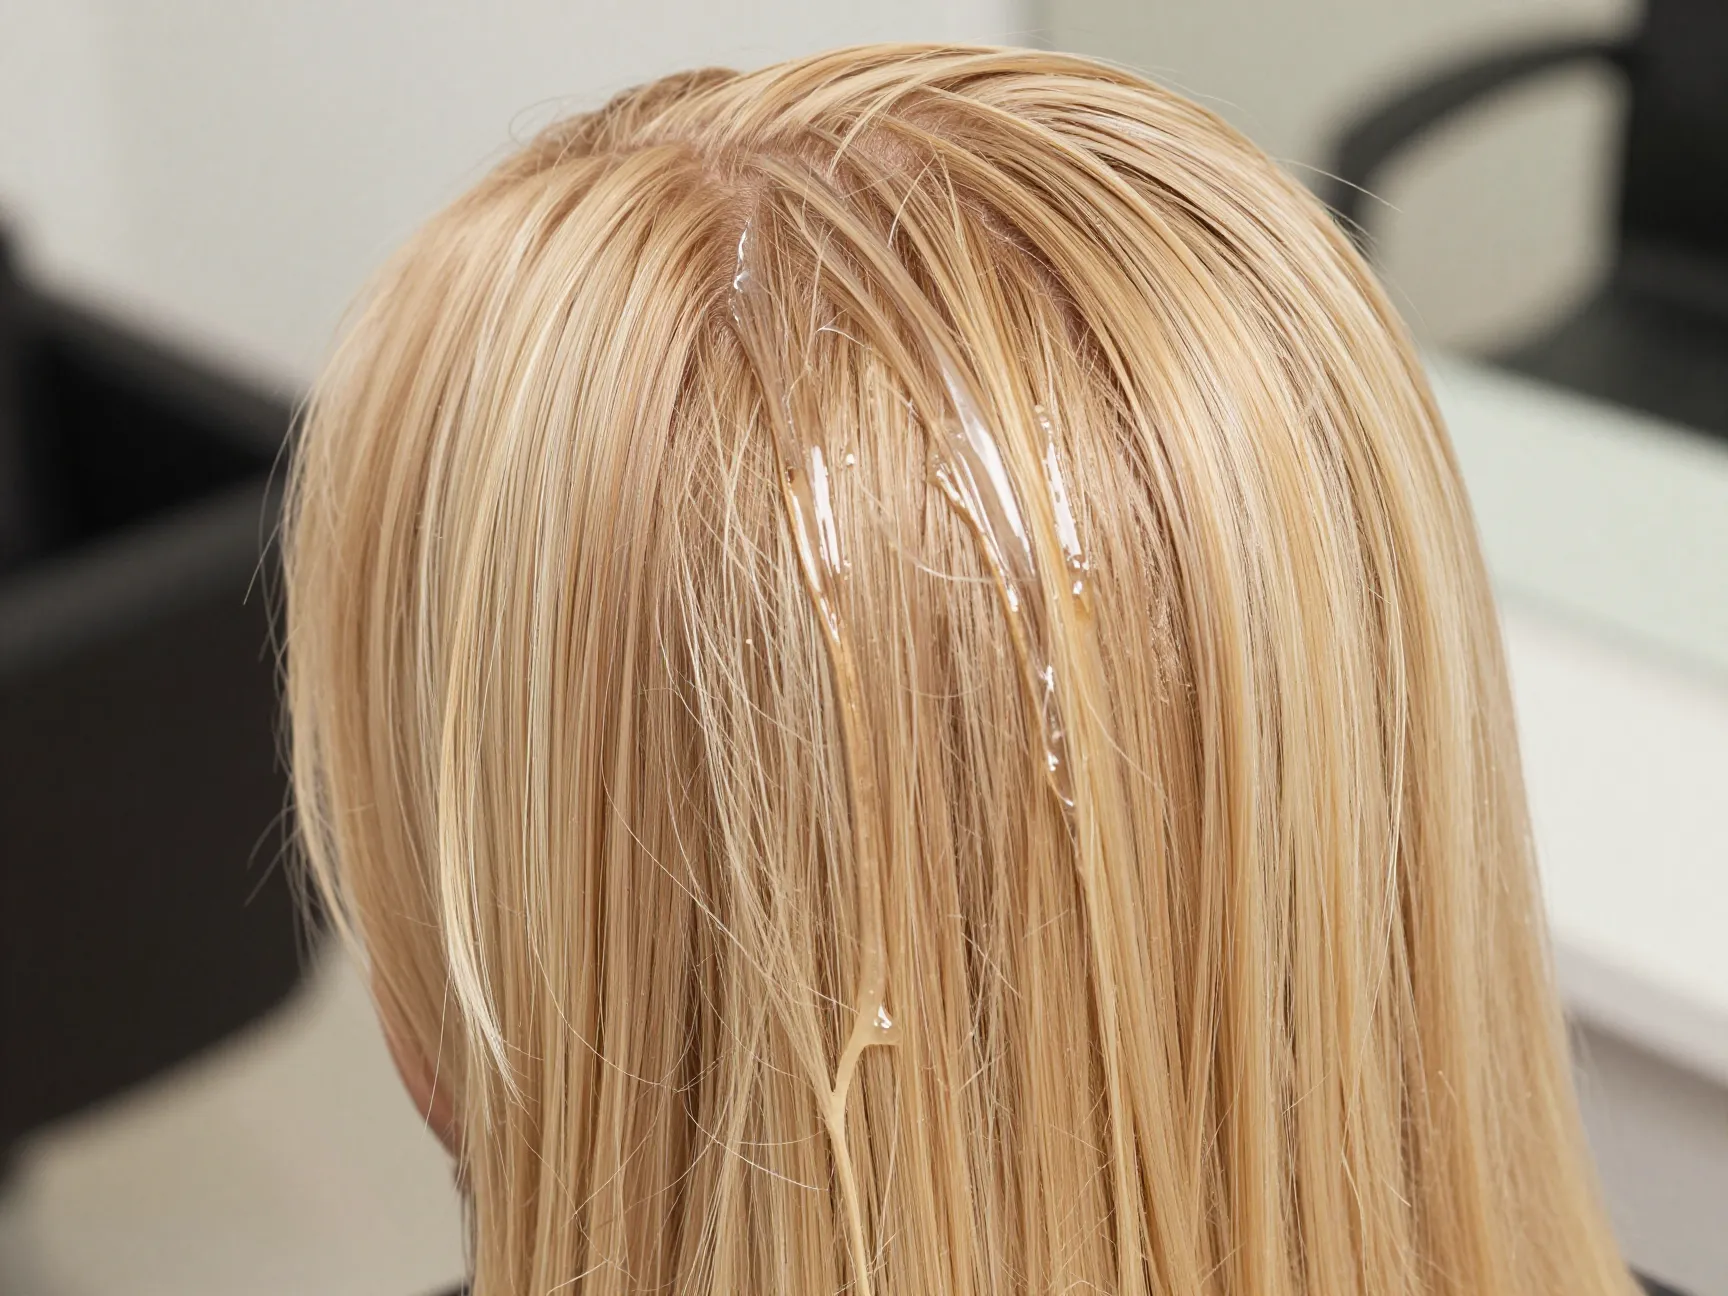
A gloss root melt skips traditional color application and instead uses a clear or tinted gloss formula at the root to add shine and subtle depth without permanent commitment.
Best for: Clients with naturally light bases (Level 6–7) who just need a soft transition, or those who want a glossy, healthy finish.
How it works:
- Apply a clear or lightly tinted gloss at the root zone
- Blend downward into the lightened hair
- Process under heat for 10–15 minutes for maximum shine
Benefit: Zero lift, zero damage. This is the most gentle root melt option and works beautifully as a maintenance treatment between balayage appointments.
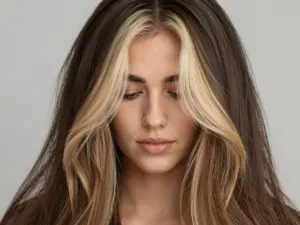
4. The Babylights Root Melt
Babylights are ultra-fine highlights woven throughout the root area to mimic the natural highlights children often have near the scalp. When combined with a root melt, they create an incredibly realistic, multi-dimensional blend.
Best for: Clients who want the most natural-looking blonde, or those with fine hair where chunky sections would look obvious.
How it works:
- Weave very fine sections at the root area using a highlighting comb
- Apply lightener to these micro-sections only, leaving the rest of the root natural
- After processing, apply a shadow root formula over the entire root zone to unify
Result: A root area that looks genuinely sun-kissed rather than colored. This technique takes longer but delivers unmatched realism. ✨
5. The Foilayage Root Melt
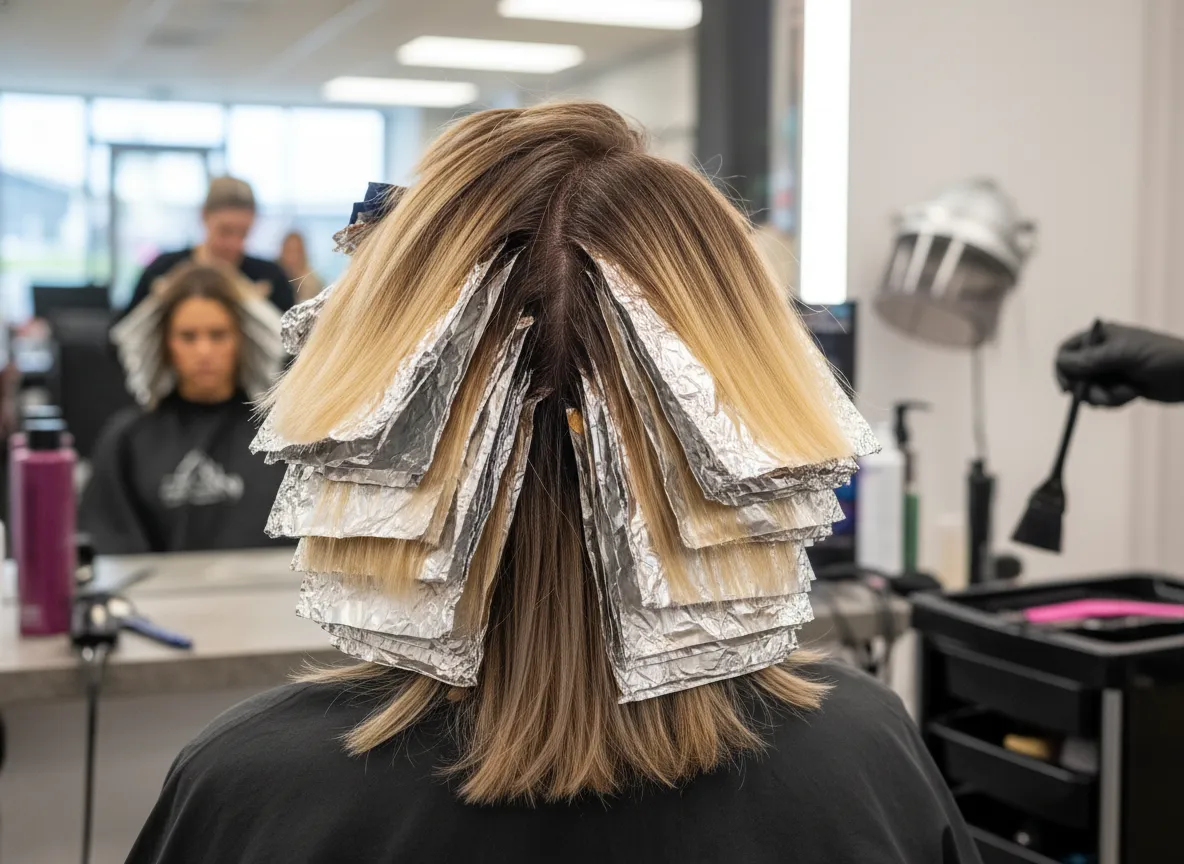
Foilayage combines the freehand painting of balayage with the controlled lift of foil highlights. When a root melt is added, the result is bright, even color with a soft, blended base.
Best for: Clients who want maximum brightness and lift, especially those with resistant or coarse hair.
How it works:
- Paint balayage sections freehand, then fold each section into a foil
- The foil traps heat, allowing the lightener to lift higher and faster
- After removing foils, apply a root melt formula to the untouched root area
| Feature | Open-Air Balayage | Foilayage |
|---|---|---|
| Lift Level | Moderate | High |
| Processing Time | 45–60 min | 30–45 min |
| Best For | Fine/Medium Hair | Coarse/Resistant Hair |
| Root Melt Compatibility | ✅ Yes | ✅ Yes |
| Brightness | Natural | Bold |
6. The Tease-Back Root Melt
The tease-back method involves backcombing small sections of hair at the root before applying lightener. This creates a naturally diffused, feathered effect right where the color begins.
Best for: Clients who want a very lived-in, effortless look with no visible start line.
How it works:
- Backcomb a small section of hair approximately 1 inch from the root
- Apply lightener just below the teased area, allowing product to bleed slightly into the backcombed section
- The irregular texture of the teased hair creates an organic, uneven edge
Why it works: The irregular surface of backcombed hair picks up color unevenly, naturally mimicking how sun would lighten hair over time. This is one of the most artisan root melt techniques in the colorist’s toolkit. 🖌️
7. The Balayage Saturation Melt
The saturation melt focuses on applying a higher concentration of lightener at the mid-lengths and ends, with a very diluted or feathered application at the root. The gradient is achieved through product concentration rather than technique alone.
Best for: Clients who want a dramatic ombre-to-balayage transition, or those with naturally dark roots who want to keep some depth.
How it works:
- Mix lightener at full strength for mid-lengths and ends
- Dilute the same lightener with conditioner or a clear filler for the root zone
- Apply the diluted mix at the root, blending into the full-strength product below
Important: This technique requires careful timing. Check the root area every 10 minutes to ensure you’re not over-lifting the diluted section. ⏱️
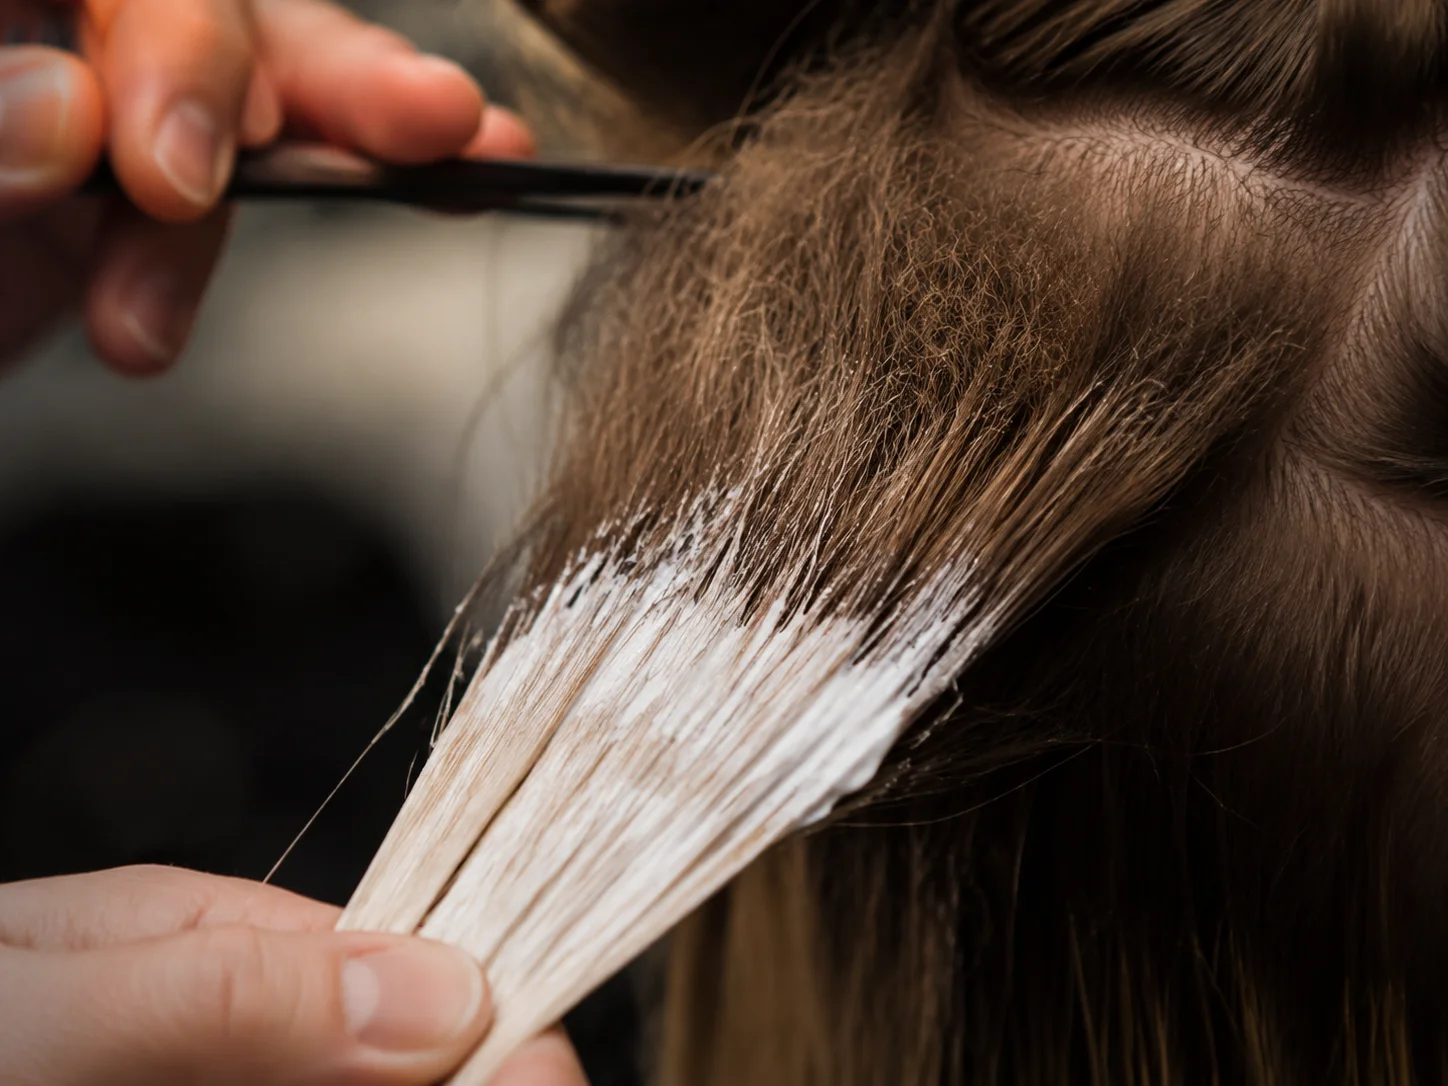
8. The Demi-Permanent Root Melt
Using a demi-permanent color (which deposits color without lifting) is one of the most reliable and beginner-friendly root melt techniques. It adds depth and tone at the root without the risk of damage.
Best for: Clients with color-treated or fragile hair, or anyone who wants a low-risk, high-reward result.
How it works:
- Choose a demi-permanent shade 1–2 levels darker than the client’s natural base
- Apply at the root zone, 1–3 inches depending on how much depth is desired
- Use a brush to feather the edges downward in long, sweeping strokes
- Process for 20 minutes, rinse, and follow with toner
Color formulation tip:
💡 For a warm, natural-looking root melt on a Level 7 blonde, try a demi-permanent in a Level 6 warm brown (6W or 6G). This adds just enough depth to look intentional without looking muddy.
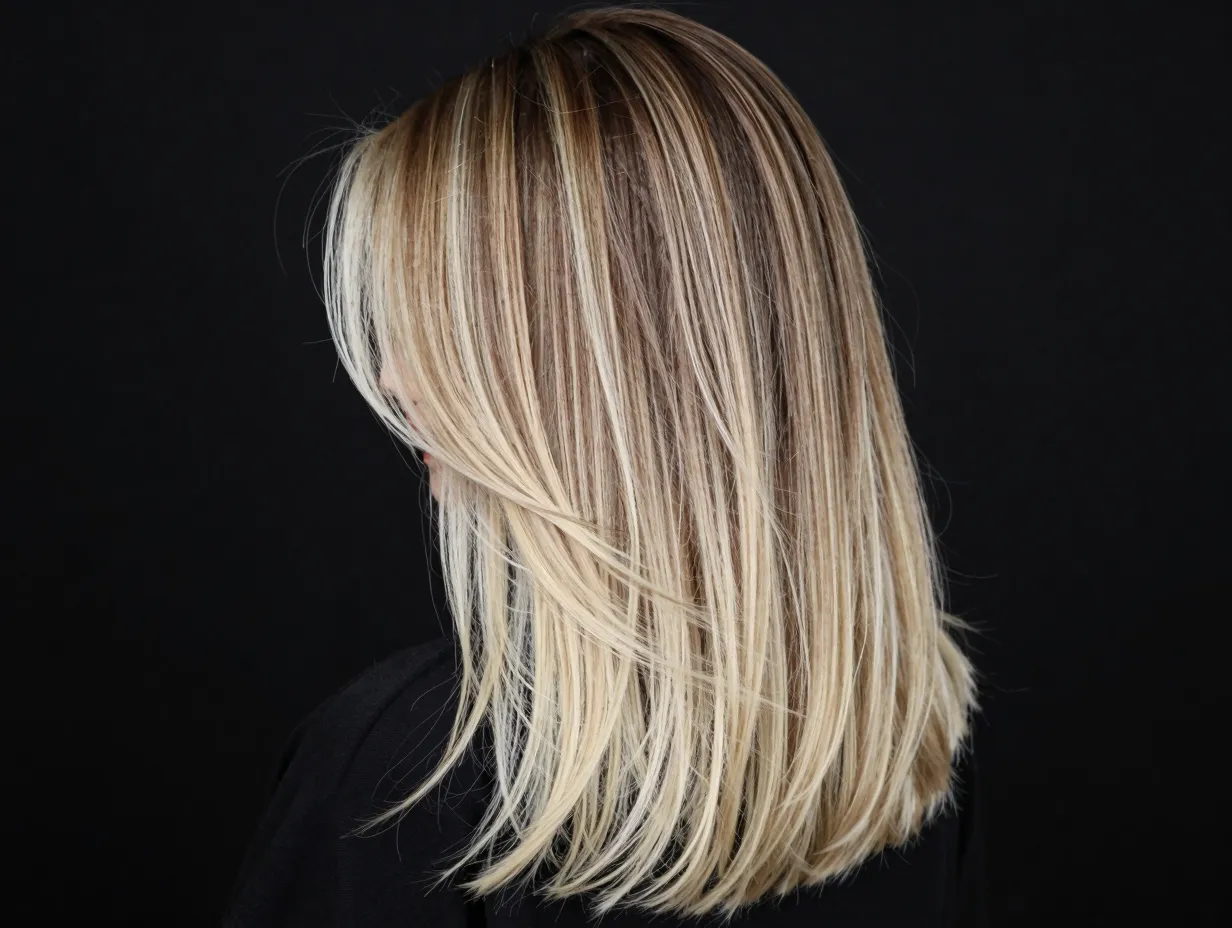
9. The Tonal Root Melt with Glaze
The final technique in the 9 Root Melt Blonde Balayage Techniques for a Seamless, Natural Blend is the tonal root melt with glaze — a two-step process that combines a root melt with a full-length toning glaze.
Best for: Clients who want a cohesive, polished finish across all lengths, or anyone whose balayage has gone brassy between appointments.
How it works:
- Step 1: Apply a root melt formula (demi-permanent or gloss) at the root zone
- Step 2: Apply a toning glaze — typically a violet, blue, or pearl-based formula — from mid-lengths to ends
- Process both simultaneously for 20–25 minutes
Why it’s a game-changer: Most root melt techniques address only the root area. The tonal glaze step unifies the entire color story, so roots, mid-lengths, and ends all feel like they belong together. This is the technique that makes clients say, “It looks so natural — I can’t tell where my real hair ends and the color begins.” 🌟
How to Choose the Right Root Melt Technique
Not every technique works for every client. Here’s a quick reference guide to help match the method to the person in your chair:
| Client Profile | Recommended Technique(s) |
|---|---|
| Dark base (Level 1–4), first-time blonde | Shadow Root + Foilayage |
| Fine hair, wants natural look | Babylights Root Melt |
| Low-maintenance lifestyle | Glossing Root Melt or Demi-Permanent |
| Coarse, resistant hair | Foilayage Root Melt |
| Wants lived-in, effortless vibe | Tease-Back Root Melt |
| Brassy, needs refresh | Tonal Root Melt with Glaze |
| Sharp demarcation from box dye | Smudge Technique + Shadow Root |
| Wants dramatic ombre-to-blonde | Saturation Melt |
| Color-treated, fragile hair | Demi-Permanent Root Melt |
Common Root Melt Mistakes to Avoid ❌
Even experienced colorists can run into trouble with root melts. Here are the most frequent errors — and how to sidestep them:
1. Applying too much product at the root. A root melt should be subtle. If you’re applying color heavily at the root, you risk creating a new line of demarcation lower on the shaft.
2. Not feathering the edges. The entire point of a root melt is the gradient. Use long, light strokes to blend the formula downward — never stop abruptly.
3. Skipping the toner. A root melt without toning is unfinished work. Toner unifies the root color with the lightened lengths and neutralizes brassiness throughout.
4. Choosing the wrong depth. Going too dark at the root looks unnatural. Aim for 1–2 levels deeper than the client’s natural base, not 3–4.
5. Rushing processing time. Root melts need time to develop. Pulling too early results in uneven color; pulling too late can cause over-processing at the root.
Toning After a Root Melt: The Non-Negotiable Step 🎨
Every single one of the 9 Root Melt Blonde Balayage Techniques for a Seamless, Natural Blend requires a toning step at the end. Here’s why:
- Lightener leaves warmth. Even the best lighteners leave underlying warm pigment (yellow, orange, gold) in the hair. Toner neutralizes this.
- Toner unifies the color story. When root melt and balayage are toned together, they read as one cohesive color rather than two separate applications.
- It adds shine. Toning closes the cuticle and adds a glassy finish that makes color look professional.
Toner Selection Guide
| Desired Result | Toner Base Color |
|---|---|
| Icy platinum blonde | Violet or blue-violet |
| Beige or ash blonde | Blue or cool ash |
| Champagne or golden blonde | Neutral or light gold |
| Sandy or bronde | Warm beige or light copper |
| Pearl or silver | Silver-violet |
Processing tip: Apply toner to damp, towel-dried hair for the most even result. On dry hair, toner can grab unevenly, especially at porous ends.
Maintenance Tips for Long-Lasting Root Melt Results 💛
A beautiful root melt is an investment — and the right home care routine protects that investment between appointments.
- Use a sulfate-free shampoo. Sulfates strip color faster than anything else. Switching to a sulfate-free formula can extend color vibrancy by 2–4 weeks.
- Apply a purple or blue shampoo weekly. This neutralizes brassiness between toning appointments. Use it once or twice a week, not daily.
- Deep condition every 1–2 weeks. Lightened hair is more porous and needs moisture. A bond-building treatment (like those with amino acids or keratin) is ideal.
- Protect hair from heat. Always use a heat protectant before blow-drying or styling. Heat accelerates color fading.
- Schedule a gloss refresh every 6–8 weeks. Even if clients aren’t ready for a full balayage appointment, a gloss refresh keeps the root melt looking intentional and the blonde looking bright.
Conclusion: Your Next Steps to a Perfect Seamless Blend
The difference between a good balayage and a truly exceptional one almost always comes down to the root melt. As we’ve explored through the 9 Root Melt Blonde Balayage Techniques for a Seamless, Natural Blend, there is no single “best” method — the right choice depends on your client’s base, hair type, lifestyle, and the final result they’re chasing.
Here’s how to move forward:
- Assess your client’s hair thoroughly before choosing a technique. Consider base level, texture, previous color, and maintenance commitment.
- Start with one technique and master it before layering in others. The shadow root and demi-permanent melt are great starting points for newer colorists.
- Never skip the toner. It is the final step that pulls everything together.
- Educate your clients on at-home maintenance. A root melt that’s properly cared for can look beautiful for 10–14 weeks.
- Practice on a mannequin head if you’re new to any of these techniques. The tease-back and babylights methods especially benefit from hands-on practice before working on a paying client.
Root melts are one of the most valuable skills in modern color work — and in 2026, with clients more educated and color-savvy than ever, they’re also one of the most requested. Master these nine techniques, and you’ll have the tools to deliver seamless, natural-looking blonde results every single time. 🌟