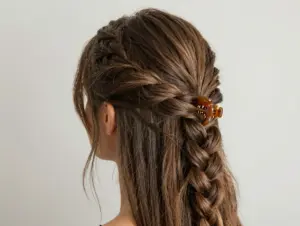
8 Simple DIY Hair Accessories with Ribbon You Can Make in Minutes
A single 7-yard spool of grosgrain ribbon — costing less than $3 at most craft stores — can produce up to 12 finished hair accessories. That math alone makes ribbon crafting one of the most cost-effective hobbies in 2026. Whether you’re stocking up for a party, making gifts, or just refreshing your own hair drawer, the 8 Simple DIY Hair Accessories with Ribbon You Can Make in Minutes covered in this guide require no sewing machine, no advanced skills, and in most cases, no more than 5–10 minutes of active crafting time per piece.
I’ve pulled together the most popular ribbon hair accessory tutorials trending across YouTube, Pinterest, and TikTok right now, and distilled them into clear, beginner-friendly instructions. Every project on this list is genuinely fast, genuinely simple, and genuinely satisfying to finish.
Key Takeaways 🎀
- Speed is real: Most ribbon hair accessories on this list take 2–10 minutes each once your supplies are ready.
- Minimal tools required: A hot glue gun, sharp scissors, a lighter or fray check, and ribbon are all you need for most projects.
- Batch-making saves time: Pre-cutting ribbon and organizing supplies before you start lets you produce 8–10 accessories in a single short crafting session.
- No sewing required: Every project here uses hot glue, hand stitching, or simple tying — no sewing machine needed.
- Budget-friendly: One spool of ribbon goes a long way, making these projects ideal for gifts, parties, or resale.
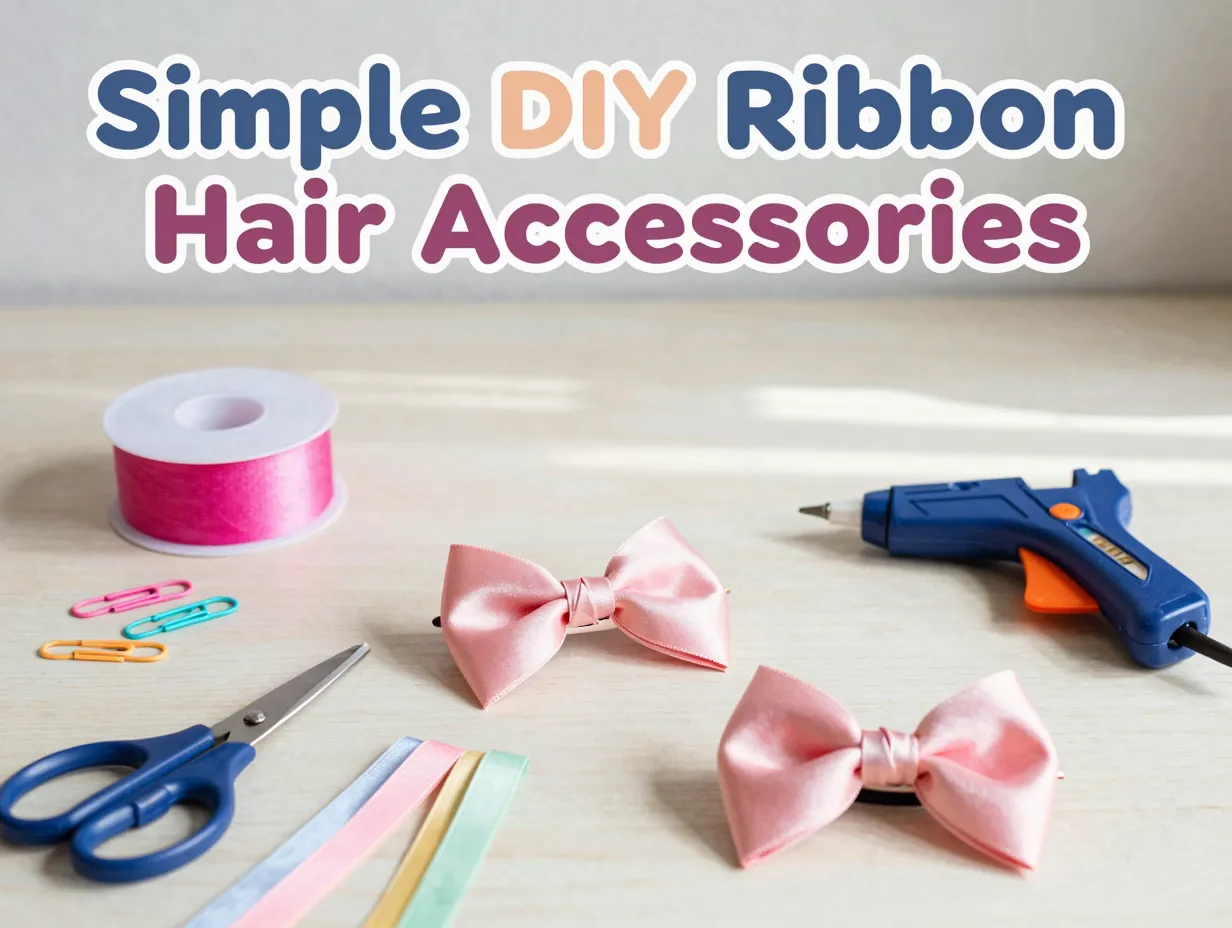
What You Need Before You Start
Before diving into the 8 Simple DIY Hair Accessories with Ribbon You Can Make in Minutes, gather your core supplies. Keeping everything pre-organized is the single biggest time-saver. [3]
| Supply | Recommended Size/Type | Purpose |
|---|---|---|
| Grosgrain ribbon | 3/8″–5/8″ width | Clips, bows, streamers |
| Satin ribbon | 1″–1.5″ width | Elegant bows, headbands |
| Sharp scissors | Fabric scissors | Clean cuts |
| Lighter or fray check | — | Sealing ribbon ends |
| Hot glue gun + sticks | Low or high temp | Attaching to clips/bases |
| Alligator clips | Small or medium | Hair clip base |
| French barrettes | Standard size | Bow barrette base |
| Elastic hair ties | Standard | Ponytail accessories |
| Rhinestones or pearls | Optional | Embellishment |
| Wire headband or plastic headband | — | Headband projects |
💡 Pro tip: Pre-cut all your ribbon strips before you start any project. This single step can cut your per-accessory time in half.
The 8 Simple DIY Hair Accessories with Ribbon You Can Make in Minutes
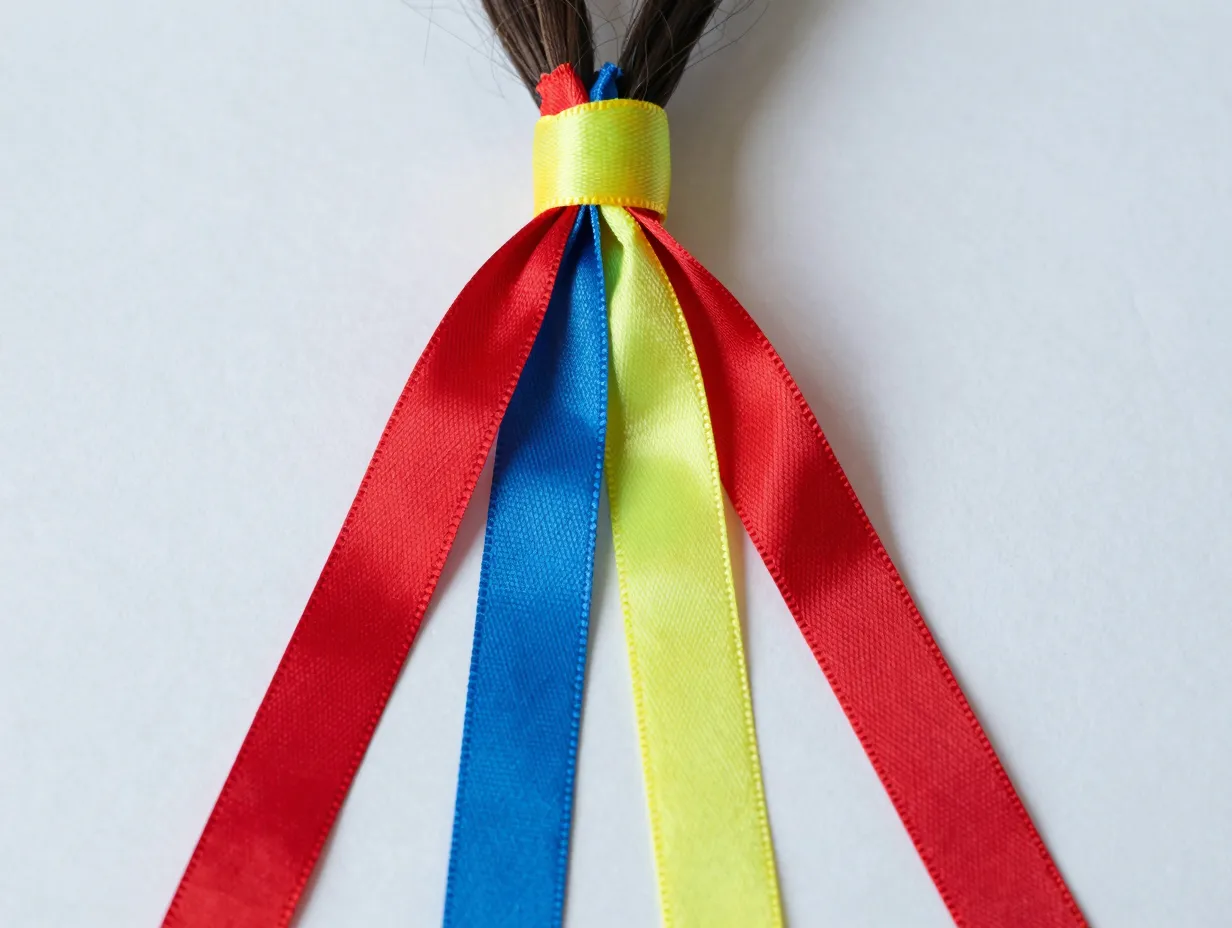
1. Ribbon Ponytail Streamers
Time to make: ~5 minutes per streamer
Skill level: Absolute beginner
Ribbon ponytail streamers are arguably the fastest ribbon hair accessory you can make, and they look stunning on both kids and adults. [2]
What you need:
- 3–4 coordinating ribbon colors (grosgrain or satin)
- Scissors and lighter
- One elastic hair tie
- Needle and thread (optional but recommended)
How to make it:
- Cut each ribbon to approximately 20 inches (50 cm) in length.
- Seal each cut end with a lighter or fray check to prevent fraying.
- Stack the ribbon strips together, fold them in half, and loop them through the elastic hair tie.
- Pull the loose ends through the loop to create a lark’s head knot around the elastic.
- Adjust the ribbons so they hang evenly, then hand-stitch or hot-glue the knot to secure it firmly.
Why it works: A 7-yard roll of 5/8″ ribbon yields approximately 12 completed streamers when cut to 20-inch lengths — incredible value for the cost. [2] These are perfect for cheerleading, dance recitals, birthday parties, or everyday wear.
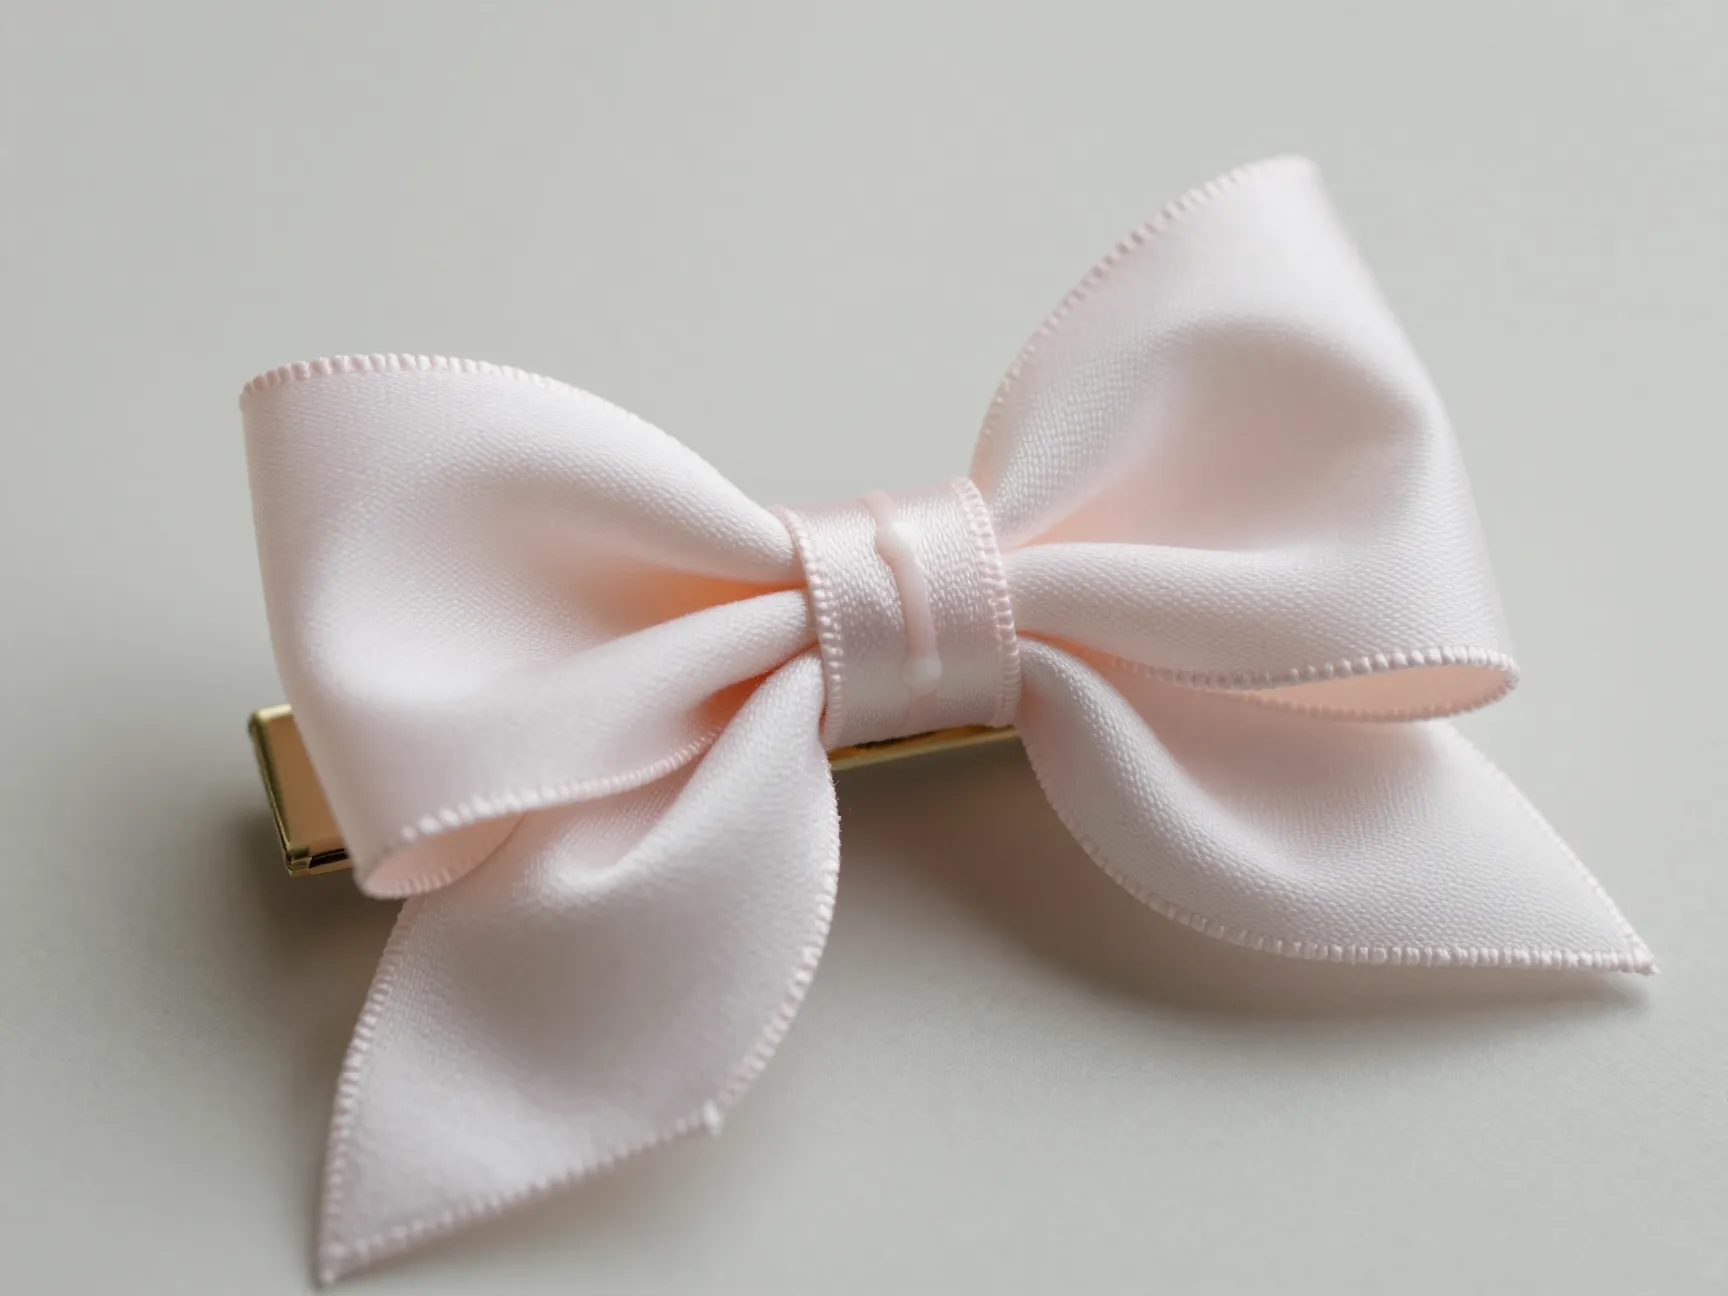
2. Basic Grosgrain Bow Hair Clip

Time to make: Under 5 minutes per clip
Skill level: Beginner
The classic grosgrain bow clip is a wardrobe staple. The textured surface of grosgrain ribbon adds grip, which means the bow actually stays in place better than smooth satin alternatives. [3]
What you need:
- 3/8″–5/8″ grosgrain ribbon
- Alligator clip (small or medium)
- Hot glue gun
- Scissors and lighter
How to make it:
- Cut a strip of grosgrain ribbon to match the length of your alligator clip.
- Seal both ends of the strip with a lighter.
- Apply a thin line of hot glue along the top of the clip and press the ribbon strip firmly onto it.
- Cut a second, longer piece of ribbon (about 8–10 inches) for the bow.
- Fold it into a classic bow shape and pinch the center tightly.
- Wrap a small piece of ribbon around the center pinch and glue it at the back.
- Hot-glue the finished bow on top of the ribbon-covered clip.
Batch tip: Once your glue gun is hot, you can assemble a pair of matching clips in under 5 minutes. [3] Make multiples in different colors for a coordinated hair accessory set.
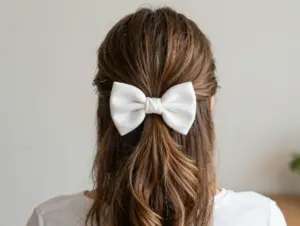
3. No-Sew Fabric or Ribbon Bow Barrette
Time to make: 5–10 minutes
Skill level: Beginner
No sewing machine? No problem. This no-sew bow uses hot glue and simple folding to create a polished, full bow on a French barrette. [8]
What you need:
- Satin or cotton ribbon (or a pre-cut fabric rectangle, approximately 6″ x 3″)
- French barrette clip
- Hot glue gun
- Small rubber band or thin ribbon strip for center
How to make it:
- Cut your ribbon or fabric into a rectangle — roughly 6 inches long and 3 inches wide.
- Fold both short ends toward the center so they meet in the middle.
- Pinch the center of the folded piece to create the bow shape.
- Wrap a small rubber band or thin ribbon strip tightly around the center pinch and secure with a dot of hot glue.
- Fluff out the bow loops to make them full and even.
- Hot-glue the finished bow to the top of the French barrette.
🎀 “The no-sew method is a game-changer for beginners — you get a professional-looking bow without ever touching a sewing machine.”
This project is consistently marketed as beginner-friendly and quick, and it truly delivers on both promises. [8]
4. Mini Coquette Bow Snap Clips
Time to make: 3–5 minutes per bow
Skill level: Beginner
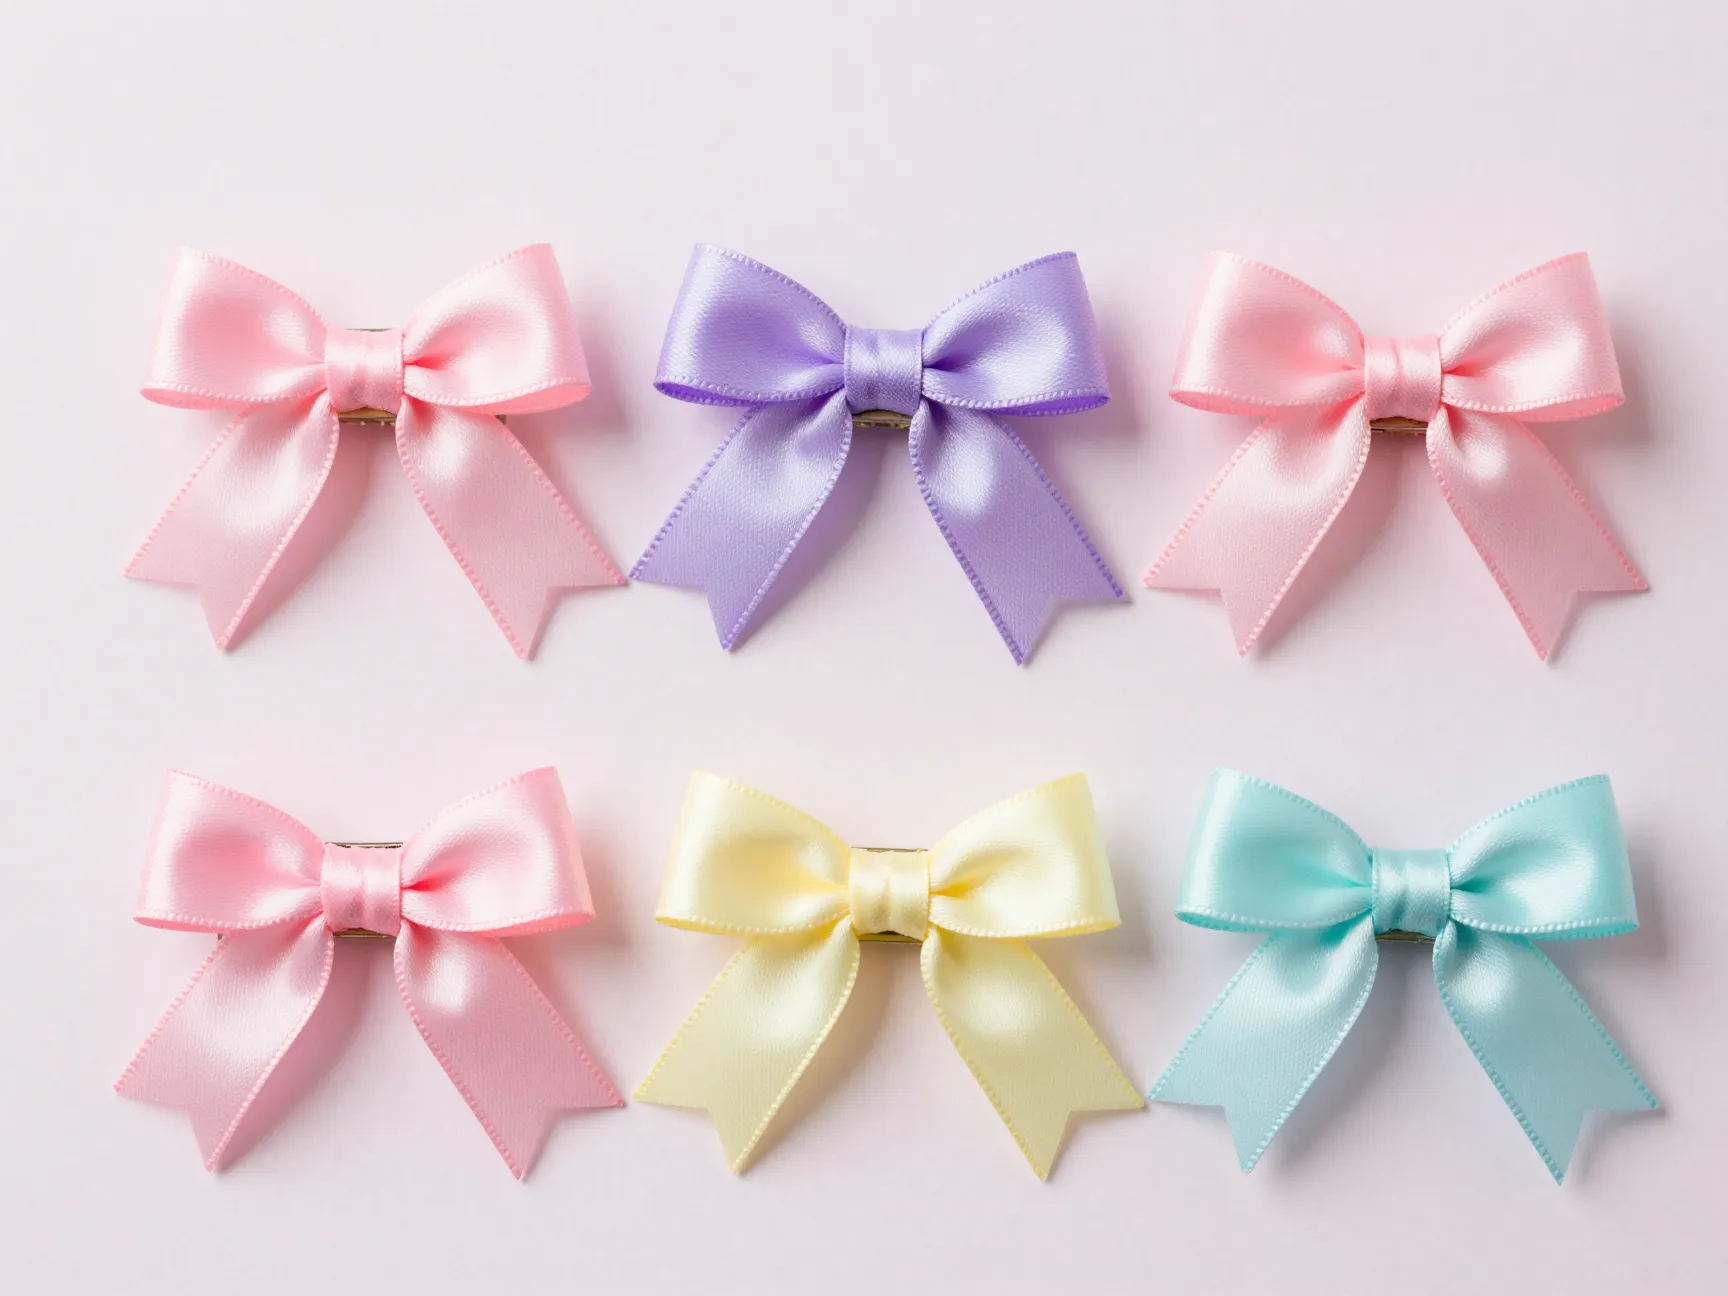
Mini bow clips in pastel colors are one of the biggest hair accessory trends of 2026, heavily featured on Pinterest and TikTok under the “coquette aesthetic” tag. [6][5] These tiny, delicate bows look expensive but cost almost nothing to make.
What you need:
- Thin satin ribbon (3/8″ width works beautifully)
- Small snap clips or mini alligator clips
- Hot glue gun
- Scissors
How to make it:
- Cut a piece of satin ribbon to about 5–6 inches.
- Form a small bow by crossing the ribbon and pulling one end through, just like tying a shoelace — but stop after the first loop.
- Alternatively, fold the ribbon into a figure-eight and pinch the center.
- Wrap a tiny piece of matching ribbon around the center and glue it at the back.
- Glue the finished mini bow onto a snap clip.
Batch-making magic: One popular idea pin shows crafters making multiple mini bows in different pastel colors — pink, lavender, butter yellow, mint — and attaching them to small clips, producing 8–10 bows in well under an hour. [6] That’s just a few minutes each.
5. Satin Ribbon Bow Clip with Rhinestone Center
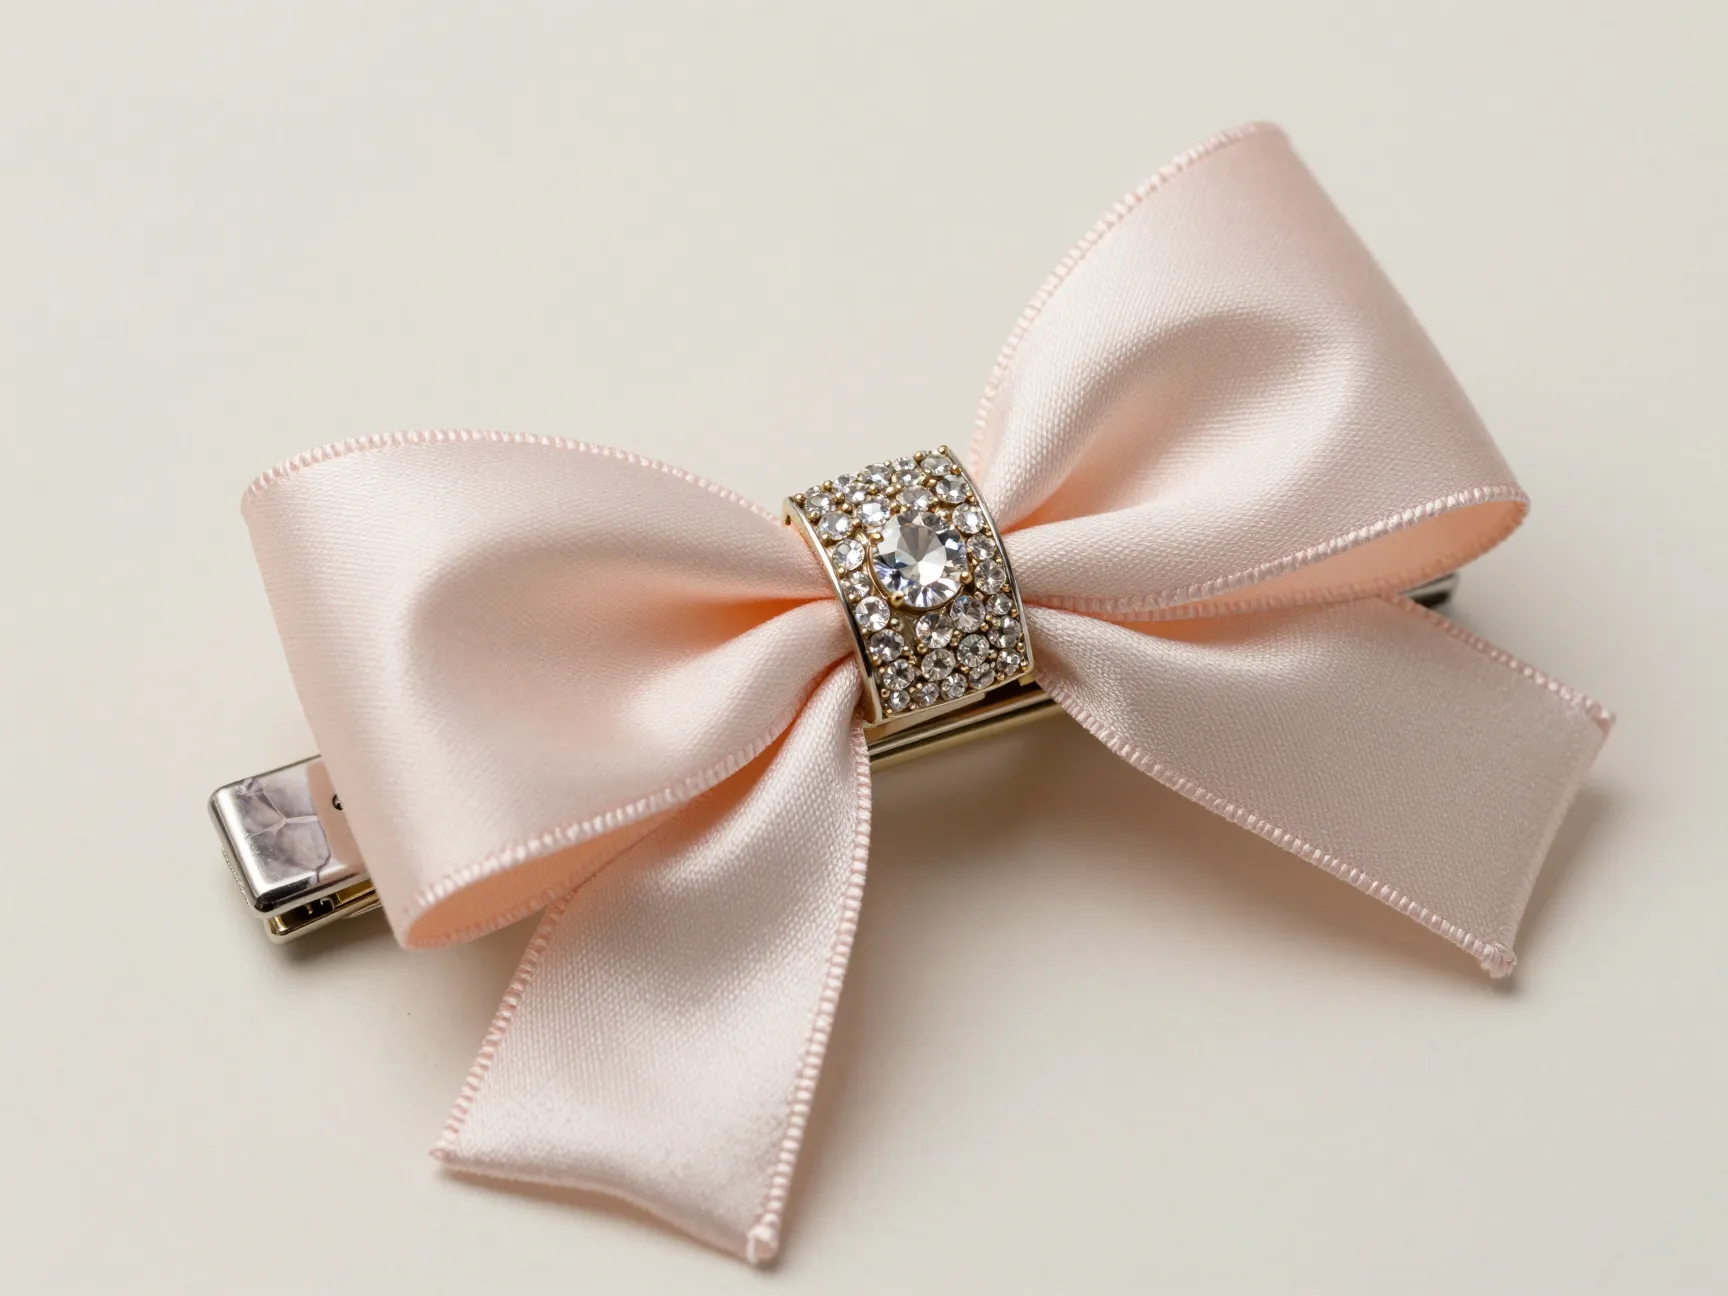
Time to make: 5–8 minutes
Skill level: Beginner to intermediate
This is the “elevated but easy” option on the list. The rhinestone center transforms a simple satin bow into something that looks boutique-worthy. [7]
What you need:
- 1″–1.5″ satin ribbon
- Alligator clip
- Rhinestone strip or individual rhinestone gems
- Hot glue gun
- Thread (optional, for extra security)
How to make it:
- Cut about 10–12 inches of satin ribbon.
- Fold the ribbon into a double-looped bow: bring both ends to the center, then pinch the middle.
- Secure the center pinch with a few wraps of thread or a dot of hot glue.
- Press a small rhinestone strip (or a single rhinestone gem) onto the center of the bow.
- Allow the glue to set for 30 seconds.
- Glue the completed bow firmly onto an alligator clip.
This method is popular among small craft business owners because it produces professional-looking results quickly and consistently. [7] Once you’ve made your first one, the next five come even faster.
6. Simple Tied Ribbon Bow for Elastic Hair Ties
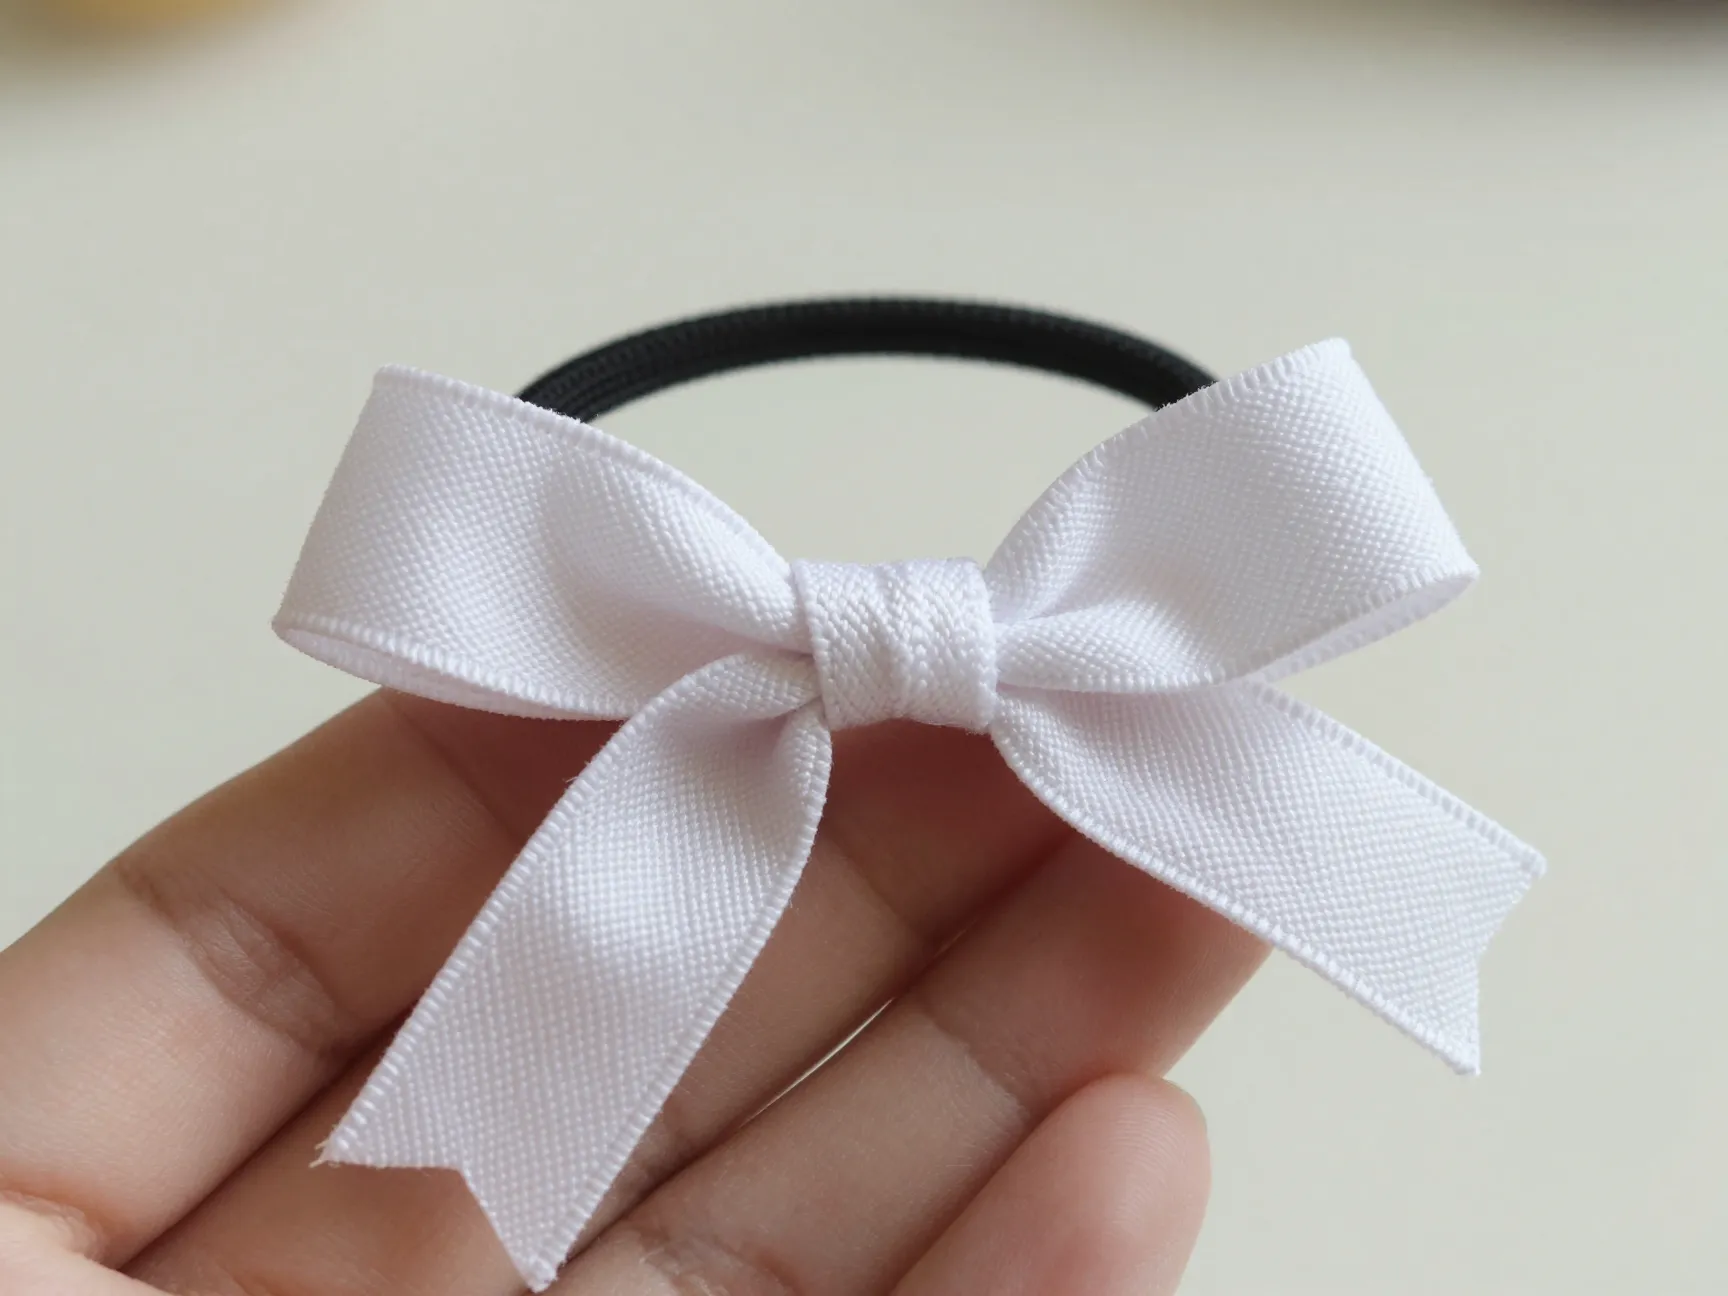
Time to make: 2–3 minutes
Skill level: Complete beginner
This might be the simplest project on the entire list — and it requires almost no supplies beyond ribbon and a hair tie. [9]
What you need:
- One length of ribbon (about 12–14 inches), any width or style
- Elastic hair tie
- Scissors (optional)
How to make it:
- Fold the ribbon in half and loop it around the elastic hair tie.
- Tie the ribbon into a classic bow, exactly like you’d tie a shoelace.
- Adjust the loops so they’re even and full.
- Trim the ribbon tails at an angle if you want a cleaner look, and seal the ends with a lighter.
That’s it. Genuinely. [9]
✂️ Fun fact: These ribbon bows work just as well for gift wrapping as they do for hair — the same bow-tying skill serves double duty during the holidays.
These are ideal for making in bulk before a birthday party or as a quick add-on to a gift. Once you’ve practiced the technique, each bow takes under 2 minutes.
7. Ribbon-Wrapped Headband
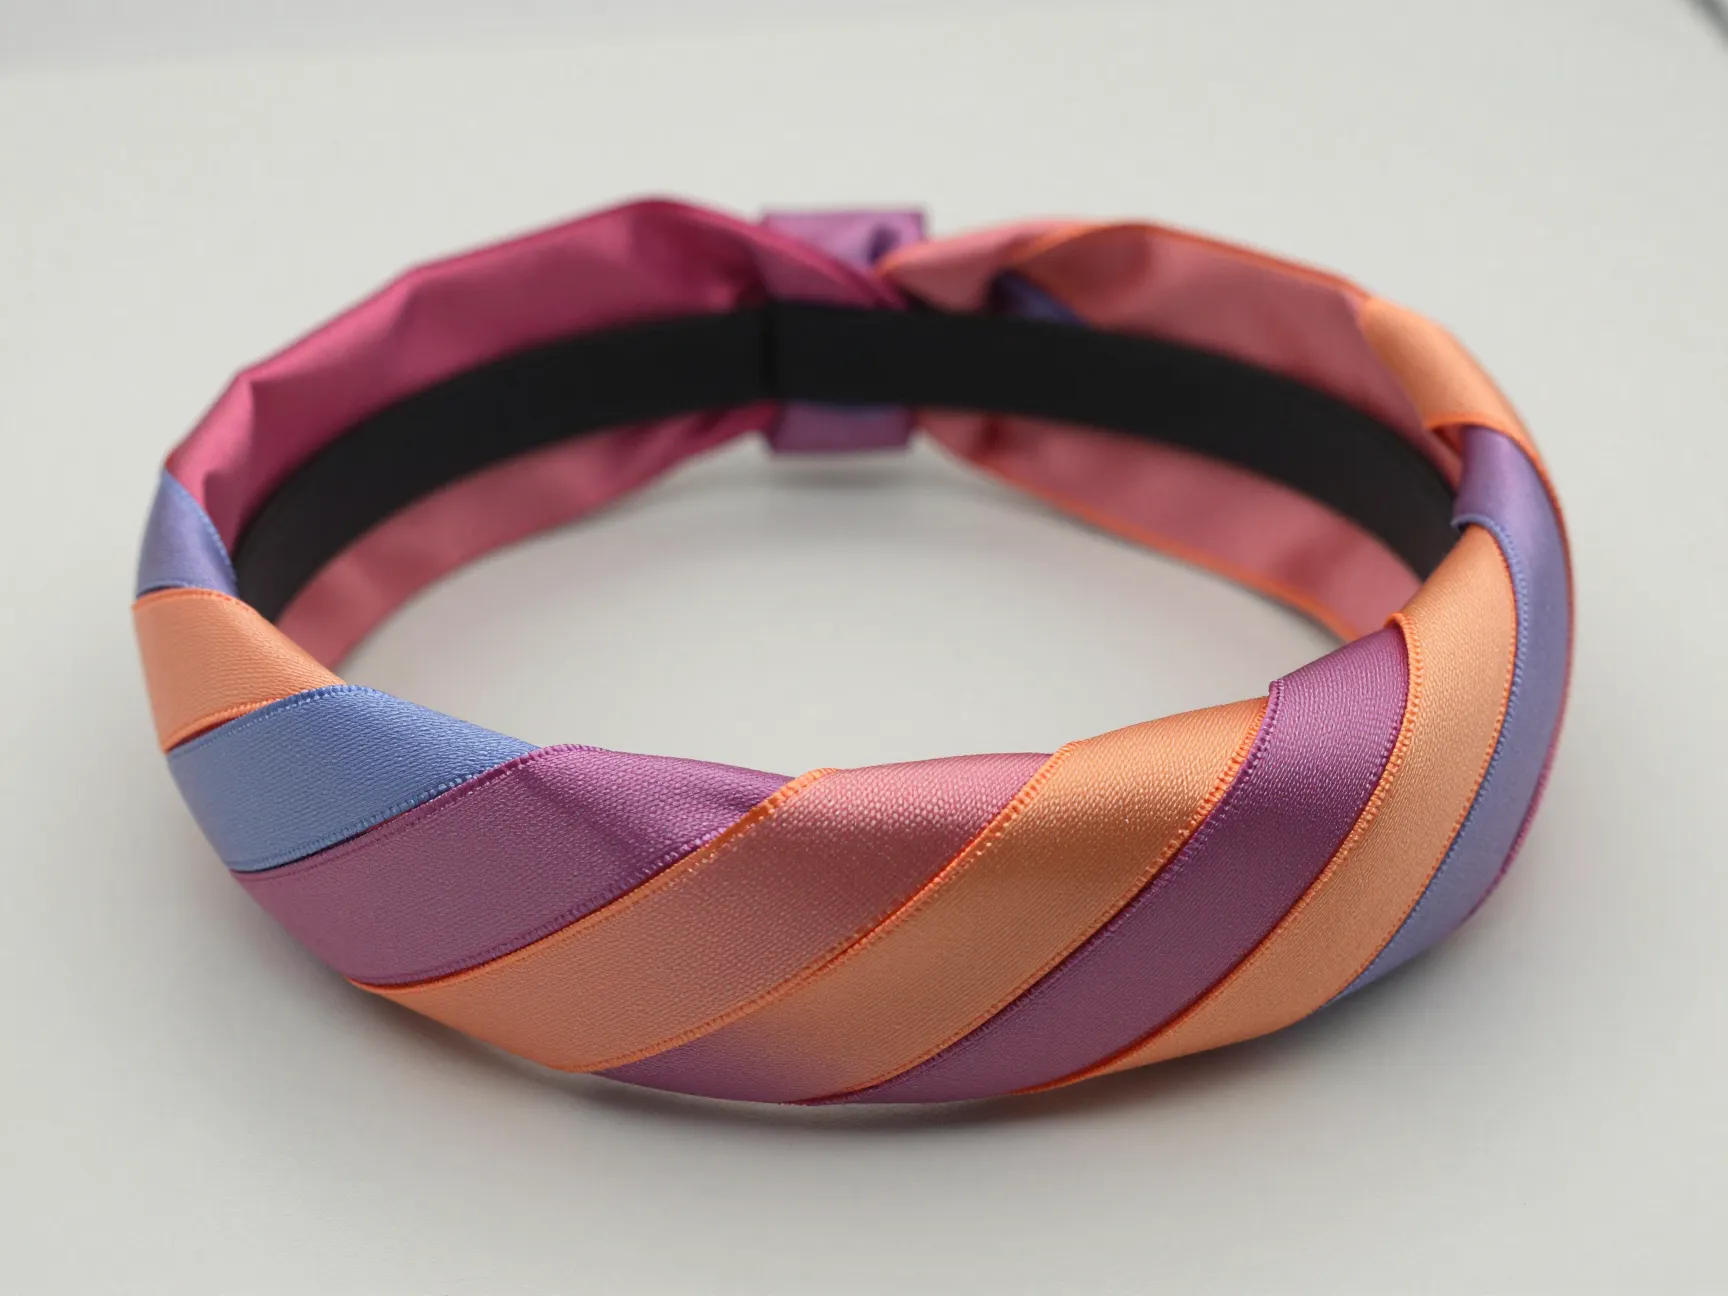
Time to make: 10–15 minutes
Skill level: Beginner
The ribbon-wrapped headband is slightly more time-intensive than the other projects, but it’s still well within the “quick craft session” category. The result is a polished, colorful headband that looks custom-made. [1]
What you need:
- Plastic or wire headband base
- Satin or grosgrain ribbon (at least 2–3 yards for a full wrap)
- Hot glue gun
- Scissors
How to make it:
- Apply a small dot of hot glue to one end of the headband and press the ribbon end firmly onto it.
- Begin wrapping the ribbon tightly around the headband at a slight diagonal angle, overlapping slightly with each pass.
- Every 4–5 inches, add a tiny dot of hot glue on the underside of the headband to keep the ribbon from slipping.
- When you reach the other end, glue the ribbon tail securely to the underside.
- Optional: Add a small bow or trailing ribbon streamers at one end for a fairy-style finish.
Styling idea 🌸: For children’s fairy parties or festivals, add trailing ribbon lengths at one end of the headband and let them flow freely. Idea pins describe this look as “simple” and “magical” — and it really is both. [1]
8. Fairy-Style Ribbon Crown
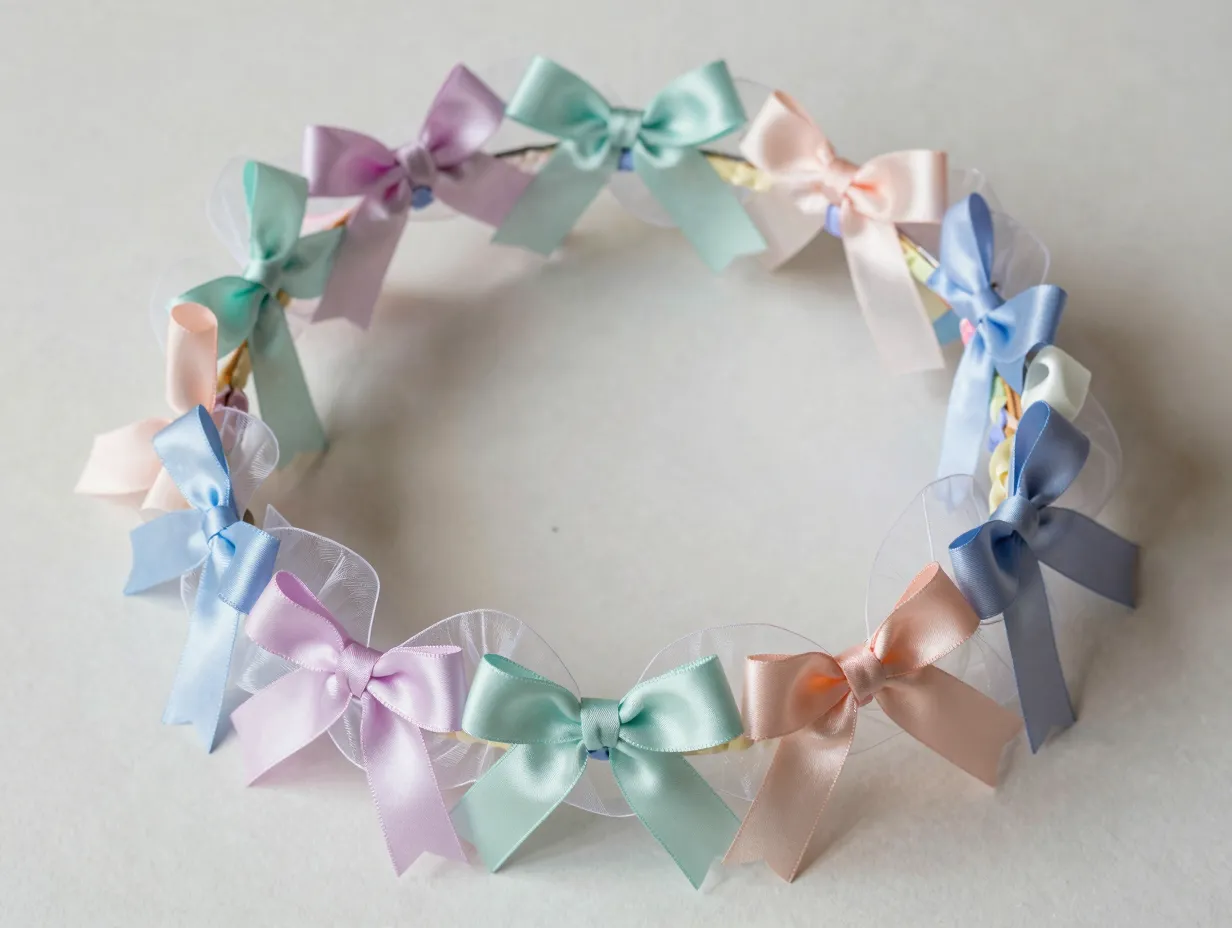
Time to make: 15–20 minutes
Skill level: Beginner to intermediate
The fairy ribbon crown is the most involved project on this list, but it’s still achievable in a single short crafting session. It’s a showstopper for costume events, children’s parties, and festival season. [4]
What you need:
- Thin wire or a wire headband base
- Multiple ribbon colors (satin or organza work beautifully), cut to 12–18 inch lengths
- Hot glue gun
- Scissors and lighter
How to make it:
- Shape your wire into a circle that fits comfortably around the head, twisting the ends together to secure.
- Seal all ribbon ends with a lighter to prevent fraying.
- Using lark’s head knots (fold ribbon in half, loop through wire, pull ends through the loop), attach ribbons all the way around the wire circle.
- Alternate colors and widths as you go for a layered, whimsical effect.
- Add small pre-made bows (use the technique from project #2 or #4) at intervals around the crown using hot glue.
- Optionally, glue small rhinestones or pearl beads between the bows for extra sparkle.
The payoff: This crown takes the longest of the eight projects, but the result is genuinely stunning — and it still costs only a few dollars in materials. [4] Craft communities online rave about how impressive these look for the minimal effort involved.
Tips for Batch-Making All 8 Projects Efficiently
Once you’ve tried each of the 8 Simple DIY Hair Accessories with Ribbon You Can Make in Minutes individually, the next step is learning to batch-make them efficiently. Here’s how to set up a productive crafting session:
Before you start:
- Pre-cut all ribbon strips to the required lengths for every project you plan to make.
- Organize cut pieces by project in small piles or zip-lock bags.
- Heat your glue gun fully before starting — waiting for it mid-project wastes time.
- Have your lighter, scissors, and clips within arm’s reach.
During your session:
- Work in assembly-line style: complete the same step across all pieces before moving to the next step.
- Let glued pieces rest for 30 seconds before handling to avoid burns and weak bonds.
- Keep a silicone mat or parchment paper under your glue gun work area for easy cleanup.
Efficiency numbers to know:
| Project | Time Per Piece | Pieces Per Hour |
|---|---|---|
| Tied ribbon bow (elastic) | 2–3 min | 20–30 |
| Mini coquette bow clip | 3–5 min | 12–20 |
| Grosgrain bow clip | 4–5 min | 12–15 |
| Ponytail streamer | 5 min | 12 |
| No-sew bow barrette | 5–10 min | 6–12 |
| Rhinestone satin bow clip | 5–8 min | 7–12 |
| Ribbon-wrapped headband | 10–15 min | 4–6 |
| Fairy ribbon crown | 15–20 min | 3–4 |
🎯 Key insight: Keeping supplies pre-organized and pre-cut is the single most impactful factor in reducing per-accessory crafting time across all 8 projects. [10]
Choosing the Right Ribbon for Each Project
Not all ribbon is created equal. Here’s a quick guide to matching ribbon type to project:
Grosgrain ribbon — Textured, durable, holds its shape well. Best for: bow clips, ponytail streamers, headband wrapping. The texture adds grip, which helps bows and clips stay in place. [3]
Satin ribbon — Smooth, shiny, elegant. Best for: rhinestone bow clips, no-sew barrettes, fairy crowns. Satin catches light beautifully and gives a more formal or “boutique” look.
Organza ribbon — Sheer and lightweight. Best for: fairy crowns, trailing streamers. Adds a whimsical, ethereal quality.
Velvet ribbon — Luxurious texture, autumn/winter feel. Best for: headband wrapping, statement bows. Slightly harder to work with but worth the effort for special occasions.
Width guide:
- 3/8″ — Mini bows, delicate coquette clips
- 5/8″ — Ponytail streamers, standard bow clips
- 1″–1.5″ — Larger bows, rhinestone clips
- 2″+ — Statement bows, headband wrapping
Common Mistakes to Avoid
Even simple projects have a few pitfalls. Here’s what to watch for:
- Not sealing ribbon ends — Unfinished ends fray quickly, especially with grosgrain. Always use a lighter or fray check immediately after cutting.
- Using too much hot glue — Excess glue creates lumpy, visible blobs on your finished piece. A thin, even line is all you need.
- Skipping the pre-cut step — Cutting ribbon as you go slows you down dramatically. Pre-cut everything first.
- Choosing the wrong ribbon width — A bow made with ribbon that’s too wide for a mini clip looks clunky. Match width to the scale of your base.
- Not letting glue cool fully — Handling pieces before the glue sets can weaken the bond or cause burns. Give each glued joint 30–60 seconds.
Conclusion: Your Next Steps
The 8 Simple DIY Hair Accessories with Ribbon You Can Make in Minutes in this guide prove that beautiful, professional-looking hair accessories don’t require expensive tools, advanced skills, or hours of crafting time. From a 2-minute tied bow on an elastic to a stunning fairy ribbon crown, every project here is achievable for any skill level — and genuinely fast once you’ve gathered your supplies.
Here’s how to get started today:
- Start with one project — Pick the simplest one that appeals to you (the tied ribbon bow or mini coquette clip are great first choices) and make just one.
- Gather your core supplies — Hot glue gun, grosgrain and satin ribbon in 2–3 colors, scissors, lighter, and a pack of alligator clips covers most of the list.
- Pre-cut your ribbon — Before your next crafting session, cut ribbon strips for all 8 projects. This single step makes batch-making dramatically faster.
- Try a batch session — Once you’re comfortable with the techniques, set aside 60–90 minutes and try making all 8 in one sitting.
- Share and gift your work — These accessories make thoughtful, handmade gifts. Package a set of matching bow clips in a small box for a gift that looks far more expensive than it is.
Ribbon crafting rewards consistency. The more you make, the faster and more polished your results become. Start with one bow today — you might be surprised how quickly you’re making a dozen. 🎀
References
[1] pinterest – https://www.pinterest.com/ideas/diy-hair-accessories-ribbon/956113832463/
[2] Watch – https://www.youtube.com/watch?v=PhGTOci5BzM
[3] Easy Diy Ribbon Hair Clips – http://thespohrsaremultiplying.com/hair/easy-diy-ribbon-hair-clips/
[4] facebook – https://www.facebook.com/groups/craftyfungroup/posts/1364745637531057/
[5] tiktok – https://www.tiktok.com/@knot_magic/video/7493906425773624598
[6] Easy 1hour Diy Mini Bow Hair Clips Coquette Accessories Pink Feminine Style Tutorial Video 1548181184311918 – https://www.pinterest.com/pin/easy-1hour-diy-mini-bow-hair-clips-coquette-accessories-pink-feminine-style-tutorial-video–1548181184311918/
[7] Watch – https://www.youtube.com/watch?v=5u0d-Cd5YwU
[8] Watch – https://www.youtube.com/watch?v=V9U9gSU-AB8
[9] Watch – https://www.youtube.com/watch?v=Yx3aEuI5IDU
[10] Watch – https://www.youtube.com/watch?v=hQom0bpneZA